Enjoying music or videos with the tx-ds898, Changing the listening mode, Entering characters using the tx-ds898 – Onkyo TX-DS898 User Manual
Page 49
49
Changing the listening mode
To change the listening mode during playback, press the listening
mode buttons.
The functions of the buttons on the TX-DS898 and those on the
remote controller are the same.
DIRECT/PURE AUDIO (DIRECT): Changes the listening mode
directly to the Direct listening mode. If pressed, the listening mode
for the selected input source set in the Listening Mode Preset is also
changed to the Direct listening mode. When the listening mode is set
to Direct, you can switch between Direct and Pure Audio.
STEREO: Changes the listening mode directly to the Stereo
listening mode. If pressed, the listening mode for the selected input
source set in the Listening Mode Preset sub-menu is also changed to
the Stereo listening mode.
SURROUND (SURR): Changes the listening mode to the surround
mode for the current input signal (e.g., Dolby Pro Logic II, Dolby
Digital, or DTS). If pressed, the listening mode for the selected input
source set in the Listening Mode Preset is also changed to the
Surround listening mode.
When the Surround listening mode is selected
• When playing back DTS sources
Switches the DTS-ES setting from Auto
→ On → Off.
• When playing back Analog/PCM sources
Switches from Pro Logic II Movie
→ Pro Logic II Music →
DTS Neo6:Cinema
→ DTS Neo6:Music.
• When playing back D.F. 2-channel sources
Switches from Pro Logic II Movie
→ Pro Logic II Music.
THX: Changes the listening mode to the THX listening mode.
When the THX listening mode is selected
• When playing back Dolby Digital sources
Switches the THX Surround EX mode (Auto
→ On → Off) if the
source is a Dolby Digital-compatible source.
• When playing back Analog/PCM sources
Switches the decoding mode (Pro Logic II Movie
→ DTS
Neo6:Cinema) for THX processing.
• When playing back DTS sources
Allows you to enjoy the DTS THX Cinema, DTS-ES Discrete 6.1
THX Cinema, and DTS-ES Matrix 6.1 THX Cinema surround
systems. The DTS-ES mode changes from Auto
→ On → Off.
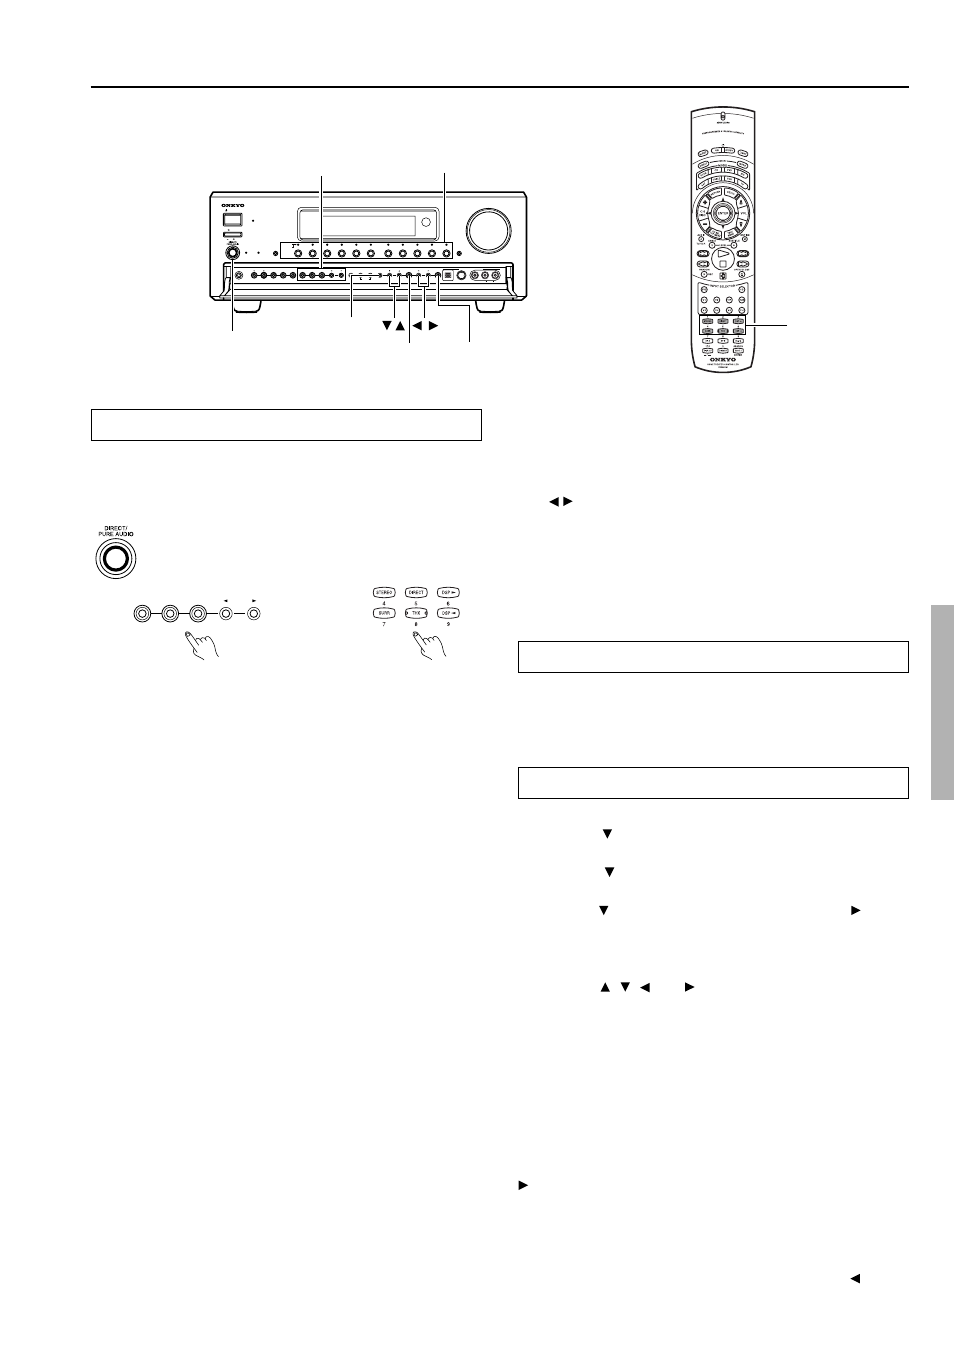
TX-DS898
Remote controller
Listening
mode
buttons
Enjoying music or videos with the TX-DS898
STANDBY/ON
OFF
ON
POWER
STANDBY
MASTER VOLUME
FM
AM
PHONO
C D
TAPE
DVD
VIDEO
3
VIDEO
5
VIDEO
4
VIDEO
2
VIDEO
1
ZONE
2
(
)
GRN
REC
(
)
RED
AUDIO
SELECTOR
DISPL AY
PURE AUDIO
UPSAMPLING
PHONES
ZONE
2 LEVEL
STEREO SURROUND
THX
DSP
REC OUT
ZONE
2
OFF
DIMMER
FM MODE
MEMORY
SETUP
CLEAR
ENTER
RETURN
VIDEO
5/VIDEO CAM INPUT
TUNING
PRESET
S VIDEO
AUDIO
VIDEO
L
R
DIGITAL
DIRECT/
PURE AUDIO
SETUP
ENTER
RETURN
/
/
Listening mode buttons
Input source buttons
STEREO SURROUND
THX
DSP
Entering names for input sources and tuner stations
You can enter names for your components or radio station names as
names for your input sources and have them displayed in the front
panel display when that input source is selected. (see page 36)
If surround back speakers are not connected, or if the Powered Zone
2 setting of the Speaker Config menu is set to “Activated,” you
cannot select THX Surround EX, DTS-ES Discrete 6.1, or DTS-ES
Matrix 6.1.
DSP / : Changes the listening mode as shown below.
Mono
→ Direct/Pure Audio → Stereo → Theater-Dimensional →
Surround
→ THX → Mono Movie → Enhanced 7 → Orchestra →
Unplugged
→ Studio-Mix → TV Logic → All Ch Stereo → Mono.
If pressed, the listening mode for the selected input source set in the
Listening Mode Preset is also changed.
Entering characters using the TX-DS898
1. Press the SETUP button.
2. Press the button to select the “2.Input Setup” menu and
press the ENTER button.
3. Press the button to select the “Character Input?” sub-
menu and press the ENTER button.
4. Press the button to select “Char: ” and press the button.
5. The screen changes to show you the characters you have
already entered (< >) and then automatically changes to the
Character Selection screen (ABCDEF...).
Press the , , , and buttons to select the character you
desire and press the ENTER button. The screen again shows you
the characters entered for approximately two seconds and
returns you to the Character Selection screen.
If you enter an incorrect character, press the RETURN button to
move the cursor to the left and re-enter the character.
Repeat the above operations to enter up to 10 characters. When
you are finished, the entered name appears.
6. Press the SETUP button to complete the procedure.
To correct entered characters
Perform steps 1 to 4 given above. After performing step 4, press the
button to display a name that has already been entered. Press the
ENTER button to move the cursor to the location of the character
that you want to change, enter the new character, and press the
ENTER button.
To delete an entered name
Perform the steps 1 to 3 given above. At step 4, press the button.