Enjoying audio sources – Onkyo A-1VL User Manual
Page 12
12
Enjoying Audio Sources
Tips on sound quality
You will get better sound quality 10 to 30 minutes after you turn on the A-1VL. To avoid degrading the sound quality,
do not tie audio RCA/phono cables and speaker cables together in a bundle.
When placing the A-1VL, avoid a place where it is susceptible to vibrations.
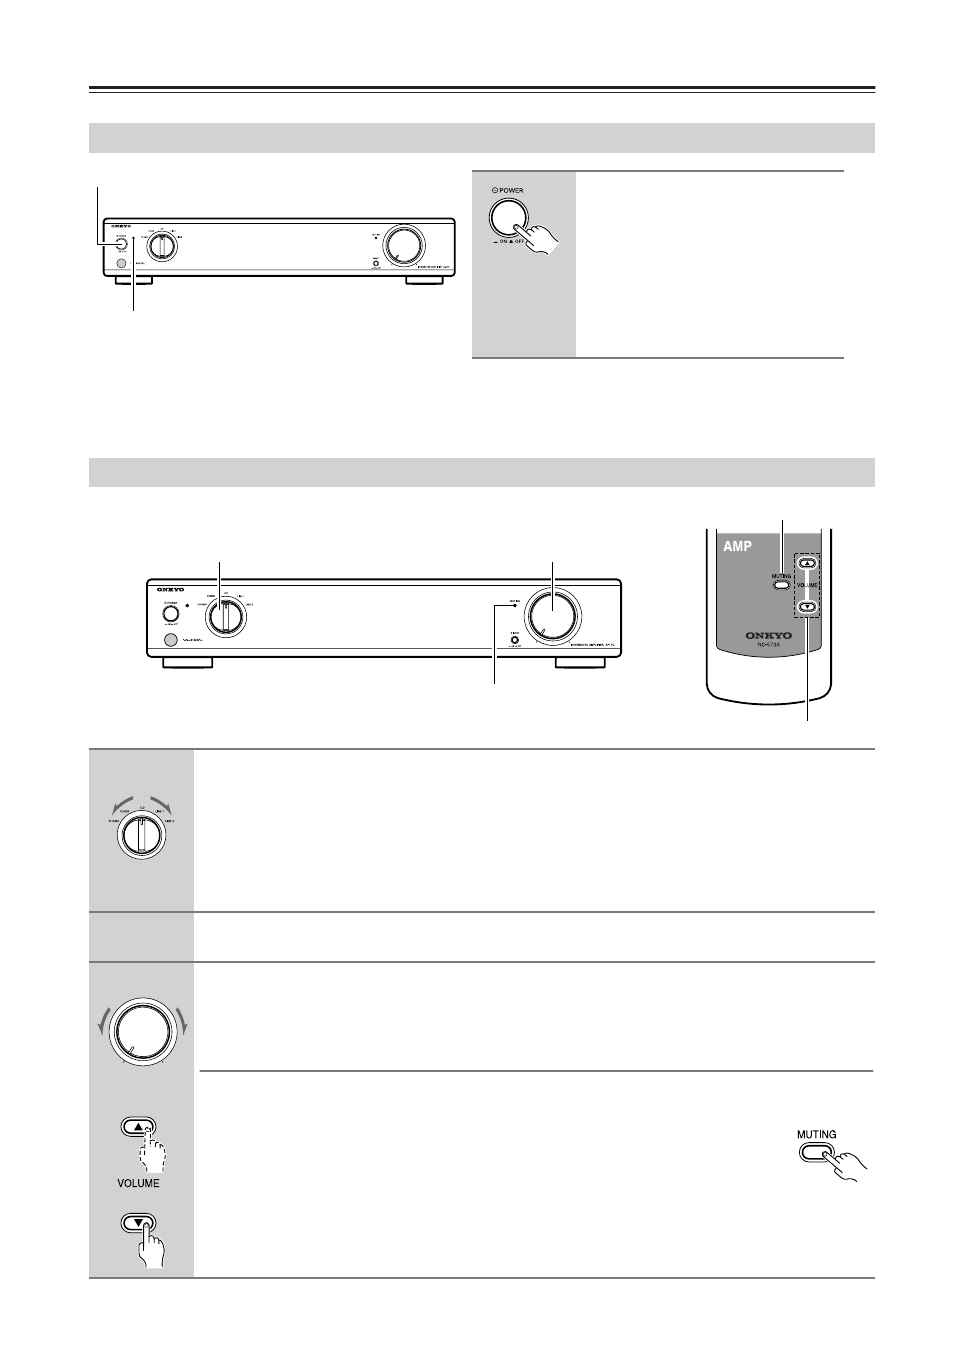
Turning on the A-1VL
Press the [POWER] button to
turn on the A-1VL.
The POWER indicator lights up.
Note:
It takes about five seconds for the elec-
tric circuit to be stable. During this
time the A-1VL does not output an
audio signal.
POWER
POWER indicator
Playing a Connected Component
1
MUTING indicator
VOLUME
MUTING
3
1
Select the component you want to play.
Turn the Input selector control to select the component you want to play.
CD: Select to play the audio signal from the component connected to the CD terminal.
TUNER: Select to play the audio signal from the component connected to the TUNER terminal.
LINE 1: Select to play the audio signal from the component connected to the LINE 1 terminal.
LINE 2: Select to play the audio signal from the component connected to the LINE 2 terminal.
PHONO: Select to play the audio signal from the component connected to the PHONO terminal.
2
Start playback on the selected audio component.
3
To adjust the volume, use the VOLUME control, or the remote controller’s [VOLUME]
button.
Muting the A-1VL (remote controller only)
With this function you can temporarily mute the output of the A-1VL.
Press the remote controller’s [MUTING] button.
The output is muted and the MUTING indicator flashes on the A-1VL.
To unmute the A-1VL, press the remote controller’s [MUTING] button again.
Note:
The Mute function is cancelled when the A-1VL is set to Off.
A-1VL
Remote
controller