OWI CRS-101 User Manual
Page 12
12
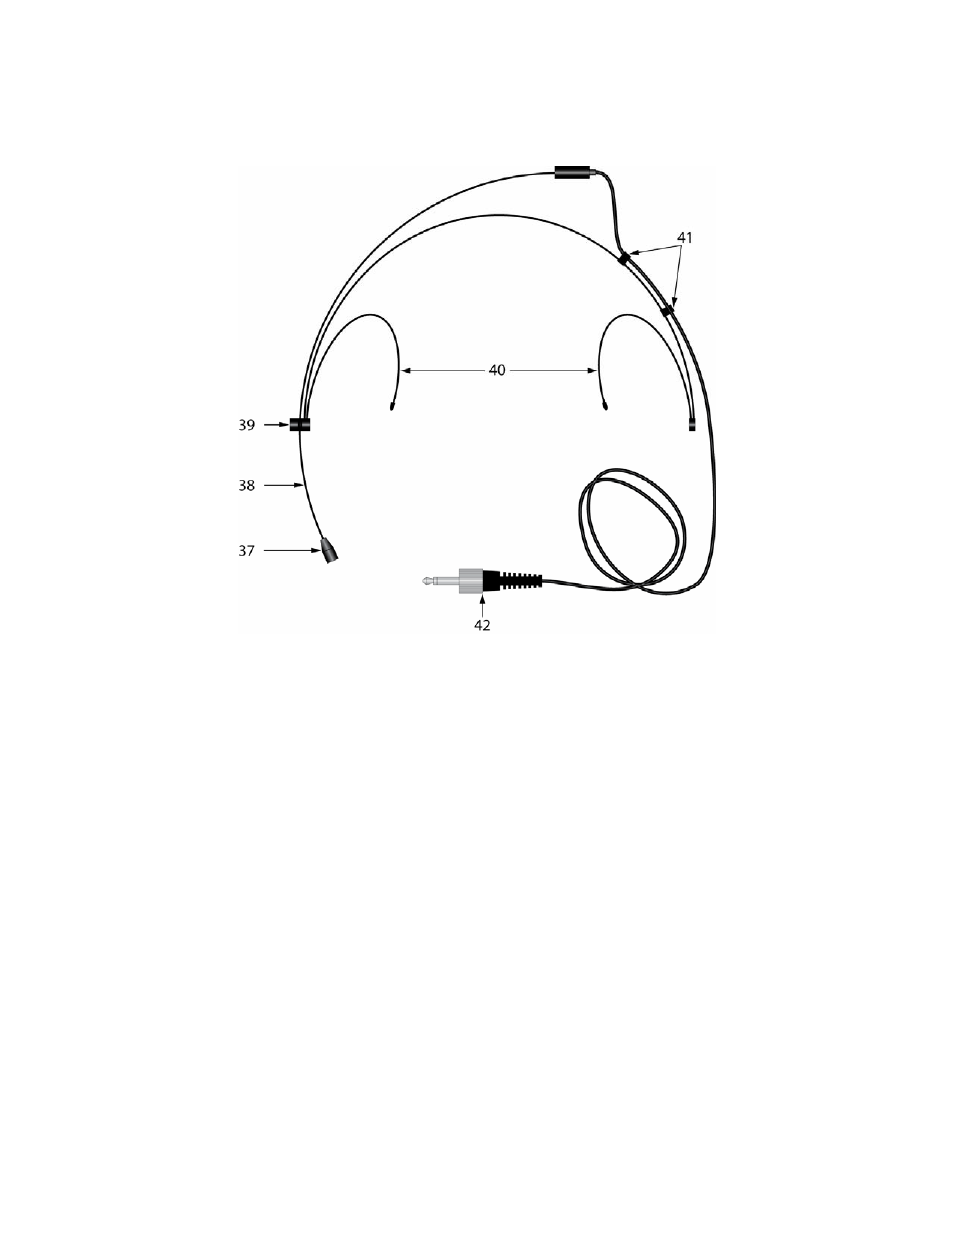
Figure 11. CRS-HSMIC Headset Mic (Optional)
CRS-HSMIC HEADSET MIC FEATURES (Optional)
The CRS-HSMIC Lapel Microphone is used with the Pendant Mic and is another option for hands-free
presentations.
NOTE:
The CRS-HSMIC is an optional accessory and must be purchased separate from the CRS-101.
37. MICROPHONE –
Detects audible sound such as voice. Should be positioned as close to the
speaker’s mouth as possible.
38. MIC BOOM –
Adjustable mic boom allows the microphone to be set to the optimum position. The
Boom
will extend out from the Headset by carefully pulling the Boom, not the microphone, from the
Boom Hinge
. The Boom can also be swiveled into position by carefully turning the Boom at the
Boom Hinge
. Push the Wire Clips toward the Boom Hinge to create slack in the wire before
adjusting. Try not to flex or strain the wire connection at the end of the boom more than necessary to
avoid damaging the wire.
39. BOOM HINGE –
Allows positioning the microphone as described in Item 38 above.
40. EAR CLIPS –
Secures the Headset by wrapping the ear clips around the user’s ears.
41. WIRE CLIPS –
Secure the Headset Wires to the Headset.
42. MINI PLUG –
Connects to the MIC Input on the CRS-PMIC Pendant. High output IR LED’s on the
Pendant
output audio as infrared pulses in an omni-directional pattern that are received by the CRS-
IRS IR Sensors
. The IR Sensors output DC electrical pulses to the CRS-CASE which converts them
back to audio signals, amplifies them and outputs the audio to the Speakers.
NOTE:
When connected the Headset Mic overrides the Pendant Microphone, so only the Headset
Mic
will be active.