OWI CRS-101 User Manual
Page 10
10
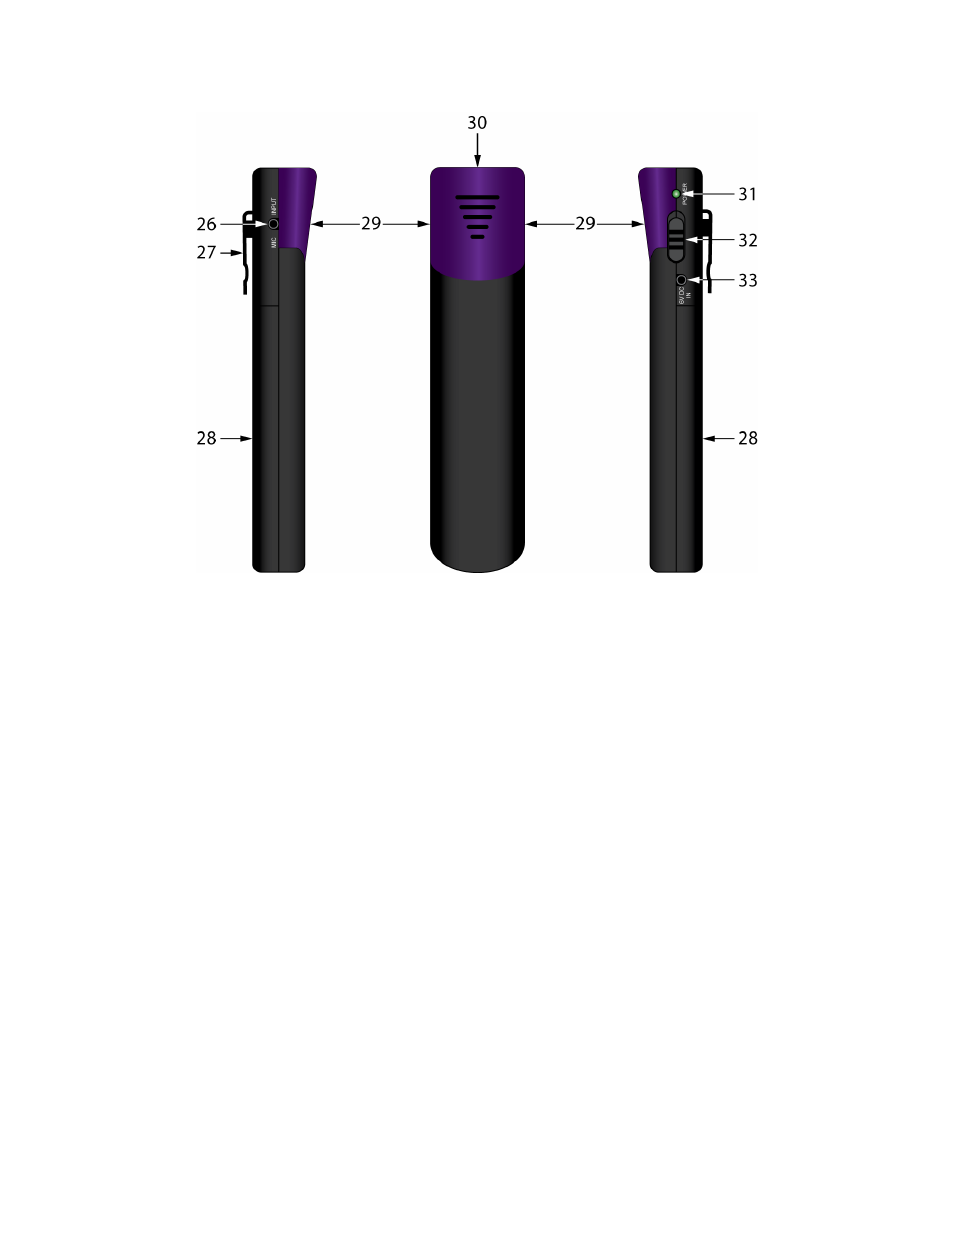
Figure 9. CRS-PMIC Pendant Mic/Charger
CRS-PMIC PENDANT MIC/CHARGER FEATURES
The CRS-PMIC Pendant Microphone can be used as a wireless microphone itself or as an IR Transmitter
when used with the Lapel or Headset Mics.
26. MIC INPUT –
One, 3.5mm mini jack connects to the mini plug on either the CRS Lapel Mic or
Headset Mic
. When either is connected to this jack, it overrides the Pendant Microphone, so only
the Lapel Mic or Headset Mic will be active.
27. CLIP –
Clips the Pendant Mic on to the included lanyard or a coat or shirt pocket for use as a hands
free microphone.
28. BATTERY DOOR –
Removable battery door for access to the AA re-chargeable Lithium battery. A
regular alkaline battery can be used if necessary, but will not last as long as the Lithium (approx. 4
hours).
NOTE: THE PENDANT IS ALSO A CHARGER. DO NOT CONNECT THE CHARGER POWER
SUPPLY WHEN USING NON-RECHARGEABLE BATTERIES!
29. IR OUTPUT ARRAY –
High output IR LED’s output audio as infrared pulses in an omni-directional
pattern that are received by the CRS-IRS IR Sensors. The IR Sensors output electrical DC pulses to
the CRS-CASE which converts them back to audio signals, amplifies them and outputs the audio to
the Speakers.
30. MICROPHONE –
The Pendant Microphone is located at the top of the Pendant.
31. ON LED –
One LED illuminates green to indicate that the microphone is ON.
32. ON/OFF SWITCH –
Turns the Pendant ON/OFF.
33. 6V DC IN –
One 3.5mm mini jack connects to the included CRS-PENCH Charger Power Supply for
re-charging the Lithium battery. (Charging Time: 3 Hours).
NOTE: THE PENDANT IS ALSO A CHARGER. DO NOT CONNECT THE CHARGER POWER
SUPPLY WHEN USING NON-RECHARGEABLE BATTERIES!