Connecting external devices, Connecting an onkyo stereo cassette tape deck, Connecting an ri dock (remote interactive dock) – Onkyo DR-815 User Manual
Page 21
21
Connecting External Devices
Connect the white plugs of the audio cables to the L jacks and connect the red plugs of the audio cables to the R jacks.
Tip:
The source names appearing in the display can be customized for the connected component (see page 28).
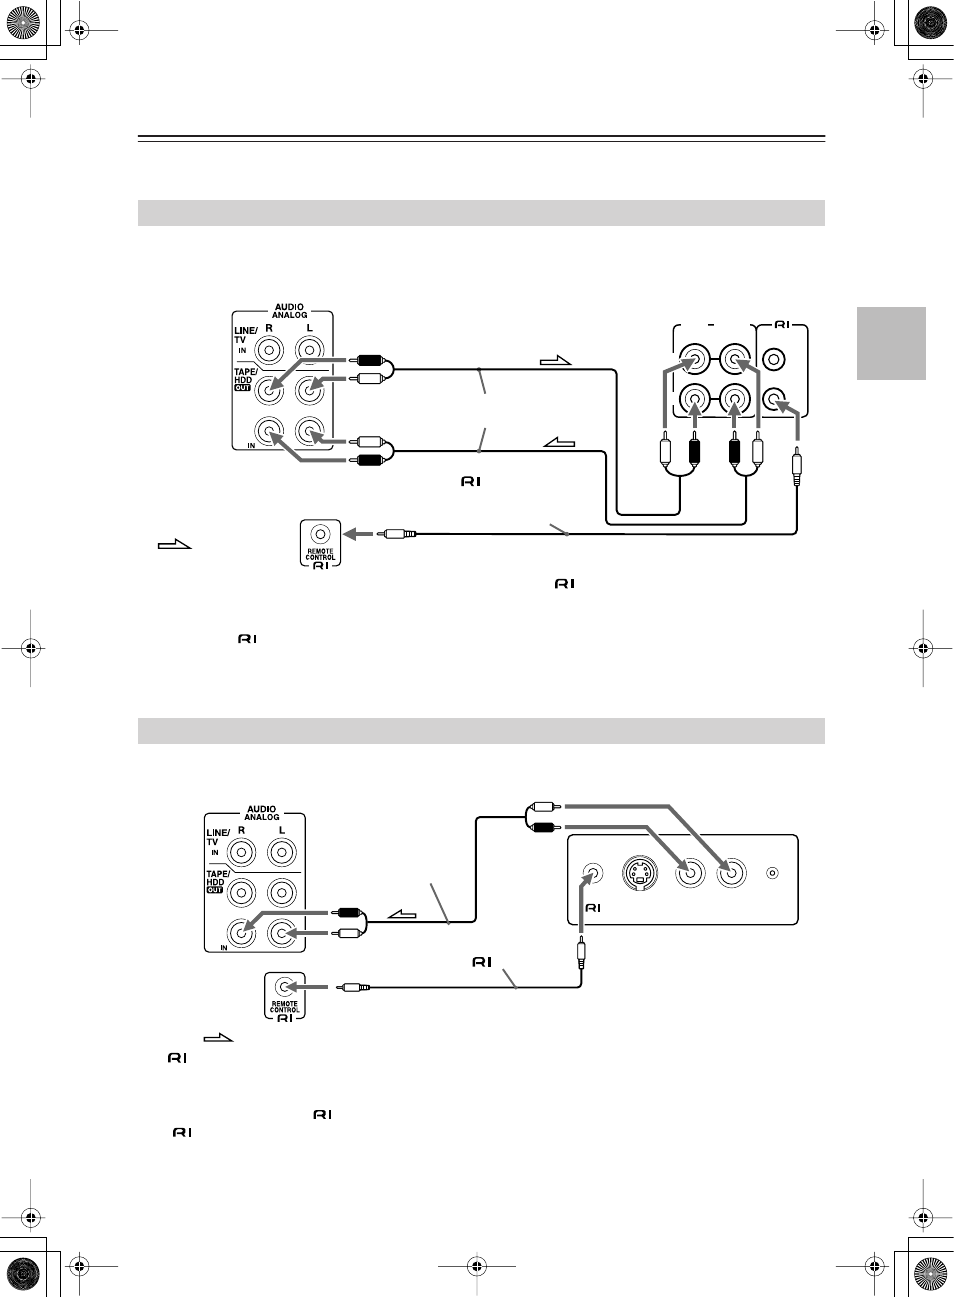
The following diagram illustrates how to connect an optional Onkyo stereo cassette tape deck.
Connect the DVD receiver’s TAPE/HDD OUT jacks to the tape deck’s INPUT (REC) jacks, and the DVD receiver’s
TAPE/HDD IN jacks to the tape deck’s OUTPUT (PLAY) jacks.
What does connecting an Onkyo stereo cassette tape deck using an
cable enable you to do?
• You can control a connected Onkyo stereo cassette tape deck using the supplied remote controller. You also need to
connect the RCA/phono audio cable.
• To operate the
system, the source name in the display should be TAPE. (Since the default source name in the
display is TAPE, you do not need to change the setting. See page 28 for further information.)
• When the connected Onkyo stereo cassette tape deck plays back, the Input Selector on the DVD receiver is automat-
ically switched to TAPE.
The following diagram illustrates how to connect the Onkyo RI Dock which is sold separately.
Connect the TAPE/HDD IN jacks on the DVD receiver to the AUDIO OUT jacks on the RI Dock.
The
jack connection enables you to use the following functions:
• You can control a connected Onkyo RI Dock using the supplied remote controller. You also need to connect the RCA/
phono audio cable.
• When an RI Dock and other
-compatible devices are connected with the DVD receiver, you must also interconnect
the
terminals between the two external devices.
• You need to change the source name in the display to HDD. (The default source name in the display is TAPE. See
page 28 for further information.) If the RI Dock has a MODE switch, you must set the switch to HDD.
• When the connected Onkyo RI Dock plays back, the input selector on the DVD receiver is automatically switched to HDD.
Connecting an Onkyo Stereo Cassette Tape Deck
(REC)
(PLAY)
INPUT
OUTPUT
REMOTE
CONTROL
L
R
DVD receiver’s rear panel
red
white
white
red
: Signal flow
cable supplied
with the Onkyo stereo
cassette tape deck
RCA/phono audio cable
red
white
white
red
Onkyo stereo cassette
tape deck rear panel
Connecting an RI Dock (Remote Interactive Dock)
R
AUDIO OUT
DC IN
S VIDEO OUT
---- L
: Signal flow
DVD receiver’s rear panel
white
red
RCA/phono audio cable
cable
Jacks on the RI Dock’s rear
panel may differ depending on
the model.
white
red
Use either socket