Speaker setup, Speaker configuration submenu, Buttons to be used – Onkyo TX-DS696 User Manual
Page 22: Standby off on, Rec out zone 2 zone 2 level ch level
22
Speaker setup
After you have installed the TX-DS696, connected all the
components, and determined the speaker layout, it is now time to
perform the settings in the Speaker Setup menu for the optimum
sound acoustics for your environment and speaker layout.
Before you perform the following settings, it is important that you
first determine the following characteristics:
• The types and sizes of the speakers that are connected.
• The distance from each speaker to your normal listening
position.
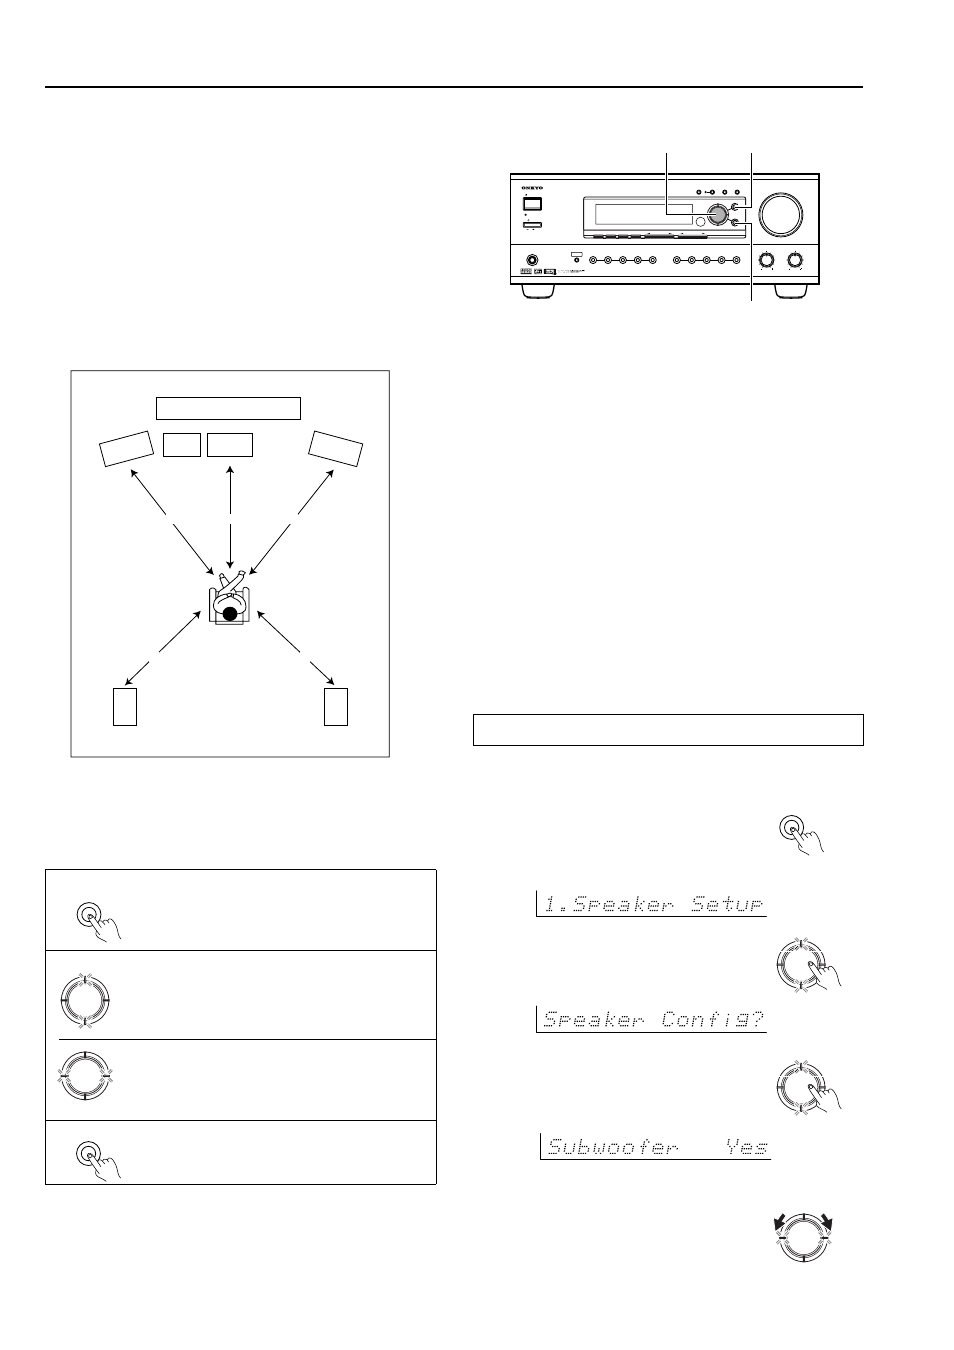
Before performing the settings, write down your speaker
settings in the diagram below for future reference.
SETUP
PUSH TO ENTER
DSP / MODE ADJ
Speaker Configuration submenu
This submenu provides settings that tell the TX-DS696 which
speakers you have connected and what size they are.
1. Press the SETUP button.
If a menu other than “1. Speaker Setup”
appears, turn the jog dial until “1. Speaker
Setup” does appear.
2. Press the jog dial.
PUSH TO ENTER
DSP / MODE ADJ
3. Press the jog dial.
4. Turn the jog dial to set whether or
not a subwoofer is connected.
Yes: Select when a subwoofer is connected.
No: Select when a subwoofer is not
connected.
PUSH TO ENTER
DSP / MODE ADJ
SL
SR
Front
a. meters / feet
b. [ ]m/ft
c. [ ]m/ft
d. [ ]m/ft
Front
SW
Center
b
c
b
d
d
Monitor
Your speaker settings:
Buttons to be used
Setup button:
Press to enter the main menu level and put the TX-
DS696 in the mode for setting the various parameters.
If currently in the setting mode, press to exit.
Jog dial:
If the indicators directly above and below the jog dial
are lit, turning the jog dial selects a submenu and
pushing the jog dial enters the selected submenu (i.e.
takes you one level down).
If the indicators directly to the left and right of the jog
dial are lit, turning the jog dial changes the setting of
the currently selected parameter and pushing the jog
dial displays the next parameter.
RETURN button:
Press to go back one level up.
Use the buttons on the TX-DS696 to navigate through the menus and
set the various settings and parameters according to your system
setup and layout.
SETUP
RETURN
PUSH TO ENTER
DSP / MODE ADJ
PUSH TO ENTER
DSP / MODE ADJ
The normal order for performing the settings for speaker setup in
your TX-DS696 is to set the speaker configuration settings first, set
the speaker distances second, and then calibrate the speaker levels
third. Below is an explanation of how to perform these settings using
the controls on the TX-DS696.
You can also perform these settings using the On-Screen Display
(OSD) menu (see page 34).
The settings are in a hierarchical configuration as shown below.
Level 1 Main menu level
The level consisting of the menus contained in the Setup menu.
Level 2 Menu level
The level consisting of the submenus contained in each menu.
Level 3 Submenu level
The level consisting of the parameters contained in each submenu.
STANDBY/ON
STANDBY
OFF
ON
POWER
MASTER VOLUME
BASS
TREBLE
AV RECEIVER
TX-DS
696
PHONES
FM
AM
PHONO
C D
TAPE
DVD
REC OUT
ZONE
2
ZONE
2 LEVEL
CH LEVEL
VIDEO
3
VIDEO
4
VIDEO
2
VIDEO
1
VCR
2
VCR
1
AUDIO
SELECTOR
TUNING
PRESET
SMART SCAN NAVIGATOR
PRESET MEMORY
FM MODE
DISPLAY
DIMMER
PUSH TO ENTER
DSP / MODE ADJ
SETUP
RETURN
SETUP
RETURN
Jog dial