Using the side jacks, Connections & setup, Connecting the device – RCA 27F524T User Manual
Page 11: Viewing the picture from the connected device, Chapter 1
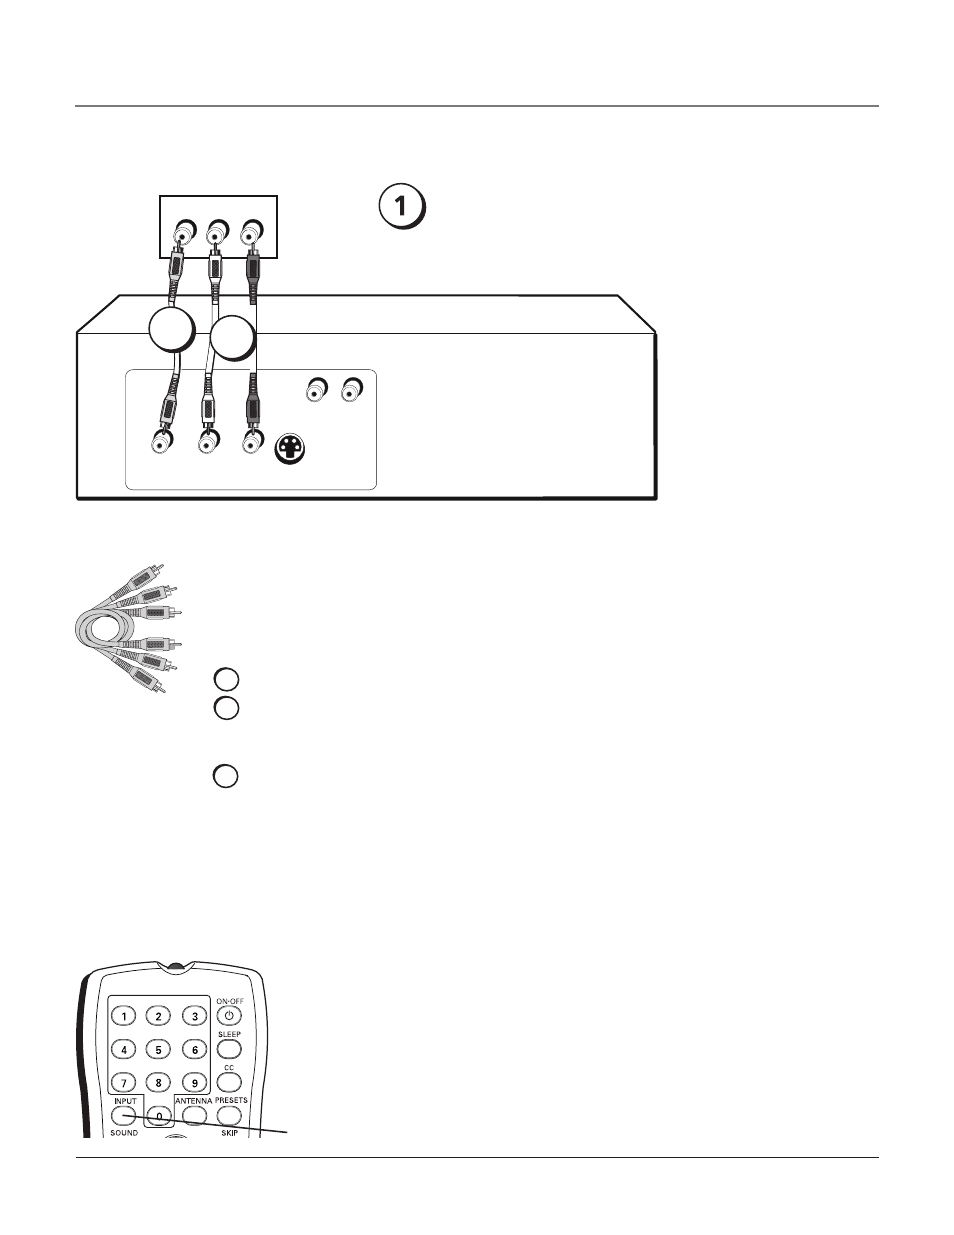
Using the Side Jacks
audio/Video
Connecting the Device
This connection allows you to connect a device, such as a video game console, that has Audio/
Video jacks. Refer to the illustration below which uses audio and video cables.
Using the example of a video game console:
1. Connect your cable and/or antenna as described on page 5.
2. Connect your video cable.
Video cables are usually yellow. Connect the Video cable to the Video jack on the side of
the TV and the jack on the video game console.
3. Connect your audio cables.
Connect the audio (white and red) cables to the R and L Audio jacks on the side of the TV
and to the audio output jacks on the video game console. Just match the colors.
4. (Optional) For models with an S-Video jack, you can use either the Video or the
S-Video connection. You cannot connect both at the same time because they share
the audio jacks. S-Video cables fit into a special shaped jack which is labeled S-Video.
Connect the S-Video cable to the jack on the side of the TV and the jack on the video game
console. Connect the audio cables.
VIDEO
OUTPUT
S-VIDEO
OUT
L
R
AUDIO
L
R
AUDIO
L AUDIO R
VIDEO
Side of TV
2
3
Video game Console
Viewing the Picture from the Connected Device
The device in this example, a video game console, is connected to the TV’s video and
audio jacks located on the side of the TV. To view the video game console:
1. Turn on the TV and the video game console.
2. Press the INPUT button on the remote control to toggle through the Video Input
Channels until FRNT is displayed in the channel banner.
DIG•ANA
GUIDE
+•?
CH LIST
ABC
DEF
GHI
JKL
MNO
PQRS
TUV
WXYZ
INPUT
button
Note: This front/side
panel graphic is for
representation only.
Your TV’s jacks might be
different.
If necessary,
connect antenna
or cable to get a
picture. Go to page
for instructions.
Chapter 1
Connections & Setup