Installation, Optional accessories, Door handle – Regency S3100L User Manual
Page 17: Glass installation, Brick installation, Screen door
Regency Freestanding Woodstove
17
OPTIONAL
ACCESSORIES
The pieces listed below can be purchased and
installed during the initial installation or added on
later.
Freestanding - Large F3100
DOOR HANDLE
Attach spring handle by rotating counter clock-
wise onto rod. Ensure that the rod fits into the
entire length of the spring handle. See Diagram
below.
GLASS INSTALLATION
Your Regency stove is supplied with 5 mm
Neoceram ceramic glass that will withstand the
highest heat that your unit will produce. In the
event that you break your glass by impact,
purchase your replacement from an authorized
Regency dealer only.
Remove the door from the stove and remove
the glass retainer. Position the glass in the door,
make sure that the glass gasketing will properly
seal your unit, and replace the retainer, it should
rest on the gasket not the glass. Tighten secure-
ly, but do not wrench down on the glass as this
may cause the glass to break.
INSTALLATION
See page 20 for Ash Drawer Operating in-
structions.
Bottom Shield Ash Drawer Kit
(850-101 )
1) Remove the bricks from the floor of the
firebox.
2) Remove and discard the cover plate by
removing the two screws on the front of
the Bottom Shield.
3) Remove the ash dump cover plates (one
inside the firebox and one on the underside
of the firebox) by removing the two nuts
and bolts holding the 2 plates together from
inside the firebox.
4) Push the ash plug into the hole inside the
firebox and replace all the bricks except for
the brick over the ash plug. See brick
diagrams.
5) Place the ash plug tool beside the lid, then
slide the ash drawer inside.
See page 18 for Ash Drawer Operating in-
structions.
Freestanding - Small F1100
Pedestal Ash Drawer Kit (850-100)
1) Remove the bricks from the floor of the
firebox.
2) If using ashdrawer, discard cover plate.
3) Remove the ash dump cover plates (one
inside the firebox and one on the underside
of the firebox) by removing the two nuts
and bolts holding the 2 plates together from
inside the firebox.
4) Push the ash plug into the hole inside the
firebox and replace all the bricks except for
the brick over the ash plug. See brick
diagrams.
5) Place the ash drawer lid inside the pedes-
tal, and the ash plug tool beside the lid, then
slide the ash drawer inside so it sits on top
of the lid.
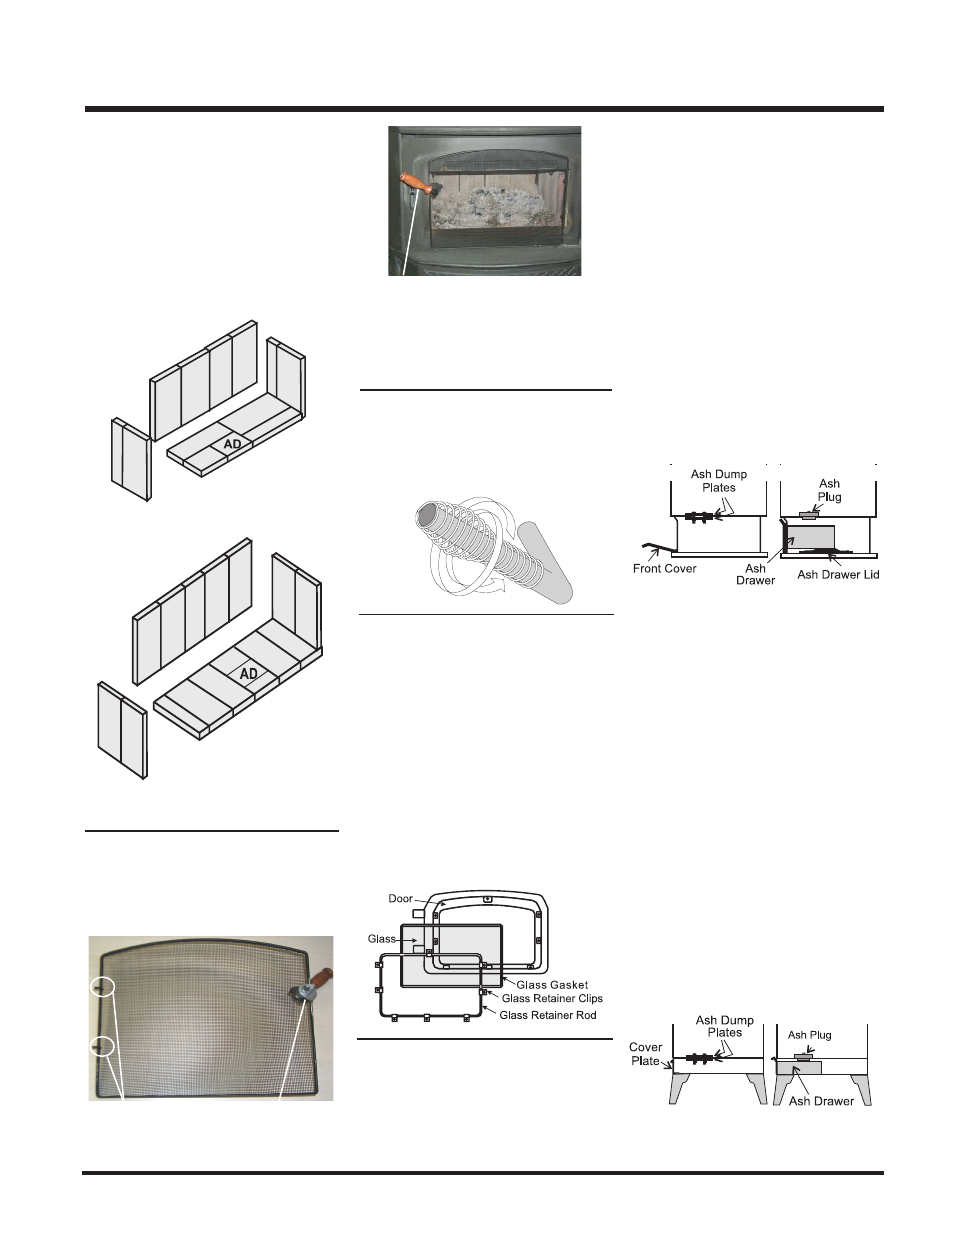
BRICK INSTALLATION
Firebrick is included to extend the life of your
stove and radiate heat more evenly. Check to
see that all firebricks are in their correct posi-
tions and have not become misaligned during
shipping.
The "AD" brick in the drawings above is the
brick covering the Ash Dump hole that is used
when the Ash Drawer Kit is installed. See page
15 for more information.
SCREEN DOOR
Hook screen to the inside on the right side of the
firebox door opening. Lock in place by turning
handle.
Back Side of Screen Shown
Handle Lock
Hooks
NOTE: The handle must be positioned at 10
o'clock when closed to avoid the handle from
getting hot and to ensure the screen stays in
place.
Handle at 10 o'clock position.