4 attach the power cables, Attach the power cables, Warning: electrical safety – Raymarine 150/400 User Manual
Page 23
Step 3: Install the Course Computer
15
Ste
p
3
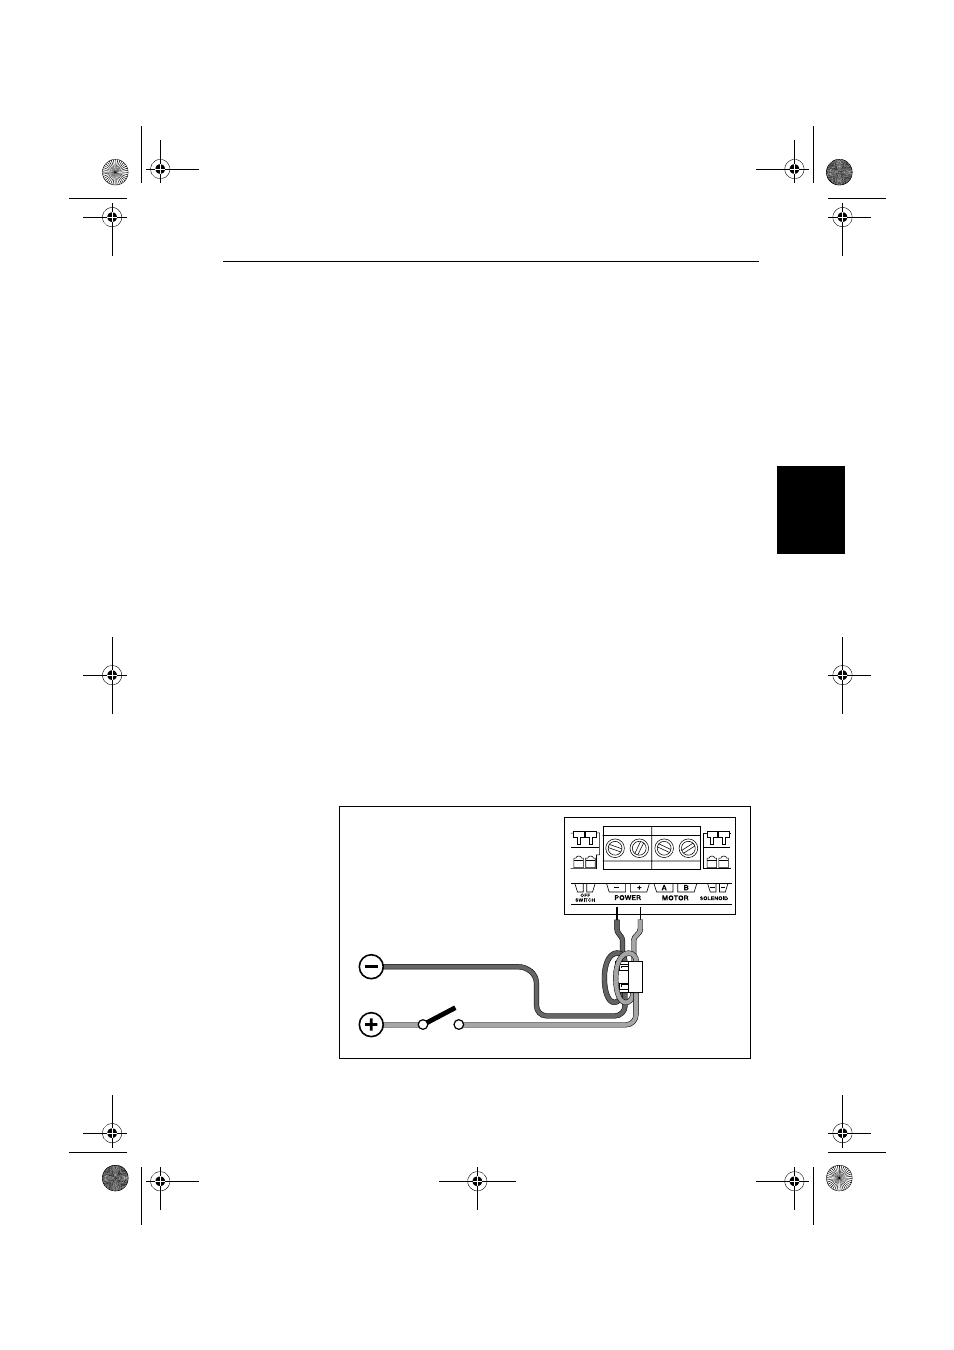
3.4 Attach the power cables
WARNING: Electrical safety
Make sure the power supply is switched off before you make any
electrical connections.
Follow these steps to provide power to the course computer:
1. Measure the total length of cable run from the boat’s distribution
panel to the course computer, then use Table 3-1 to identify the
appropriate cable size.
Note: When selecting power cable you must use the gauge specified
in Table 3-1. If in doubt, use a heavier gauge cable than specified.
A lighter gauge cable might cause a voltage drop between the supply
and the course computer. This could cause the course computer to
malfunction and will reduce the power supplied to the drive unit.
2. Route the cables back to the course computer, taking into account
the EMC installation guidelines (page 7).
3. Install a circuit breaker or fuse on the power supply to suit the
drive unit connected to your autopilot system (see Table 3-2).
4. Connect the cables to the POWER inputs on the course computer.
5. Attach the suppression ferrite (supplied) around both the positive
and negative power cables, between the cable clamp and course
computer. When you attach the ferrite, you must loop both power
cables so that the ferrite encloses two passes of each cable.
Secure the ferrite with the small tie-wrap (supplied).
Course computer – connecting power supply
Power
supply
Fuse or
circuit breaker
Ferrite
D5380-2
Course
computer
terminals
81173_3.book Page 15 Thursday, June 7, 2001 11:51 AM