Renesas M16C/6NK User Manual
Page 5
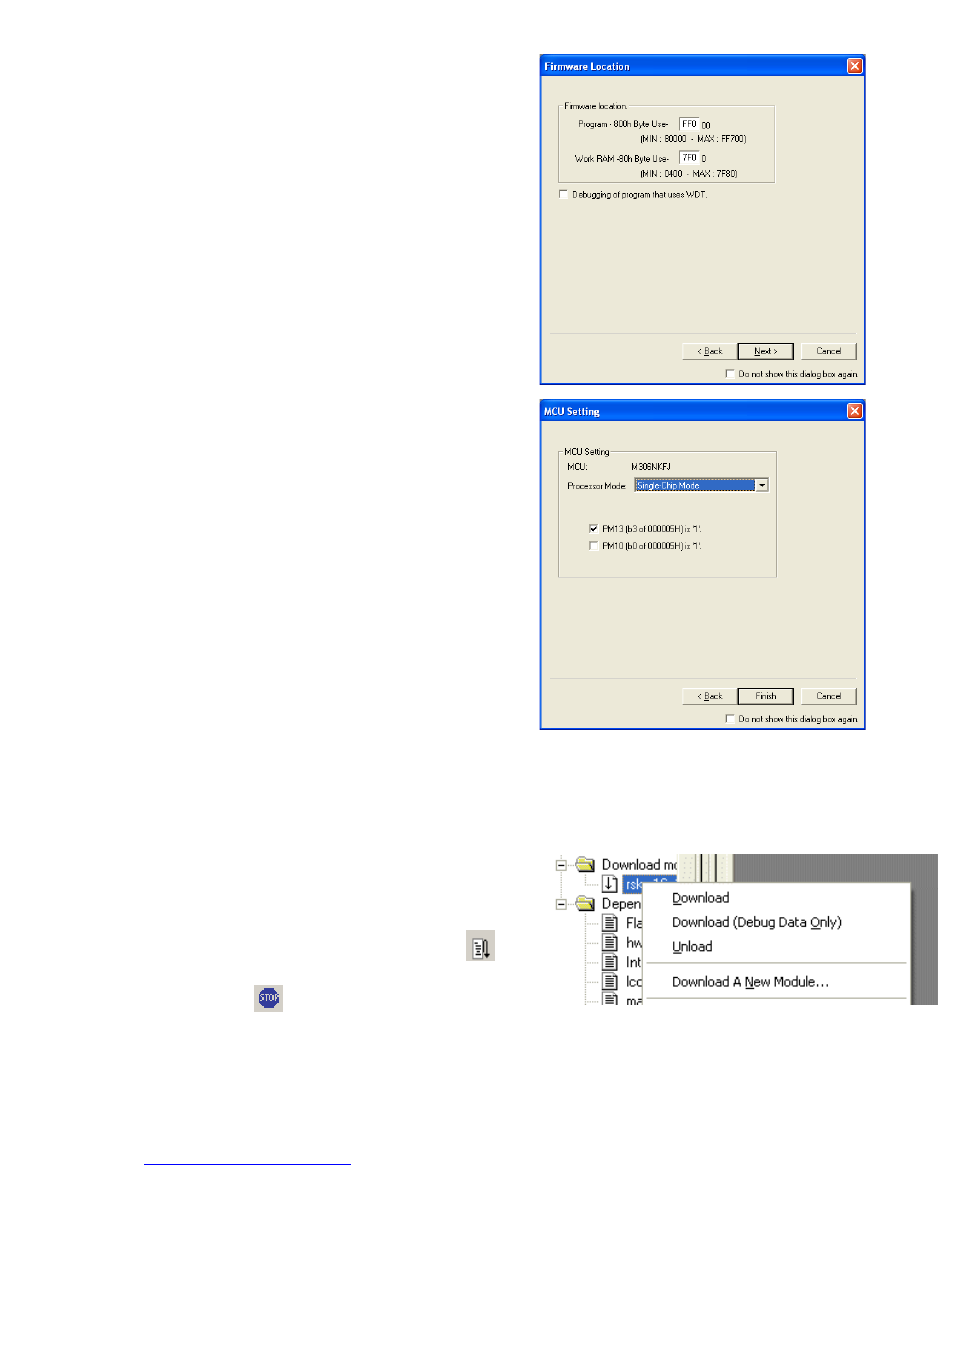
33. The ’Firmware Location’ options will be shown
Enter FF000 for the firmware location.
Enter 7F00 for the work RAM location.
34. Click
35. The “MCU Setting” options will be shown.
Check/Select the PM13*** tick box.
36. Click
Note: The first time the E8a is connected, you may be asked to choose a driver, select “Renesas Communications”, after a few seconds the
“Interface” and “Channel” numbers will be automatically displayed, click
37. Accept any dialog warning that another version of E8a firmware is necessary to work with the application.
Allow download of firmware to complete, this may take several seconds.
38. Right click on the download module listed in the left hand pane and select ‘Download’.
The code will be downloaded to the microcontroller. This may take several seconds.
39. Click the
The code will run and you will see the LEDs flash on the board.
40. Click the
The code will stop and the source
code will be opened at the current program counter.
5. Next
Step
After you have completed this quick start procedure, please review the tutorial code and sample code that came with the kit. You can add projects to the
current workspace by selecting (Project > Insert Project) from the main menu. The tutorials will help you understand the device and development process
using Renesas Development Tools.
The Hardware manual supplied with this RSK is current at the time of publication. Please check for any updates to the device manual from the Renesas
internet site
D007214_11_S01_V04