Installing guide bar and saw chain – RedMax G3100T User Manual
Page 18
18
6. Installing guide bar and saw chain
English
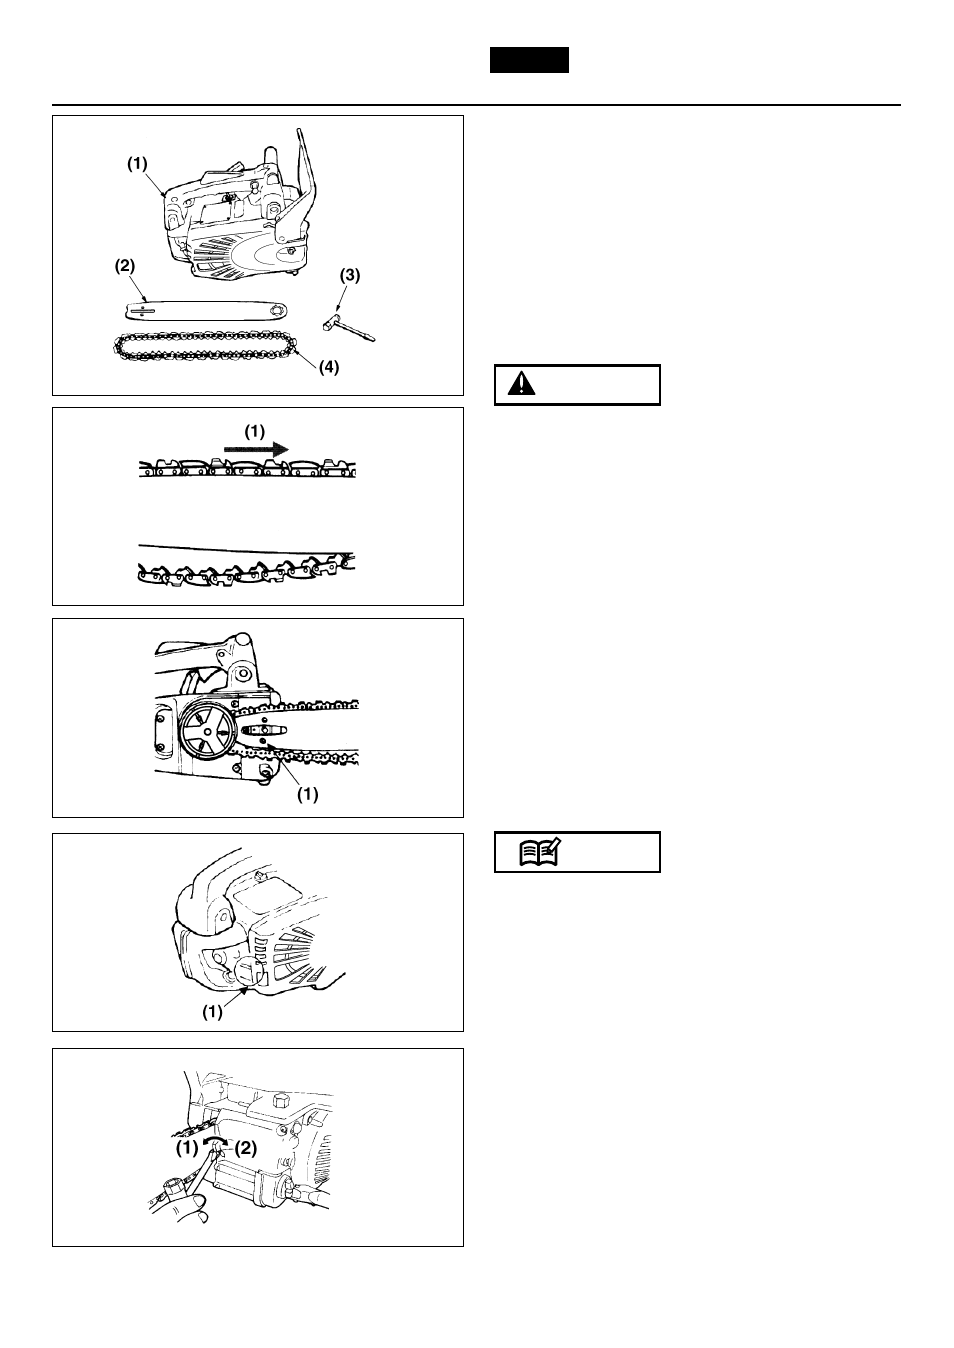
A standard saw unit package contains the items as
shown. (F6-1)
(1) Power unit
(2) Guide bar
(3) Socket wrench
(4) Saw chain
Open the box and install the guide bar and the saw
chain to the power unit as follows.
The saw chain has very sharp edges. Use thick,
protective gloves to avoid injury.
1. Loosen a nut and remove the chain cover.
2. Mount the guide bar and fit the saw chain around
the bar and the drive sprocket. Pay attention to the
correct direction of the saw chain. (F6-2)
(1) Rotating direction
3. Fit the chain tensioner nut into the lower hole of the
guide bar, then install the chain cover, and fasten
the mounting nut to finger tightness. (F6-3)
(1) Chain tensioner nut
When installing the chain cover, be sure to fit the hook
completely at the rear end of the cover. (F6-4)
(1) Hook
4. While holding up the tip of the bar, adjust the chain
tension by turning the tensioner screw until the tie
straps just touch the bottom side of the bar rail. (F6-
5)
(1) Loosen
(2) Tighten
5. Keep holding the guide bar up, tighten the mounting
nut firmly with the attached socket wrench.
6. Rotate the saw chain by hand, wearing a protective
NOTE
WARNING
F6-1
F6-2
F6-3
F6-4
F6-5