Valve tray replacement, Removing valve, Installing valve – Regency P33 SunriseTM P33S-LP4 User Manual
Page 43: Maintenance
Regency P33 Sunrise
TM
Gas Fireplace
43
MAINTENANCE
VALVE TRAY REPLACEMENT
MAINTENANCE
REMOVING VALVE
1) Shut off the gas supply.
2) Remove the faceplate.
3) Open the fl ush door and remove the door.
4) Remove the burner assembly by removing
the two Phillips head screws and then lift
the burner assembly out. (See Diagram 1)
Diagram 1: Remove the 2 screws and then lift
out the burner assembly.
7) Disconnect the inlet gas line.
8) Disconnect the 2 TP wires and the 2 TH wires
from the valve (Refer to wiring diagram on
page 33).
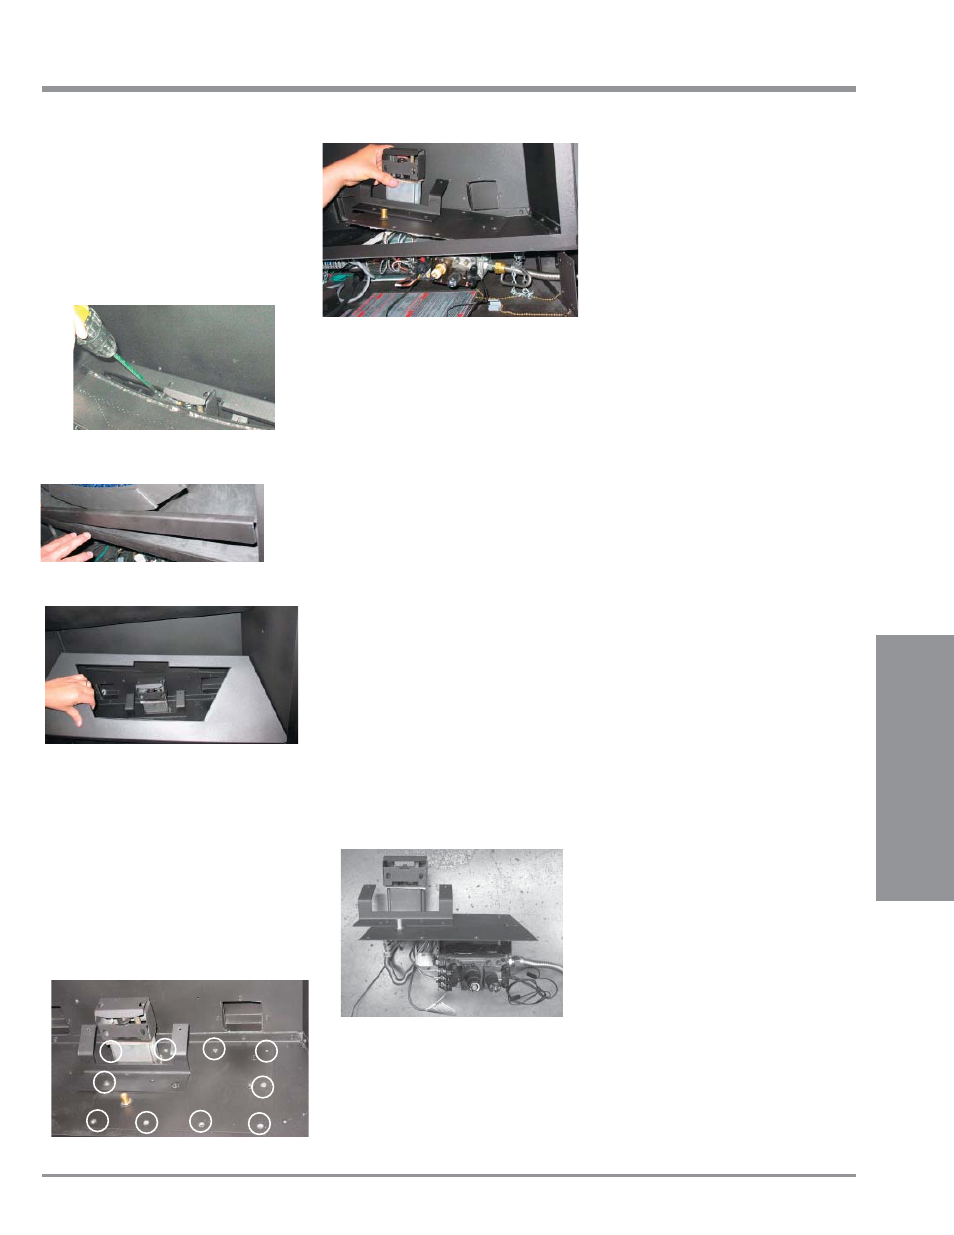
9) Remove the 10 Phillips head screws securing
the valve tray assembly in place (diagram 4)
and then lift the entire assembly out (Diagram
5).
10) Undo the pilot tube from the valve with a
7/16"
wrench.
INSTALLING VALVE
1) Install new Valve Tray Assembly. (Diagram
6)
2) Reinstall 10 hold down screws (see Diagram
4 for locations).
3) Install Burner assembly. See Step 4 in
Removing Valve for screw locations.
4) Reinstall fi rebox base.
11) Undo the quick drop out thermocouple nut
on the valve with a 9mm (metric) wrench.
12) Disconnect the 2 DC Spark generator wires
from the DC spark box located in front of the
valve.
13) Undo the "gas out" fl are nut with a 13/16"
wrench.
14) Undo the "gas out" fl are fi tting with an 11/16"
wrench.
Diagram 5: Lift out Valve Tray Assembly
Diagram 4
Diagram 6
Diagram 2
Diagram 3
5) Hook up the gas line and check for gas leaks
with a soap and water solution or a gas leak
detector. (Do not use open fl ame for leak
testing.)
6) Fire up the unit temporarily.
7) Check the manifold pressure.
8) Reinstall the Glass Crystals/Ceramic Stones,
and Pebbles as needed.
9) Reinstall the fl ush door.
10) Fire up the unit again and check for proper
fl ame appearance.
11) Reinstall the faceplate.
6) Remove the fi re box base. (Diagram 3)
5) Remove the retainer bar (Diagram 2)