Adjustments – RIDGID 13 in. THICKNESS PLANER R4330 User Manual
Page 22
ADJUSTMENTS
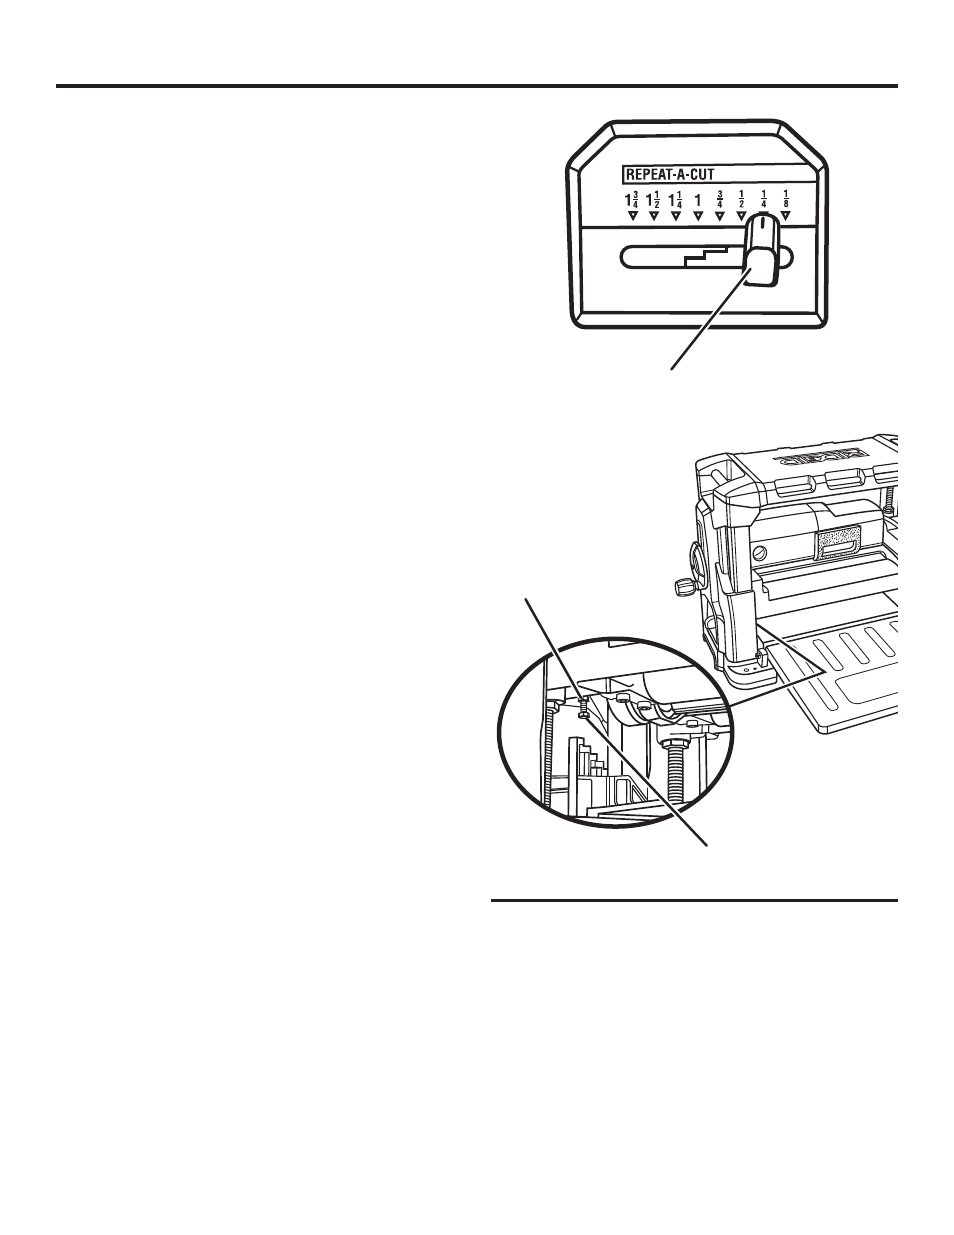
loCk nut
StoP SCrew
Fig. 17
rePlAne
indiCAtor
REPEAT-A-CUT
™
See Figure 17.
Plane a scrap piece of wood and measure the depth of the
finished piece. If an adjustment is needed:
Unplug the planer.
Pull the replane indicator straight out to remove.
Using the hex key provided, remove the hex head screw
from the depth adjustment handwheel. Remove the
handwheel.
Remove the screws on the top and right side panel of the
planer. Carefully lift and pull the side panel cover off.
Lower the cutterhead assembly until it stops against the
stop screw.
Using an accurate ruler or a scrap piece of wood, check
the measurement against the replane indicator setting.
If adjustment is necessary, use a wrench to loosen
the lock nut and adjust the stop screw to the correct
height.
Once the adjustment is made, retighten the lock nut and
stop screw securely.
Replace the top and side panel, and secure using the set
screw.
Replace the handwheel and hex head screw.
Replace the replane indicator.