Connector panel, Runco logo, Connector panel runco logo – Runco CL-810 User Manual
Page 14
14
Runco CL-810 Owner’s Operating Manual
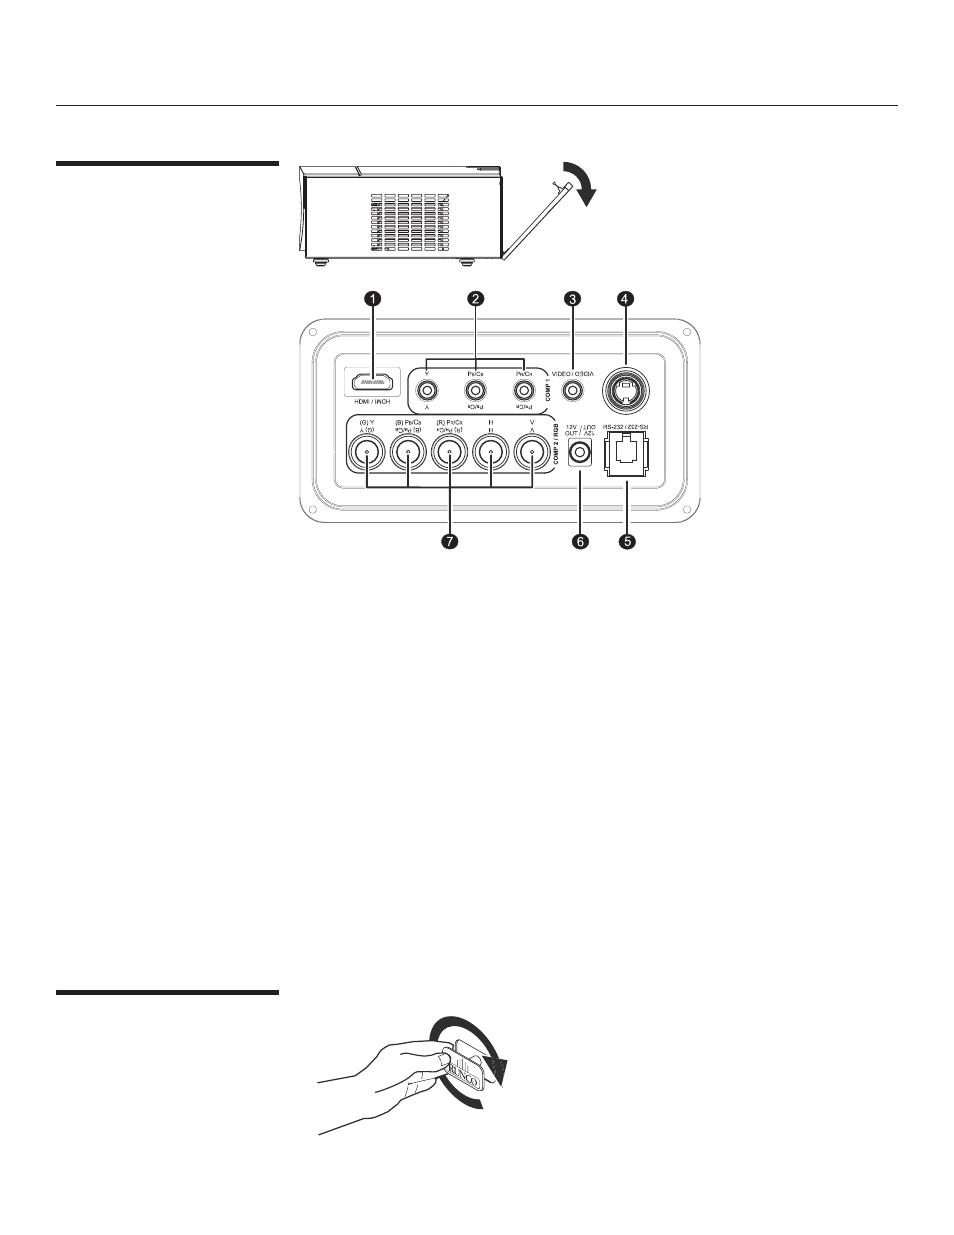
Connector Panel
Controls and Functions
Runco Logo
To access the connector panel, pull
firmly on the cable access cover to
open it.
1. HDMI (High-Definition Multimedia Interface) Input
Digital video signal input
2. Component (RCA Jacks)
480i Component (Y/CB/CR) video signal input
3. Video (RCA Jack)
Composite video signal input
4. S-Video (mini DIN 4-pin) Y/C (S-video) signal input
5. RS-232C (RJ-11 Jack)
RS-232C control signal input (refer to page 49 for details)
6. 12v Trigger (mini jack, diameter 5.5 mm outside, 2.5 mm inside)
+12V output, active when the projector is turned on
7. RGB/ HDTV (BNC) or Progressive Scan DVD players
DTV Y/P
B
/P
R
or DTV RGB video signal input
The Runco logos on the front and rear of the projector
can be rotated to match a floor or ceiling installation.
To rotate the logo, grip it at the sides, pull it away
from the projector and rotate it 180 degrees.
S-VID /
S-VID