Installation, Installing your central heating system – Regency WARMHEARTH Z2510L User Manual
Page 15
Regency Z2510 WarmHearth
15
Central Heat Option
Use high temperature silicone to seal the
block-off plate to the unit. If necessary drill
extra holes in the plate and the unit and
secure with extra screws.
Note: Make sure the block-off plate is fl ush and
fastened tightly to the WarmHearth.
Important: A tight joint between ma-
sonry and the fi replace is necessary
to prevent heat from rolling up the
front to the Face Header.
INSTALLING YOUR
CENTRAL HEATING
SYSTEM
The WarmHearth may be used as a central
forced air heating unit by adding ducting and
a fan.
Materials Required:
1)
Blower requirements: see Options 2 and
3 in section "F) Installing the Blower Sys-
tems"
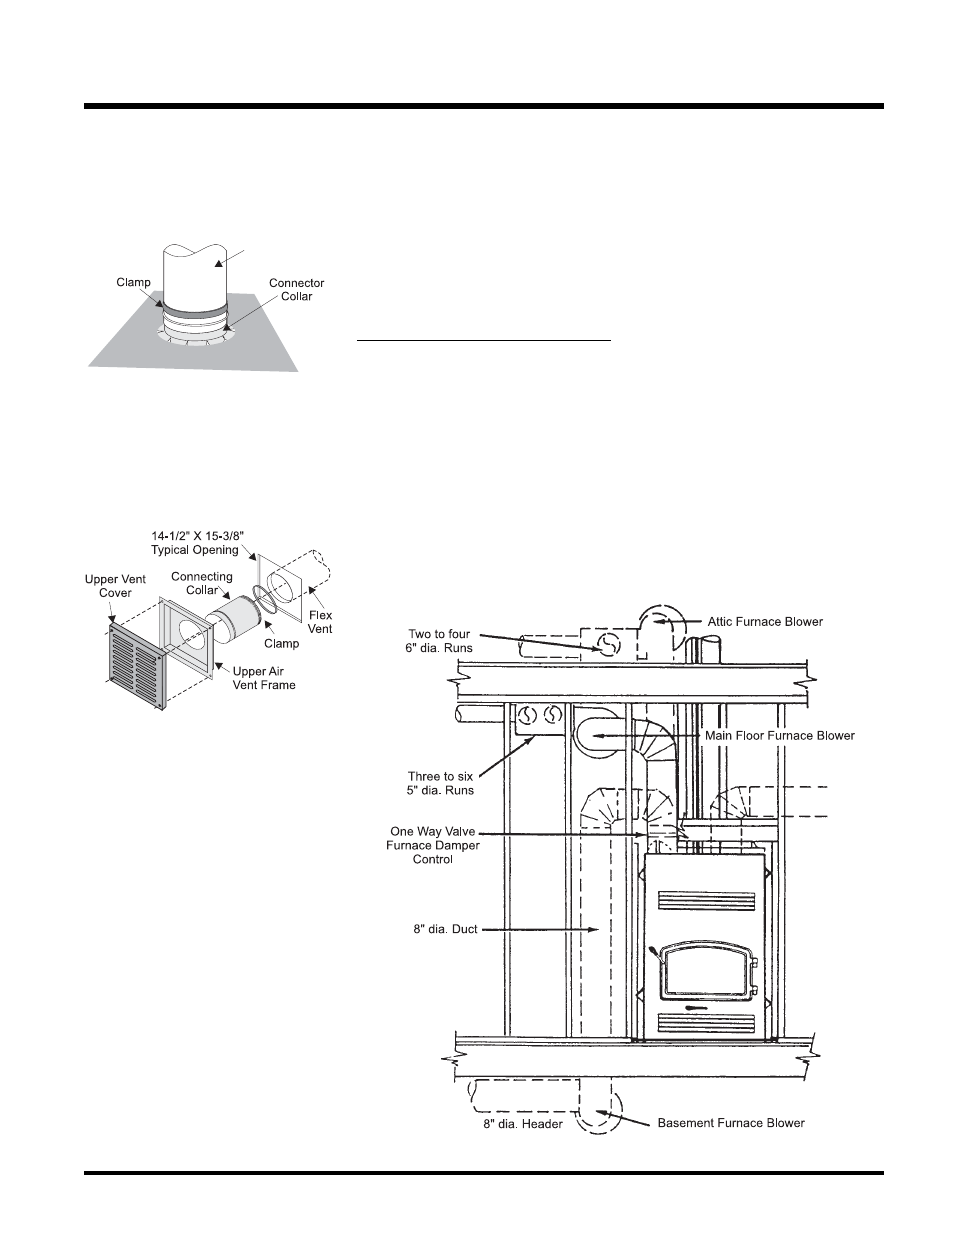
Flex Vent
5) Install the connector collar into the unit
making sure it is pushed all the way down.
Reach through the upper louver opening
and snip and bend out the lower edge of the
collar in at least 4 places inside the fi replace
with pliers so it can't be pulled out.
INSTALLATION
IMPORTANT: Make sure the front edge of
the collar is fl ush with the front edge of the
air vent frame.
Note: The fl ex duct can easily be trimmed
shorter or stretched longer.
Note: Termination boxes require a
14-1/2"W x 15-3/8"H opening in com-
bustible materials.
8) Locate and install the lower air vent next.
A 7-3/4" x 7-3/4" opening is required to fi t
the frame that is supplied. The vent must be
installed in the chase and should be within
12" of the fl oor.
WARNING: Lower air vent MUST
be installed in all applications,
otherwise serious overheating of
the chase may result.
9) Fasten the block-off plate to the WarmHearth
using the existing holes that normally secure
the louvers, using the louver screws. Make
sure the top edge is up.
6) Slide the collar into the fl ex duct. secure with
an adjustable clamp. Snip and bend out the
outer edge of the collar in at least 4 places
inside the frame so it can't be pulled out.
7) Drill holes or use nails to attach the Vent
Frame to the wall. Note: holes in frame are
used to attach the Vent cover.
2)
Metal ducting, grills and distribution boxes.
(Installer Supplied)
3)
Ducting is tested at 1 in. clearance to fram-
ing for the fi rst 6 feet and 1/2 in. thereafter
and no stand-offs are required. All ducting
should be insulated to reduce heat loss.
CAUTION: Blowers must meet
specifi cations listed (refer to Install-
ing the Blower Systems section). A
home fi re may result from the use
of substitute parts.
Installation
1) Remove screws from one of the vent hole
covers "A" (but not both) on top of the
WarmHearth.
2) Take one way duct vent pipe and rotate
in hole to cut through 4 in. of insulation.
Remove insulation from pipe.
3) Remove screws on cover "B" and slide it to
the back.
4) Install the one way valve making sure it is
pushed all the way down. Shutters should