Getting to know your gt1150 projector, E – 2, Open the cover to access the pc card slot – NEC GT1150 User Manual
Page 10: Rotate to fine-adjust the height of each foot, Security system. microsaver, Terminal panel (right)
E – 2
RE
MO
TE
1
PC
CO
NT
RO
L
REM
OTE
2
AC
IN
SC
, TR
IG
GE
R
OU
T
OU
T
IN
IN
DVI
L/MO
NO
L/MO
NO
RGB
1
RGB
2
VIDE
O 1
VIDE
O 2
S-VID
EO
AUD
IO O
UT
R/Cr
G/Y
B/Cb
V
H/H
V
MON
ITOR
OUT
R
L/M
ONO
R
L/MO
NO
R
L/MO
NO
R
R
ME
NU
E
NT
ER
CA
NC
EL
SE
LE
CT
LE
NS
SH
IFT
LE
FT
ZO
OM
FO
CU
S
UP
DO
WN
RIG
HT
AU
TO
AD
JU
ST
LA
MP
ST
AT
US
PO
WE
R
ON
/S
TA
ND
B
Y
SO
UR
CE
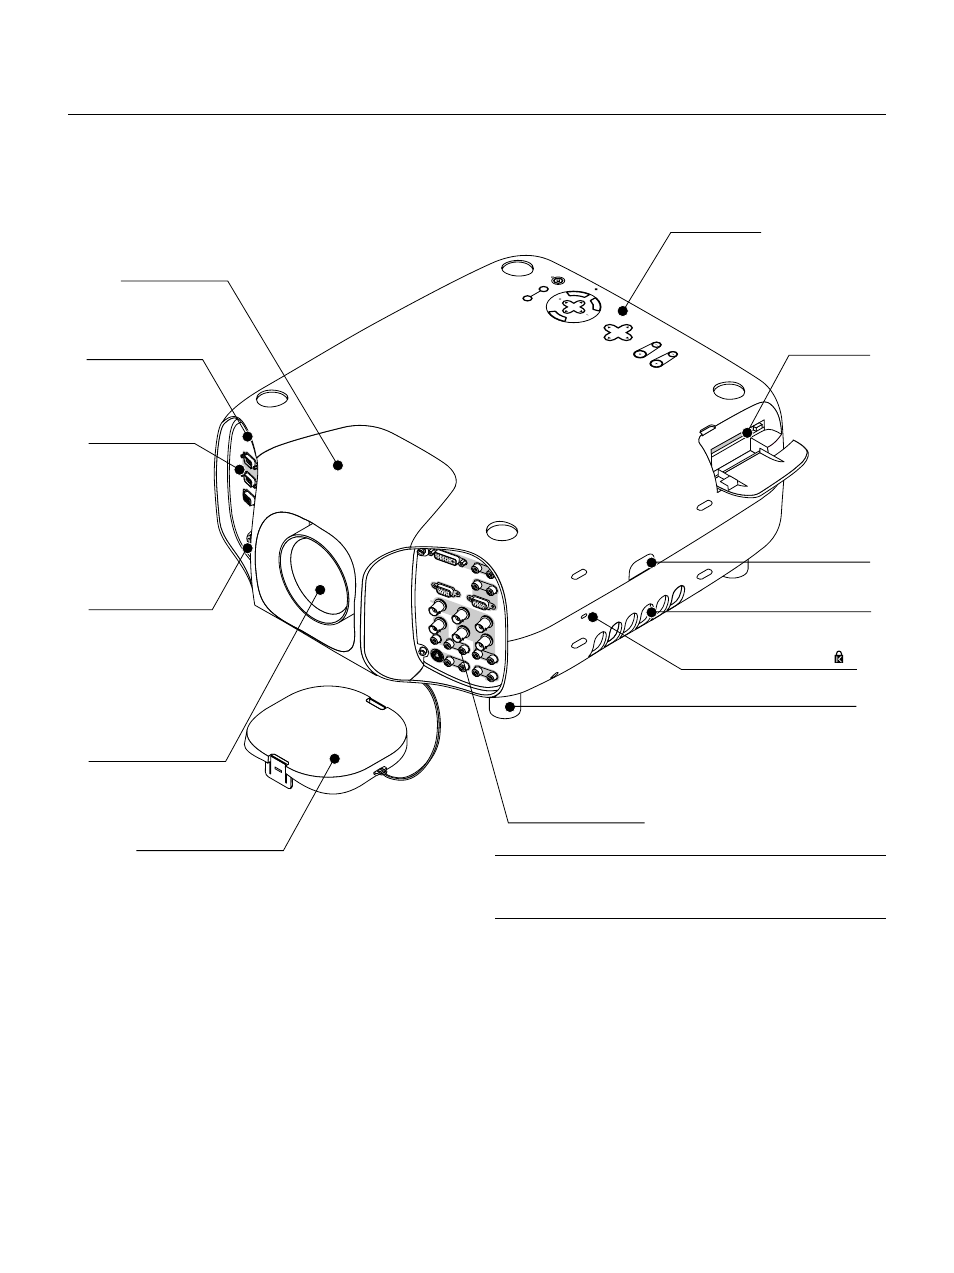
Getting to Know Your GT1150 Projector
Lens hood
Remote sensor
Terminal panel (Left)
AC INPUT
Connect the supplied power
cable’s three-pin plug here.
Lens (optional)
Lens hood cap
Controls
PC Card slot
Open the cover to access
the PC card slot.
Remote sensor
Ventilation (outlet)
Built-in Security Slot ( )*
Foot (four)
Rotate to fine-adjust the height of each foot.
Terminal panel (Right)
*NOTE: Slot for Kensington MicroSaver Security System
This security slot supports the MicroSaver
®
Security System.
MicroSaver
®
is a registered trademark of Kensington Microware Inc. The logo
is trademarked and owned by Kensington Microware Inc.