3a 3b – Napoleon Fireplaces NZ-26WI User Manual
Page 13
W415-0585 / B / 11.28.06
1
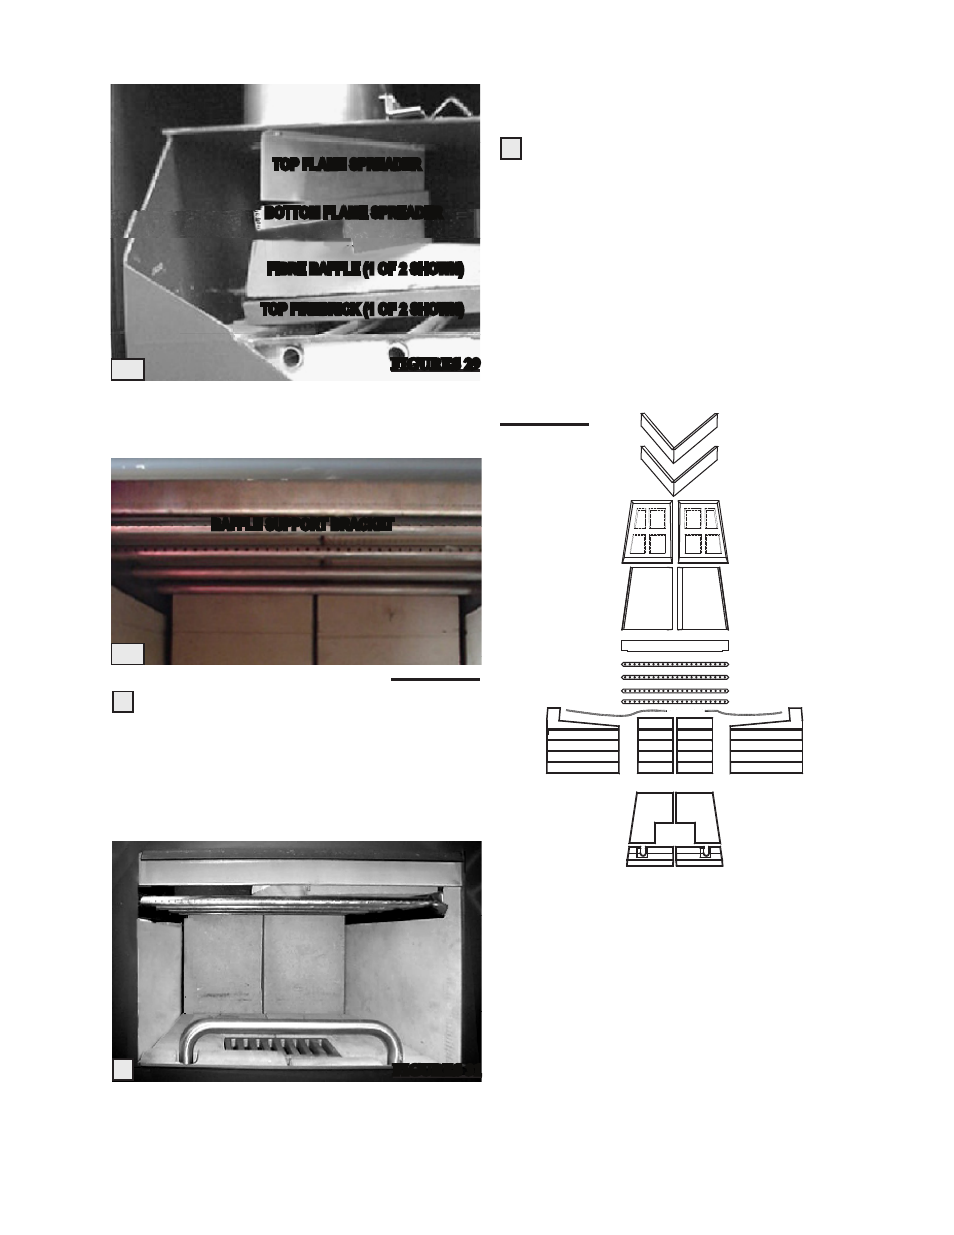
TOP FLAME SPREADER
BOTTOM FLAME SPREADER
FIBRE BAFFLES
TOP FIBREBRICKS
TUBE BURNERS
GASKET
LEFT SIDE FIBREBRICK
RIGHT SIDE FIBREBRICK
REAR FIBREBRICKS
GASKET
RIGHT FRONT FIBREBRICK
LEFT FRONT FIBREBRICK
BOTTOM RIGHT FIBREBRICK
BOTTOM LEFT FIBREBRICK
BAFFLE SUPPORT
Insert the left baffle, then the left top firebrick. Repeat
using the right baffle and brick.
The baffles are made of a brittle material. Care must be
taken not to bend or force them.
Replace the three front tubes. Position the center edges
of both baffles and bricks until they lie snugly together.
Slide the baffle support bracket into place along the front of
the unit between the front tube and the two top firebricks.
3
WARNING: Operation of the fireplace without the top
firebricks and the baffles can result in excessive tem-
peratures that could damage the fireplace, chimney and
the surrounding enclosure.
top flAme spreAder
bottom flAme spreAder
fibre bAffle (1 of 2 showN)
top firebrick (1 of 2 showN)
3a
3b
bAffle support brAcket
figures 29
figures 30
figures 32
If you need to remove the bricks (to lighten the fireplace
for ease of installation, replacement, etc), follow this se-
quence:
For Firebrick Removal: Remove the ashwell grate. This
allows the four bottom bricks to be removed first.
Slide out the baffle support bracket from above the front
tube.
Reaching above the top firebricks and baffles, lift and tape the
bottom flame spreader to the top spreader to ease top brick
and baffle removal and to avoid damaging the fibre baffle.
Remove the three front tubes.
Remove the top firebrick on the right, then the left firebrick.
Remove the baffles, starting with the right side.
Remove the gasket rope. Check the rope for deterioration
and replace if necessary. Remove the rear bricks (pull the two
bricks forward at the centre, and lift the bottom of the bricks
out). Remove the side bricks (tilt the tops inward).
4
figures 31
4