Prepare the installation 2. measure installation – NuTone NP60000 User Manual
Page 7
Remove the installation kit from inside the hood.
Make sure that the following items are included:
- Wood strip
- Installation manual
- Accessories including:
• Filters (Quantity varies depending on range hood width)
• Bag of parts including:
(4) flat head screws #10-2’’, (8) screws #8 x
3
⁄
4
’’, (4) nuts #10-32, (2) wall anchors, (2) washers
3
⁄
16
’’ ID x
3
⁄
4
’’ OD
Parts sold separately:
- Interior blower Model RM325H or RM326H (both include rough-in kit)
- In-line blower assembly HLB3, HLB6, HLB9 or HLB11 (all include transition)
- In-line and exterior blower rough-in plate model 332KR, required for all In-line or Exterior Blowers
- Exterior blower assembly 331H, 332H, 335 or 336
- Halogen lights (120 V, 50 W, PAR 20)
- Heat lamps (Infrared, 120 V, BR40, 250 W max.)
- RMP Series Backsplash (optional)
- RBF Series Baffle filters (optional)
- Transitions, duct, elbows, dampers, wall and roof caps.
Refer to pages 4 and 5 for a complete list of venting options
and model numbers.
Using a Phillips #2 or a Robertson #2 screwdriver, unscrew the
hood from the bottom of crate. Refer to figure beside to locate all
4 screws. Discard these screws and remove hood from wood pallet.
- 7 -
3. PREPARE THE INSTALLATION
2. MEASURE INSTALLATION
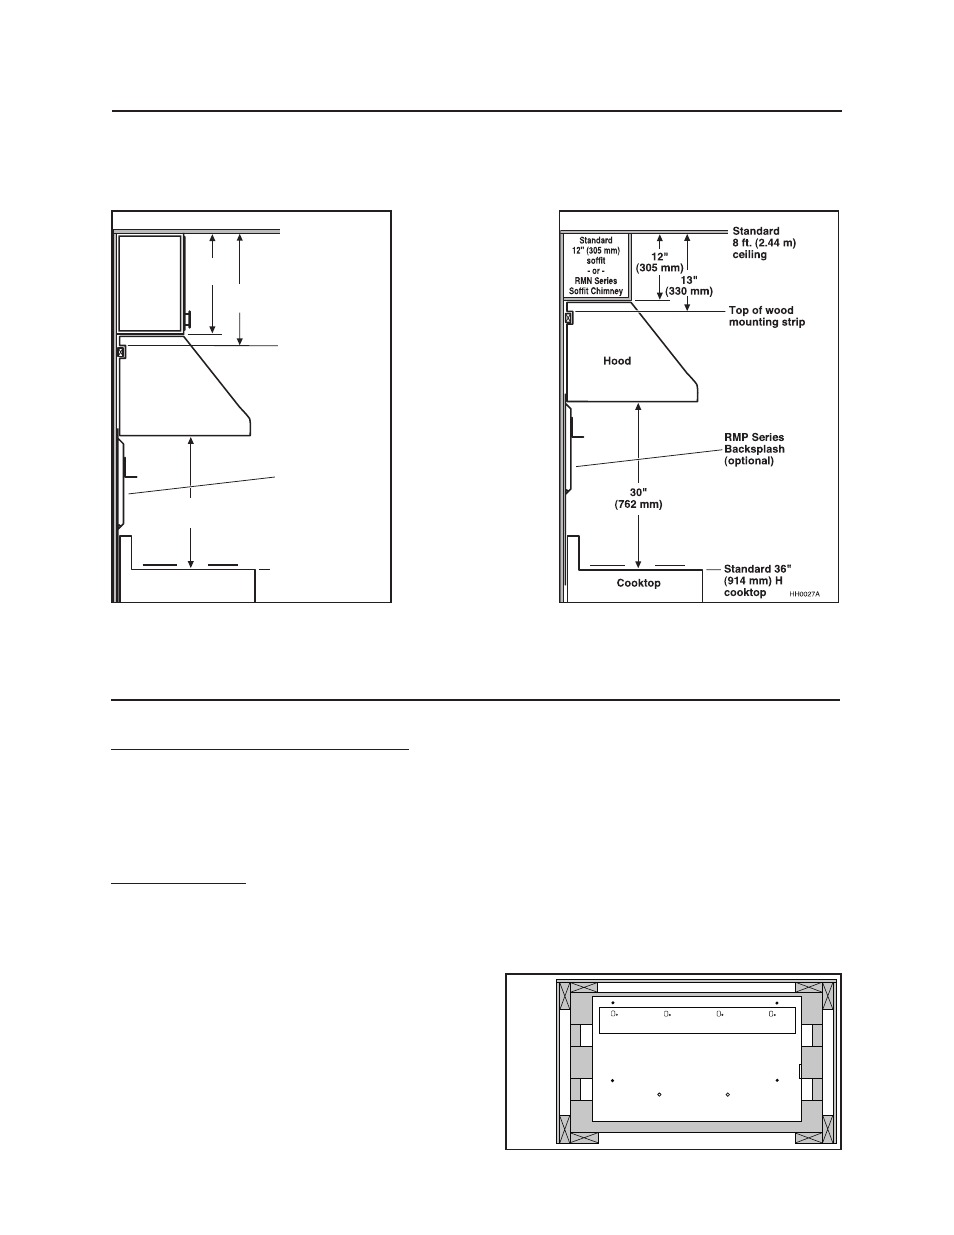
Dimensions for the most common installation are shown below.
The minimum hood distance above cooktop must not be less than 24’’. A maximum of 30” above cooktop is
highly recommended for best capture of cooking impurities.
Distances over 30” are at the installer and users discretion.
18"
(457 mm)
Standard 18"
(457 mm) H
over
-cooktop
cabinet
24"
(610 mm)
Cooktop
19"
(483 mm)
Top of wood
mounting strip
Hood
RMP Series
Backsplash
(optional)
Standard
8 ft. (2.44 m)
ceiling
Standard 36"
(914 mm)
H cooktop
HH0028A
INSTALLATION WITH STANDARD 18’’
HIGH OVER-COOKTOP CABINET
INSTALLATION WITH STANDARD
12’’ SOFFIT OR OPTIONAL
SOFFIT CHIMNEY RMN SERIES
1
2
3
4
HR0002