Advanced setup, 1 local area network (lan) – NetComm YML-O-3G19W User Manual
Page 32
3G WiFi Router User Guide
YML-O-3G19W
32
www.netcomm.com.au
7. Advanced Setup
This chapter explains the advanced setup options for your Router:
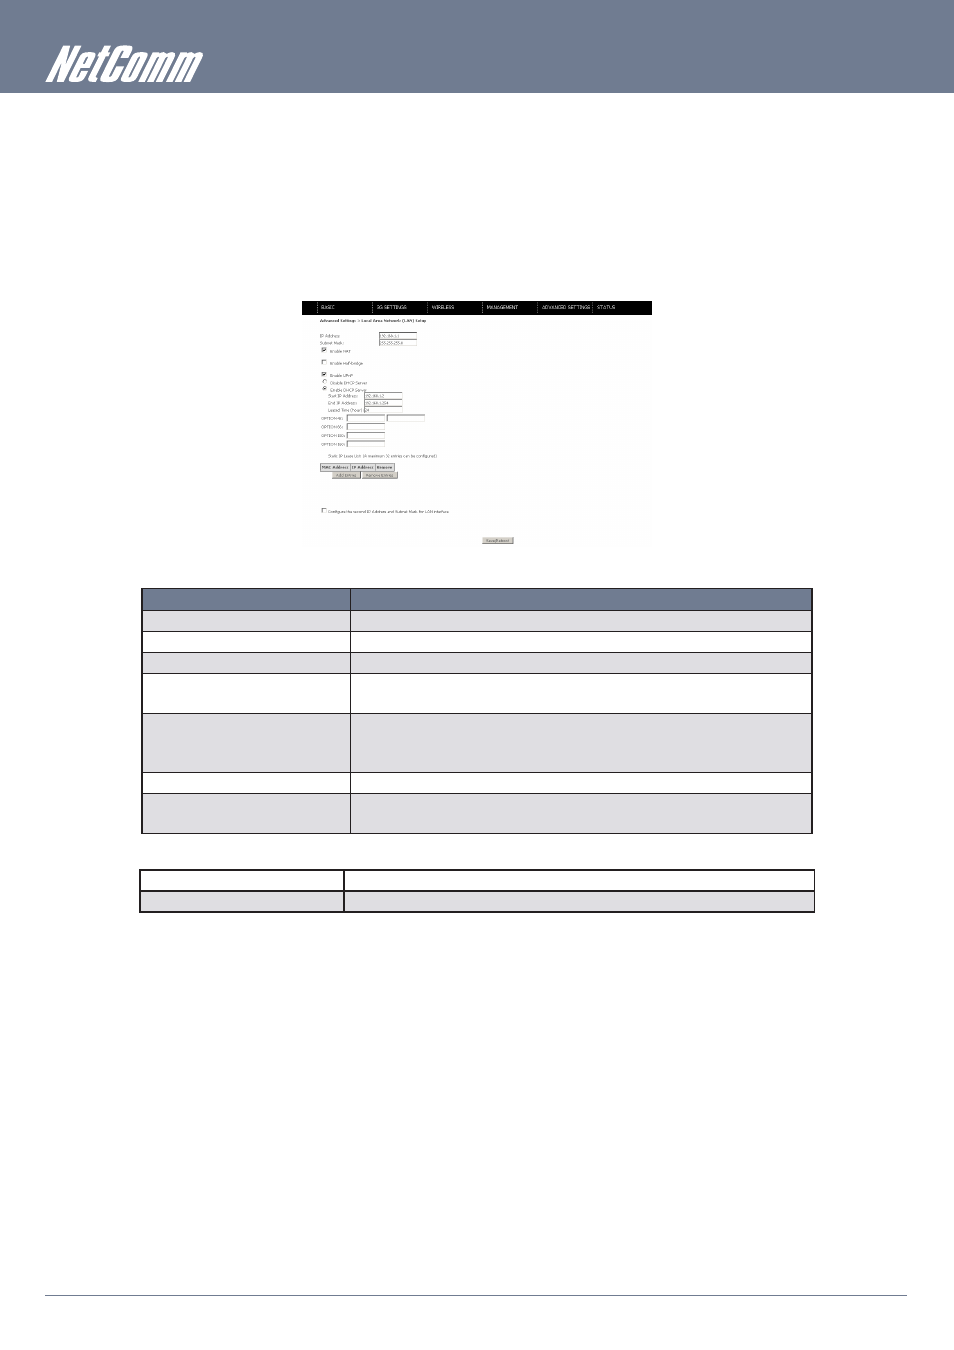
7.1 Local Area Network (LAN)
This screen allows you to configure the Local Area Network (LAN) interface on your Router.
See the field descriptions below for more details.
OPTION
DESCRIPTION
IP Address
Enter the IP address for the LAN interface
Subnet Mask
Enter the subnet mask for the LAN interface
Enable UPnP
Tick the box to enable Universal Plug and Play
Enable Half-Bridge
The Router can be setup as a half-transparent bridge to cope with some special applications
such as VPN pass-through. By default half-bridge is off..
Dynamic Host Configuration Protocol
(DHCP) Server
Select Enable DHCP server and enter your starting and ending IP addresses and the lease
time. This setting configures the router to automatically assign the IP address, default
gateway and DNS server addresses to every DHCP client on your LAN.
Option 42, 66, 150, 160
These options are used for special DHCP setup.
Static IP Lease List
To specify the IP address assigned through DHCP according to the MAC address of the
hosts connected to the router.
Configure a second IP address by ticking the checkbox shown below and enter the following information:
IP Address:
Enter the secondary IP address for the LAN interface.
Subnet Mask:
Enter the secondary subnet mask for the LAN interface.
NOTE:
The Save button saves new settings to allow continued configuration, while the Save/Reboot button not only saves new settings but also reboots the device to
apply the new configuration (i.e. all new settings).