Adjusting monitor settings, Osd main menu, Sub-menu – Planar PL1500M User Manual
Page 11: Selecting items in osd
8
Adjusting Monitor Settings
Use the OSD to easily adjust the screen image based on your viewing preferences.
Note:
You must perform Auto setup before making any adjustment.
Note:
For the best display performance, it is strongly recommended that you
use Auto setup to automatically configure your monitor’s settings.
OSD Main Menu
To display the OSD Main Menu, press the Select button.
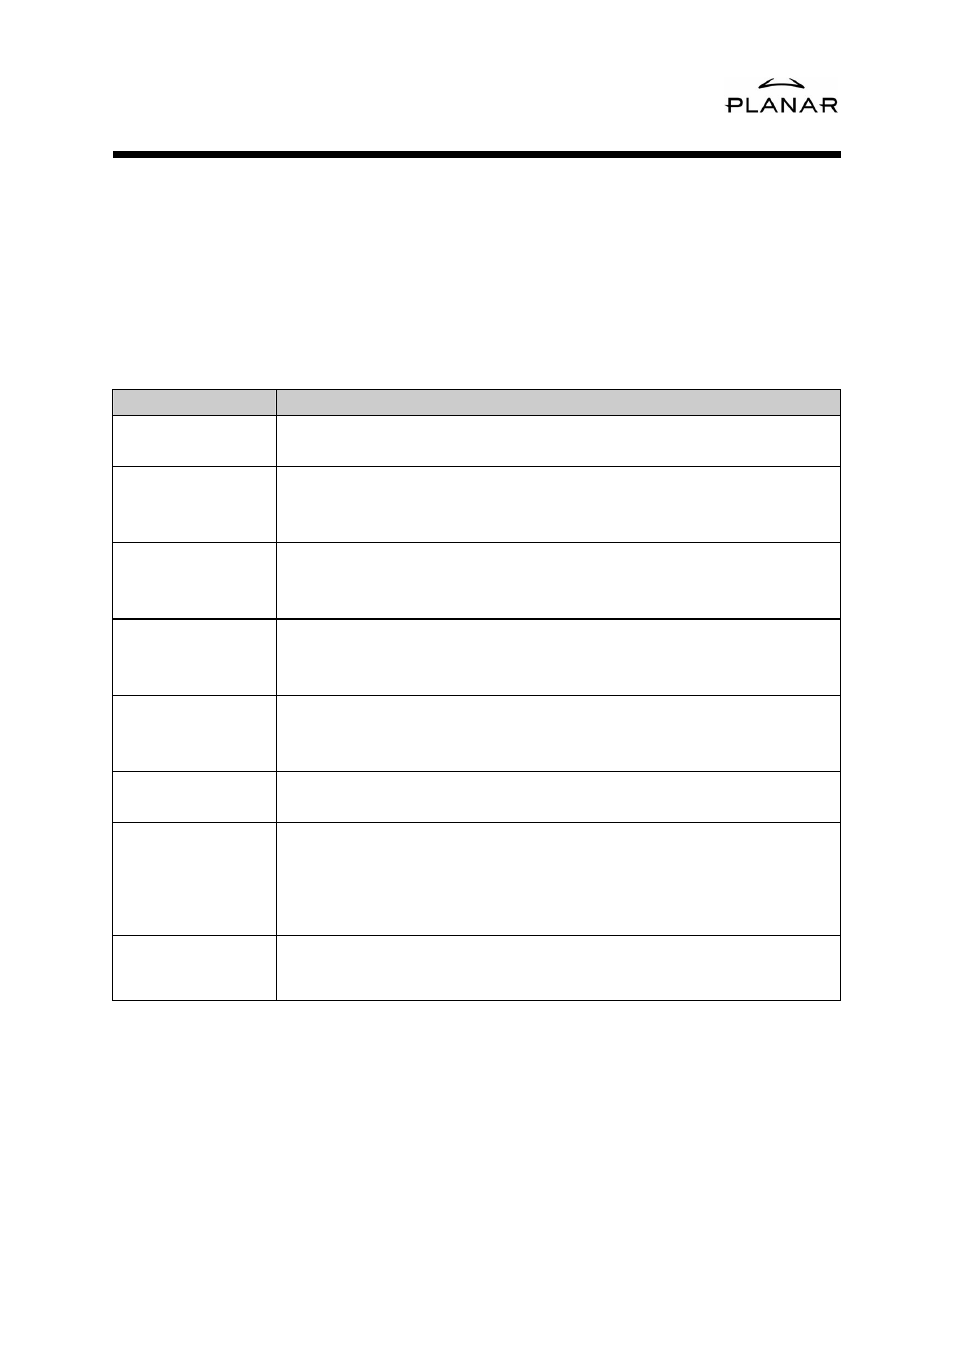
The following table briefly describes each of the items in the OSD Main Menu.
Item
Description
Auto setup
Automatically configure the monitor’s settings. See “Auto setup”
on page 9.
Management
Open the Management sub-menu where you can select
Brightness, Contrast or the image position for further
adjustment. See “Management Sub-menu” on page 10.
Clock/Phase
Open the Clock/Phase sub-menu where you can select Clock or
Phase for further adjustment. See “Clock/Phase Sub-menu” on
page 11.
Color
Open the Color sub-menu where you can select Color Temp,
Black Level Adjust and RGB Adjust for further adjustment. See
“Color Sub-menu” on page 12.
OSD Display
Open the OSD Display sub-menu where you can select H.
Position or V. Position of the OSD display for further
adjustment. See “OSD Display sub-menu” on page 13.
Factory Recall
Restore the factory default setting values. See “Factory Recall” on
page 13.
Language
Open the Language sub-menu where you can select one of the
five languages for your preference in displaying the OSD
messages. See “
Language
Sub-menu
” on page 14.
Exit
Clear and exit the OSD Main Menu. See “
Exiting
OSD
” on page 15.
Selecting Items in OSD
To select items in the OSD Main Menu, use the Up (△) or Down (▽) buttons on the
front panel of the monitor.
To select items in the OSD sub-menus, use all three, control buttons. Use the Up (△)
or Down (▽) buttons to move to a specific item, and accept the selection by
pressing the Select button.