The lcd monitor — rear view, Adjusting the viewing angle – Planar PT1814NUV User Manual
Page 9
Chapter 1
3
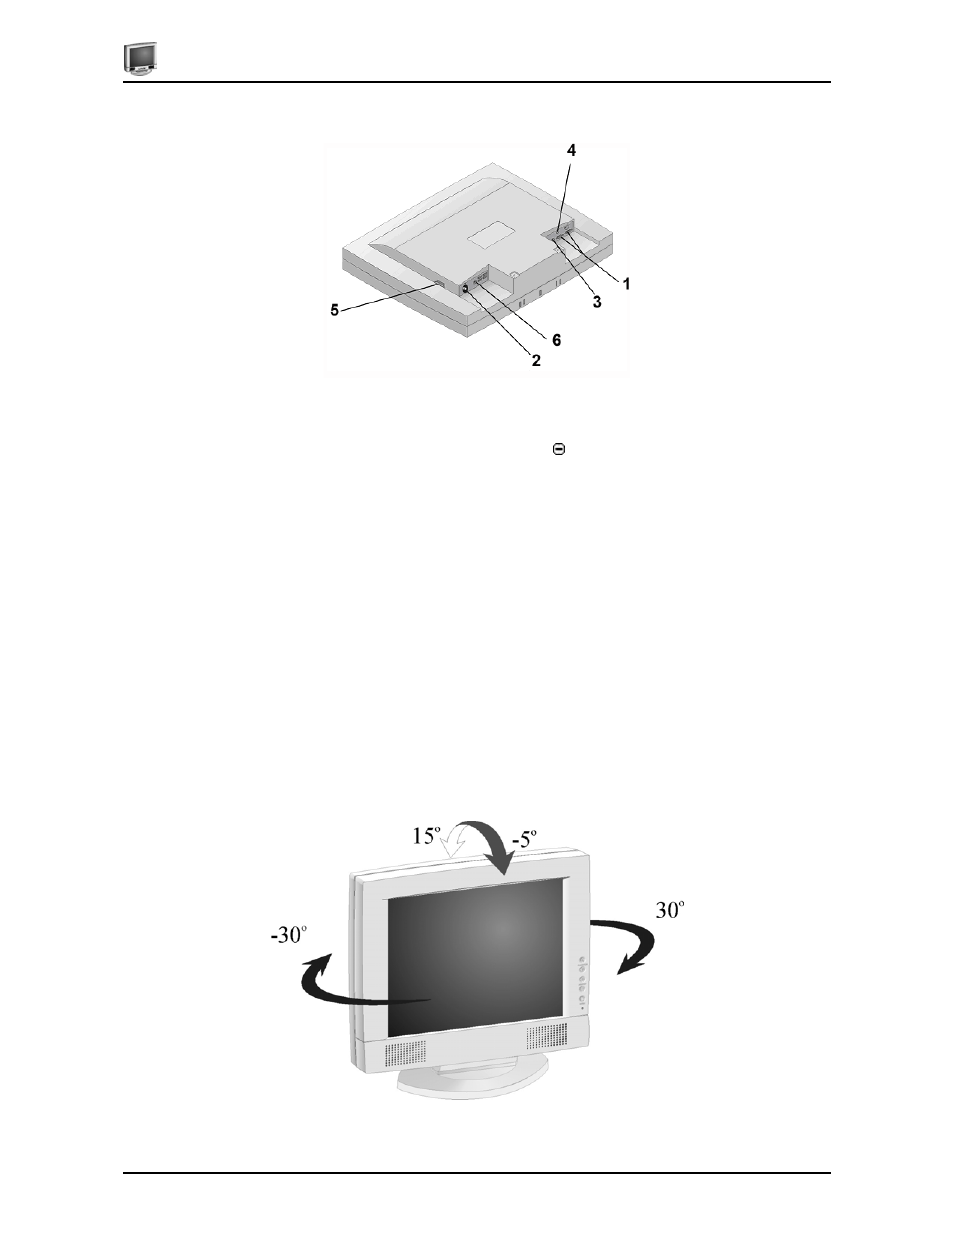
The LCD Monitor — Rear View
1. Input signal ports
The monitor can accept signal input from either a traditional analog 15-pin D-Sub VGA connector or the 24-
pin Digital Video Interface (DVI) connector. If both cables are connected, the Input Port option in the OSD
can select which video input is displayed. You can also use the quick key when the OSD is not active.
2. Power input
The power cord is attached here.
3. Audio Line In
Connect your PC’s Line out to this jack to listen to the PC’s audio through the LCD Monitor’s stereo speakers.
(You can also connect your CD-ROM’s Line out to this jack.)
4. Stereo Headphone Jack
Stereo headphones may be connected to the headphone jack.
5. Power Switch
Powers the monitor ON or OFF. The monitor will enter a power saving mode when video signal is present.
6. USB Hub
Connect the USB cable from this port to PC HOST. Up to 4 devices may be connected through this hub.
Adjusting the Viewing Angle
Your LCD Monitor can be adjusted both horizontally and vertically.