Sealing the door to the exterior wall cladding – Pella 801W0103 User Manual
Page 7
7
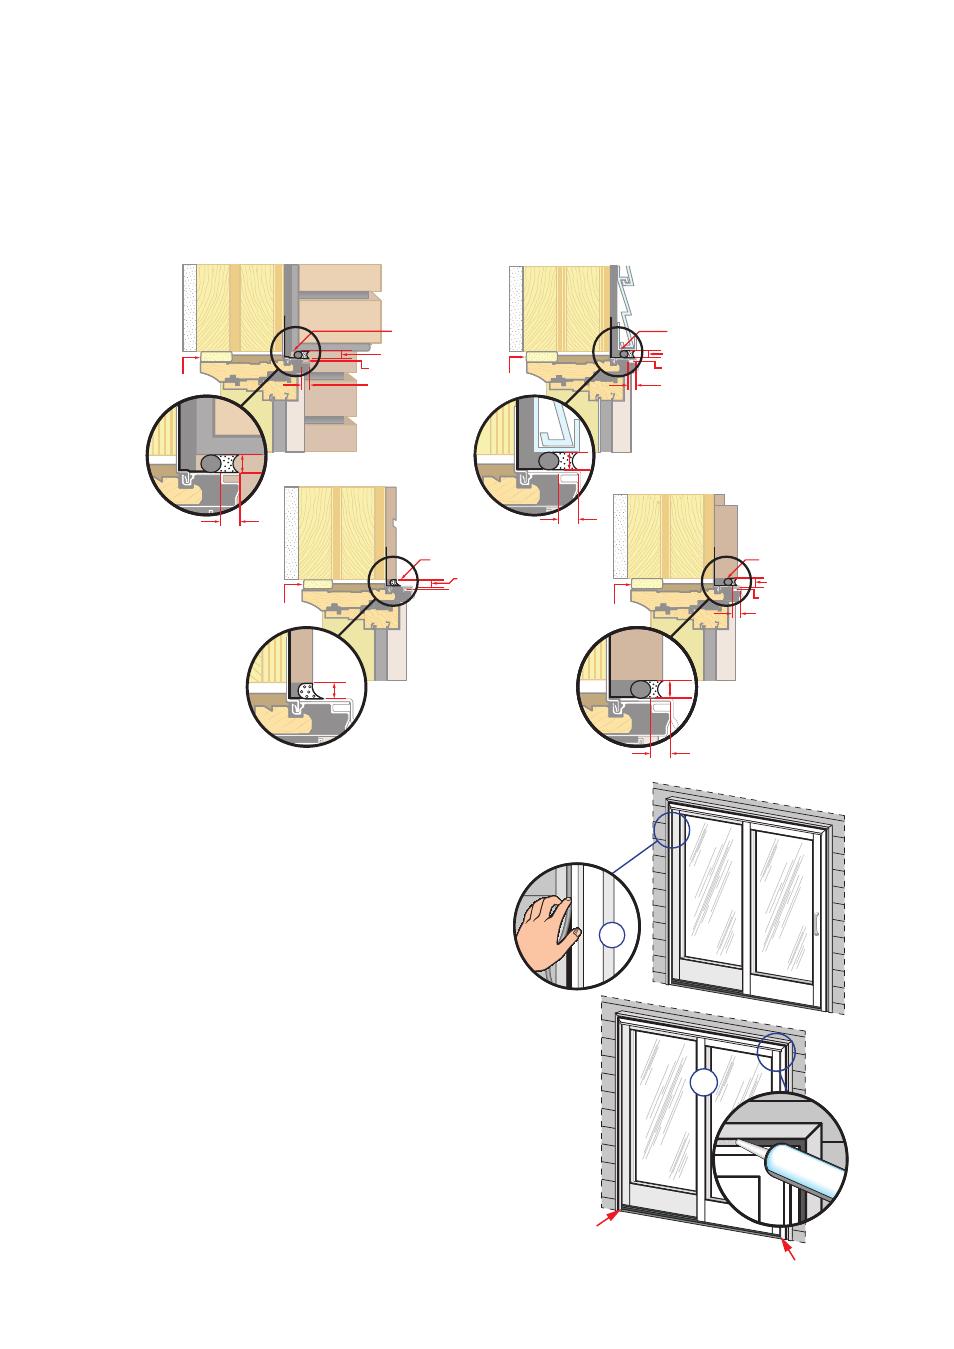
SEALING THE DOOR TO THE EXTERIOR WALL CLADDING
When applying siding, brick veneer or other exterior finish material, leave adequate space
between the door frame and the material for sealant. Refer to the illustration that corresponds
to your finish material.
Note: The sealant details shown are standard recommendations from the sealant industry.
Contact your sealant supplier for recommendations and instructions for these and any
other applications.
VINYL/STEEL
SIDING
3/8" Clearance
Backer Rod and
Sealant typical
Insulating
Foam
Perimeter Sealant
must extend to
room side of
Accessory Groove.
Accessory Groove
3/8"
Min.
3/8"
WOOD
SIDING
1/8" Clearance
Sealant typical
Insulating
Foam
Accessory
Groove
1/8"
WOOD SIDING
WITH TRIM
3/8" Clearance
Insulating
Foam
Perimeter Sealant
must extend to
room side of
Accessory Groove.
Accessory Groove
Sealant typical
3/8"
3/8"
BRICK VENEER
3/8" Clearance
Backer Rod and
Sealant typical
Perimeter Sealant
must extend to
room side of
Accessory Groove.
Accessory Groove
Insulating
Foam
3/8"
Min.
3/8"
A. Insert closed cell foam backer rod into the space around the
door so there is approximately 3/8" to 1/2" clearance between
the backer rod and the exterior face of the door.
Note: Backer rod adds shape and depth for
the sealant line.
7B
7A
B. Apply a bead of high quality exterior grade
sealan
t to the entire perimeter of the door.
At each end of the bottom of the door, insert
sealant into the spaces between the bottom of the
door and the sill support and connect it to the
perimeter sealant.
C. Shape, tool and clean excess sealant. When finished,
the sealant should be the shape of an hourglass.
Note: This method creates a more flexible sealant line
capable of expanding and contracting.
D. Remove plastic guards at the base of
the door once construction is complete.