Rough opening preparation – Pella 81AK0101 User Manual
Page 2
The performance of any building is dependent upon the design, installation, and workmanship
of the entire building system. Pella Corporation strongly recommends consulting an
experienced architect, contractor or structural engineer prior to installation of Pella products.
The individual (building owner, architect, contractor, installer and/or consumer) responsible
for the project must take into account local conditions, building codes, inherent component
limitations, the effects of aging and weathering on building components, and other design
issues relevant to each project.
The determination of the suitability of all building components for each project, as well as the
design and installation of flashing and sealing systems, are the responsibility of the building
owner, architect, contractor, installer and/or consumer.
1
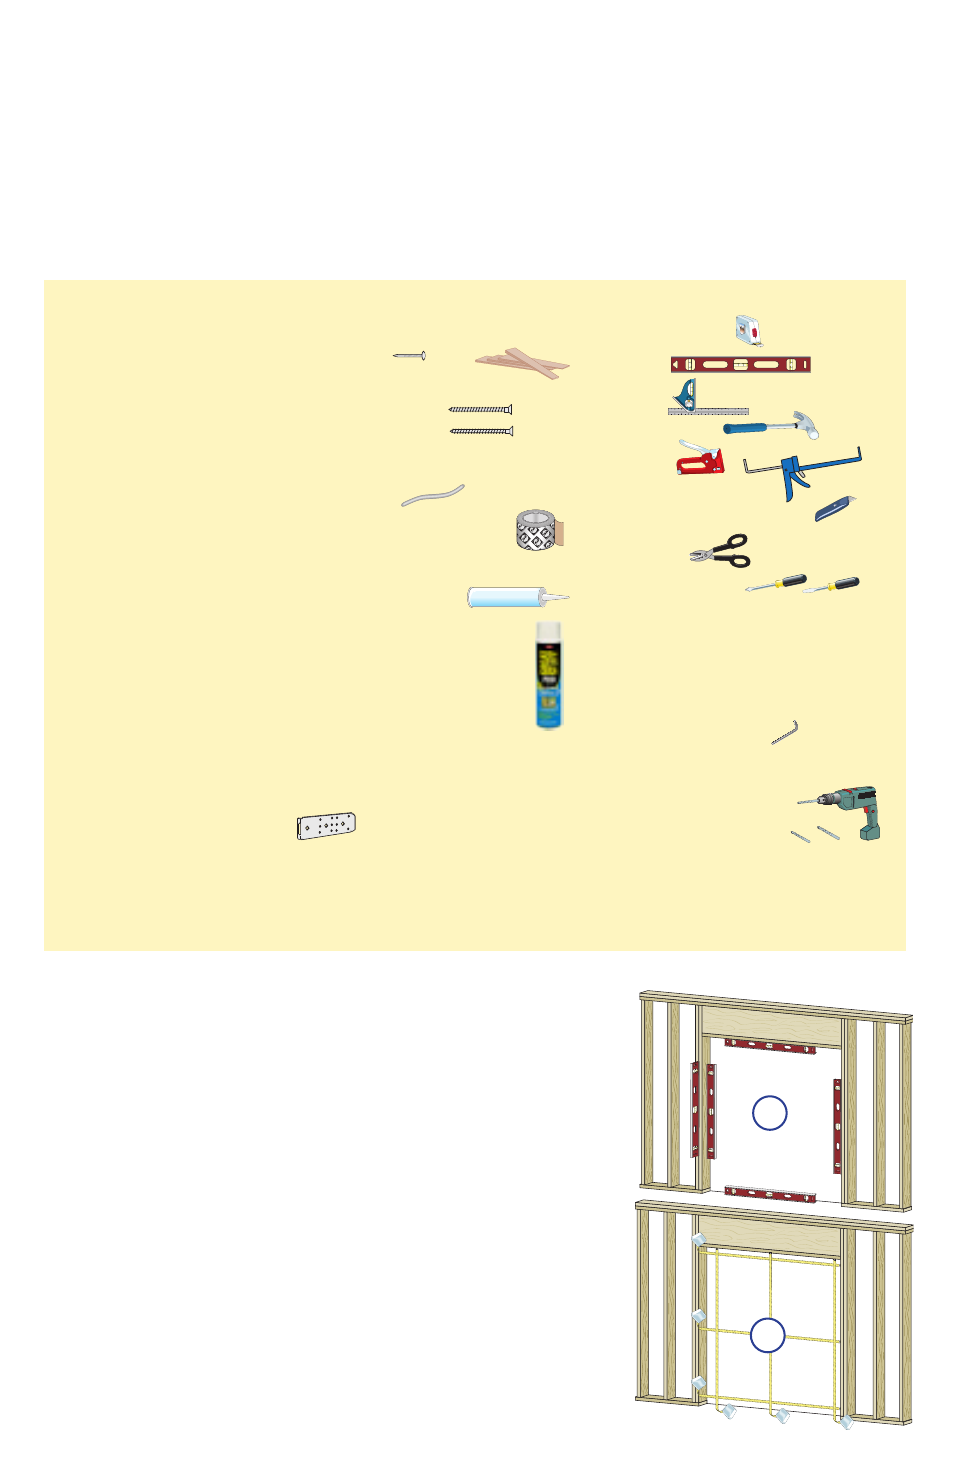
ROUGH OPENING
PREPARATION:
A. Confirm the opening is plumb and level.
Note: It is critical that the bottom is level.
B. Confirm the door will fit the opening. Measure all
four sides of the opening to make sure it is 3/4"
larger than the door in width and 1/2" larger in
height. Measure the width at the top, bottom, and
center. Measure the height at the far left side, the far
right side, and in the center.
Note: 1-1/2" or more of solid wood blocking is
required around the perimeter of the opening.
Fix any problems with the rough opening before
proceeding.
Interior
1A
Interior
1B
YOU WILL NEED TO SUPPLY:
TOOLS REQUIRED:
• Composite or Impervious shims/spacers (12 to 20)
• 2" galvanized roofing nails (1/4 lb.)
• #10 x 3-1/2" corrosion resistant wood screws
(Performance Upgrade & HurricaneShield)
• Masonry screws for concrete applications
(Minimum of 3/16’ diameter x 3")
• Closed cell foam backer rod/sealant backer
(21 to 30 ft.)
• Pella
®
SmartFlash
™
foil backed butyl window and
door flashing tape or equivalent
• High quality exterior grade polyurethane or silicone
sealant (2 to 3 tubes per door)
• Great Stuff
™
Window and Door Insulating Foam
Sealant by the Dow Chemical Company or equiva-
lent low pressure polyurethane window and door
foam - DO NOT use high pressure or latex foams
• Sill pan (optional)
• Pella aluminum sill support or wood blocking
• Interior trim and/or jamb extensions (15 to 40 ft.)
Installation Clip Option:
• 6" or 8" installation clips
• #6 x 5/8" corrosion resistant flat head wood screws
• #8 x 1-1/2" corrosion resistant screws or 3/16" x
1-1/2" masonry screws
• Tape measure
• Level
• Square
• Hammer
• Stapler
• Sealant Gun
• Scissors or utility knife
• Tin Snips
• Screwdrivers
(#2 Phillips with 8" shaft
and small flat blade)
• T20 Torx Wrench
(Architect Series
®
Entry Door and
Pella® Entry Door)
• 1/8" Allen wrench
(Designer Series®)
• Drill
• Drill Bits 13/64" and
1/8" and masonry bit for
concrete applications
SEALANT
SEALANT
FOR REPLACEMENT INSTALLATION WHERE NAIL FIN IS
NOT BEING USED, GO TO STEP 5.