2install camera, Mounting to 4s deep electrical box, Mounting to ceiling tile – Pelco CAMCLOSURE C2410M-G User Manual
Page 5
Pelco Manual C2410M-G (1/04)
[ 5 ]
8.32 X .750 SCREW
(SUPPLIED)
8.32 X .375 SCREW
(SUPPLIED)
WALL OR
CEILING
ADAPTER PLATE
BACK BOX
4S DEEP
ELECTRICAL
BOX
01063
CEILING TILE
BACK BOX
ADAPTER PLATE
8-32 X 1.25
MOUNTING
HARDWARE
(SUPPLIED)
01062
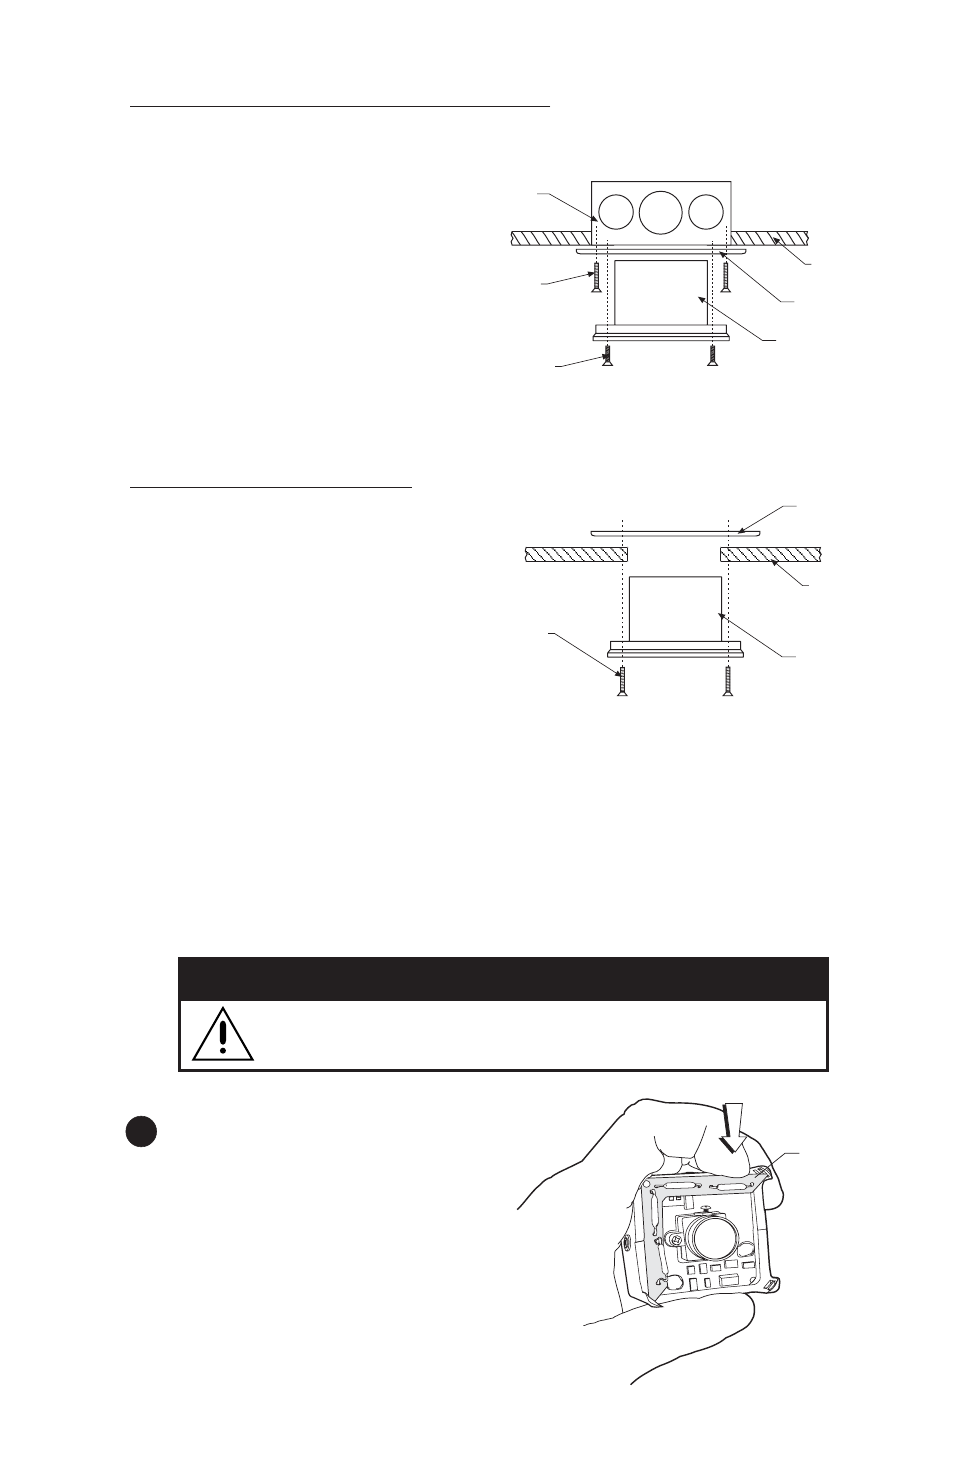
Mounting to 4S Deep Electrical Box
1. Attach adapter plate to the 4S box with the two 8-32 x .750-inch screws.
2. Connect the video cable.
3. Connect the power wires.
•
For 12 VDC, connect the
24 VAC/12 VDC (red) and GND
(black) wires to input power.
•
For 24 VAC, connect the
24 VAC/12 VDC (red) and
24 VAC (blue) wires to input
power.
4. Attach the back box to the adapter plate with the four 8-32 x .375-inch screws.
Mounting to Ceiling Tile
1. Remove the ceiling tile.
2. Using the adapter plate as a template, cut
a hole 3.5 inches (9 cm) in diameter in the
ceiling tile for the back box. Punch four
screw holes in the ceiling tile.
3. Attach the back box to the ceiling tile and
adapter plate with the four 8-32 x 1.25-inch
screws (see diagram).
4. Replace the ceiling tile.
5. Remove an adjacent ceiling tile and connect the video cable.
6. Connect the power wires.
•
For 12 VDC, connect the 24 VAC/12 VDC (red) and GND (black) wires to input power.
•
For 24 VAC, connect the 24 VAC/12 VDC (red) and 24 VAC (blue) wires to input power.
2
Install Camera
1. Some indoor installations do not require a
heater. If the installation does not require a
heater, remove the heater board from the
camera assembly. To remove the heater
apply pressure and press on the corner of
the board.
Heater elements could be hot! When camera power is on, use caution when
adjusting the camera. This applies to all models.
C A U T I O N
HEATER
BOARD
1092