Recording from an external source – Panasonic NV-FJ625AM User Manual
Page 18
18
Recording from an external source
This function can be used to make up an edited tape from
other recordings or video sources.
A new scene can be added to the end of previous one.
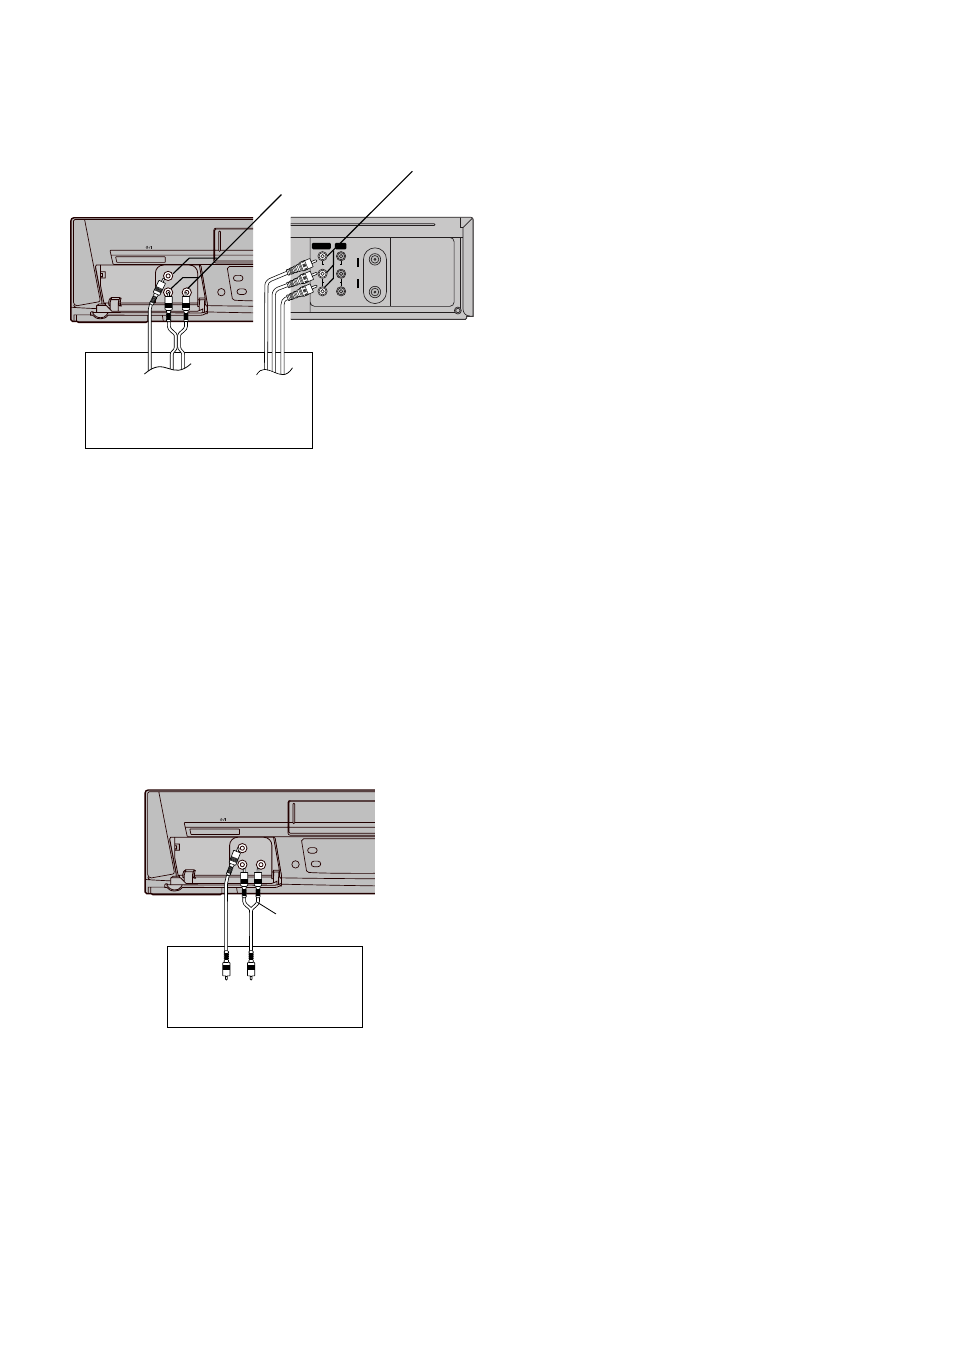
Preparations
– Connect a video movie camera or another VCR to this
VCR as shown.
– Display the VCR picture on the TV.
– Insert the cassette on which the copying is to be
performed, and make sure that its erasure prevention tab is
not broken out.
– Select the audio source required by pressing the INPUT
SELECT button K to set A1 or A2.
A1:
Through the AV1 (AUDIO IN/VIDEO IN)
sockets.
A2:
Through the AV2 (AUDIO IN/VIDEO IN) sockets
on front panel.
– Use the L and R connectors for operations in the
normal (monaural) mode.
PAUSE/STILL
A.DUB
PICTURE MODE
POWER
RF
OUT
IN
VIDEO
AUDIO
R
L
IN (AV1)
OUT
AV1 (AUDIO IN c / VIDEO IN a)
Recording VCR
AV2 (AUDIO IN Z / VIDEO IN Y)
Other VCR or
Video movie camera
PAUSE/STILL
A.DUB
PICTURE MODE
POWER
(Not supplied)
Other Monaural VCR or
Video movie camera
Operations
1
Press the Play button 7 to start playback.
2
At the point where you want to join a new scene, press
the Pause/Slow button J to put it in the still playback
mode.
3
Press the REC button I to put it in the recording pause
mode.
4
Start playback on the source unit and search for the point
from which you want to record (copy) onto this VCR.
5
When that point is reached, press the Pause/Slow button
J
again to start recording the new picture and sound
from the playback unit.
6
To record (copy) additional scenes, press the Pause/
Slow button J to put this VCR in the recording pause
mode and then perform above steps 4 and 5 again.
7
At the point where you want to stop recording, press the
Stop button F to finish recording.
Hint:
– The new sound is recorded on both the Hi-Fi audio tracks
and the normal audio track. The sound recorded on the
normal audio track is always in mono.
Notes:
– If you leave the VCR in the recording pause mode for more
than 5 minutes in step 3 or 6, the VCR automatically
switches over to the stop mode to protect the video heads.
– If [DIRECT REC] is set to [ON], connect with AV2 sockets
and select A2.