Setting and fastening the window (continued) – Pella 807X0101 User Manual
Page 4
3
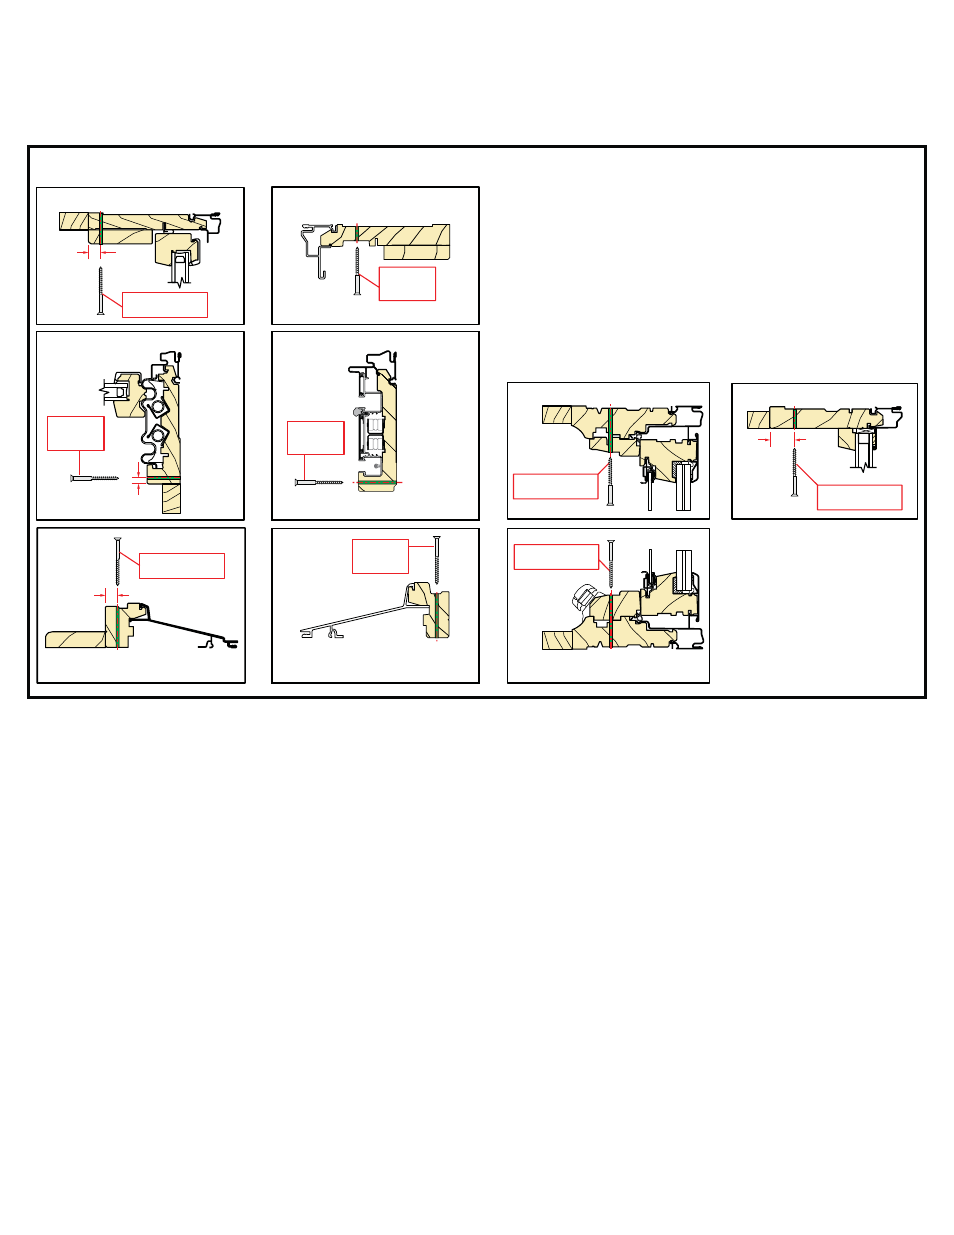
Setting and Fastening the Window (continued):
C. Fasten the window to the opening.)LQLVKQDLOLQJWKHLQWHULRUWULPWRZDOOWKHQGULYH[ŵQLVKKHDGVFUHZVLQWR
each of the pre-drilled clearance holes.
D. Check window operation (vent units only).
Architect Series® and Designer Series® Double-Hung: Cut the checkrail bands and remove the shipping spacers. Open
and close the window a few times to check for proper operation. Make sure the window will tilt correctly. Close and lock
the window.
ProLine® Double-Hung:7RUHPRYHVLGHVSDFHUVVOLGHWKHPXSWRDSSUR[LPDWHO\DERYHWKHERWWRPVDVK/LIWWKH
FOLSE\WKHLQWHULRUOHJDQGURWDWHXSZDUGWRUHPRYH5DLVHWKHERWWRPVDVKDSSUR[LPDWHO\DQGWLOWWKHVDVKLQE\
depressing the jamb liner and pulling inward on the top corners of the sash. Remove the sash clips and return the sash
to its original position.
Casement: Unlock the window by lifting up on the lock handle. Turn the crank to open the window. Remove the shipping
spacers from between the sash and window frame. Close and lock the window.
Note: If there are any problems with the operation of the window, recheck shim locations and adjust for plumb and
square.
Designer Series®
and Pella® ProLine
Architect Series®
Clad Frame Head/Sill/Jamb
1"
#8 x 3-1/8"
finish head screw
Casement Sill
Casement Head/Jamb
#8 x 3-1/8"
finish head screw
#8 x 3-1/8"
finish head screw
Double-Hung Head
#8 x 3-1/8"
finish head screw
1/2"
Double-Hung Sill
#8 x 3-1/8"
finish head screw
1/2"
Double-Hung Jamb
1/4"
Double-Hung Sill
Double-Hung Head
Double-Hung Jamb
#8 x 3-1/8"
finish head
screw
#8 x 3-1/8"
finish head
screw
#8 x 3-1/8"
finish head
screw
#8 x 3-1/8"
finish head
screw