Pride Mobility Jet10Ultra User Manual
Page 38
38
www.pridemobility.com
Jet 10 Ultra/RevA/Apr04
I X . C A R E A N D M A I N T E N A N C E
Battery Replacement
A battery wiring diagram is printed on a decal located on the battery tray. See VII. Batteries and Charging for correct
battery specifications.
WARNING! Prevent injury. Do not replace battery when seat is occupied.
WARNING! Battery posts, terminals, and related accessories contain lead and lead compounds.
Wear goggles and gloves when handling batteries and wash hands after handling.
WARNING! Power chair batteries are heavy. See specifications table. If you are unable to lift that
much weight, be sure to get help. Lifting beyond your capacity can result in personal injury.
To replace the batteries:
1. Turn off the power to the controller.
2. Make sure that the power chair is in drive mode. See IV. The Jet 10 Ultra.
3. Turn the rear shroud fasteners one-quarter turn in any direction. See figure 5.
4. Remove the rear shroud.
5. Unplug the battery connector. See figure 26.
6. Remove the retaining pin from foot platform and lift the platform off of the power base. See figure 16.
7. Slide the battery tray forward.
8. Unfasten the reusable strap around the front battery.
9. Disconnect the wiring harness from the front battery.
10. Remove the front battery.
11. Unfasten the reusable strap around the back battery.
12. Disconnect the wiring harness from the back battery.
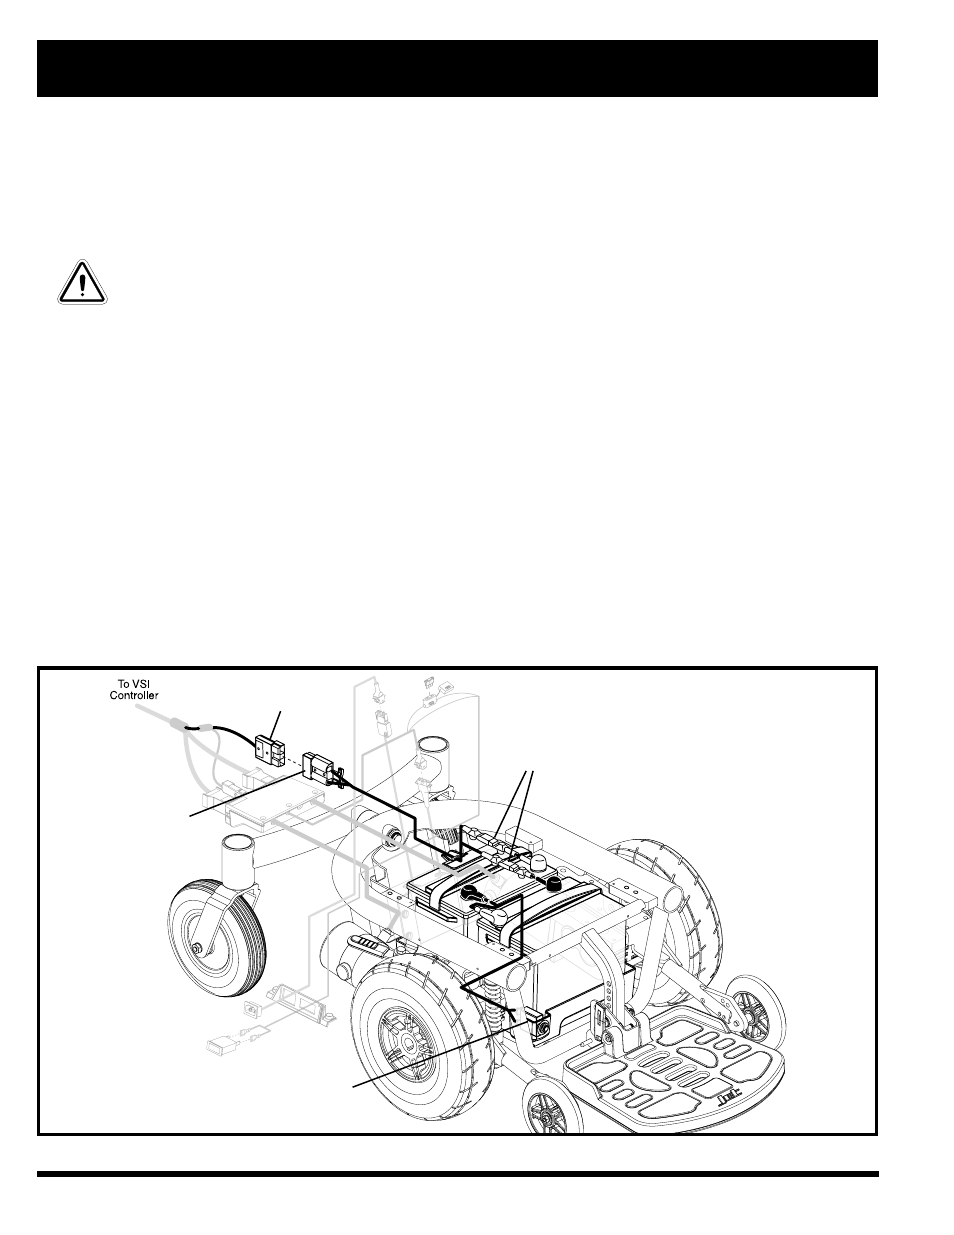
Figure 26. Jet 10 Ultra Battery Connections
BATTERY CONNECTOR
MAIN CIRCUIT BREAKER
QUICK DISCONNECT
THERMAL FUSES