Premier Mounts Polaris Universal Projector Mount MAG User Manual
Page 5
MAG
Installation Manual
Page - 5 -
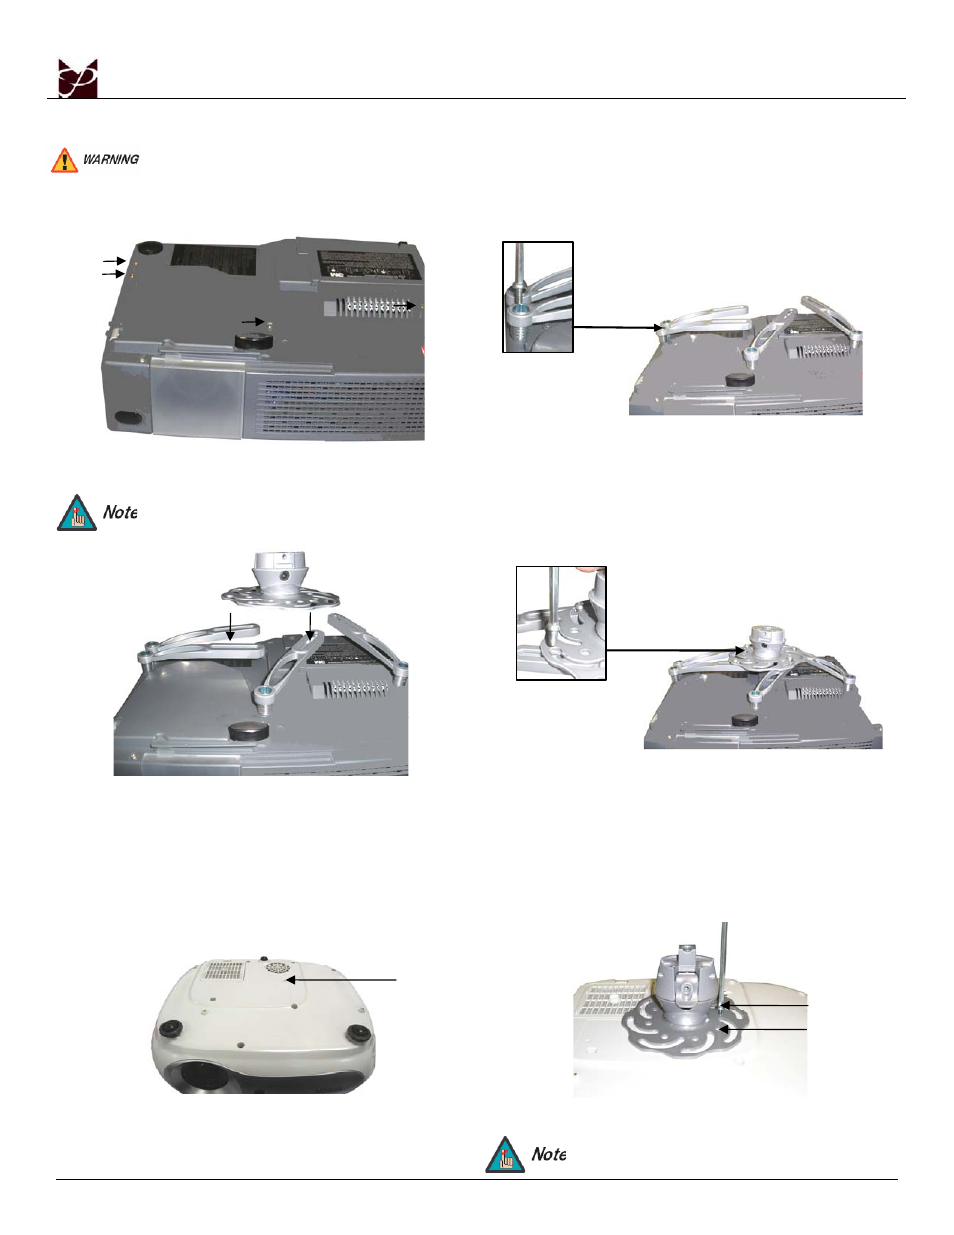
Attaching the Mount
Unpack the MAG Mount and review any WARNING statements that apply to the installation. Select the desired location for the MAG
Mount.
1. Locate the mounting points on the bottom of the projector
(see arrows above for mounting point recognition).
Projector mounting points will vary. The
projector used in this manual is an example, and
may not match yours exactly.
2. Attach the appropriate number of mounting legs to the
projector using the appropriate mounting hardware
(see Page 4, Selecting the Proper Mounting Hardware).
3. Do not tighten these screws completely at this time.
4. Align the projector plate to the mounting legs.
5. Position the legs accordingly for best configuration. You
may raise or lower each leg independently by turning the
leveling barrels.
6. Secure the legs to the projector plate by screwing
M6 x 12mm security screws into the M6 square nut (do not
overtighten) on the mounting legs.
7. Tighten all security screws at this time.
8. Once the security screws have been tightened, place the
plastic cap over each leveling barrel and firmly push the
plastic cap into place.
Single Mounting Point Installation
If your projector has a ¼-20 x 5/16” mounting point, please refer
to the following three steps:
1. Determine where the mounting point is located.
2. Place the projector plate over the mounting point.
3. Insert the ¼-20 x 5/16” security screw.
This screw will use a standard hole when
mounting.
¼-20 x 5/16”
Mounting Screw
Mounting Point
Standard Hole
Only attach to the projector manufacturer’s specified mounting points on the projector chassis with a minimum of three
mounting legs. Please follow all safety instructions specified by the projector manufacturer as well as the safety
instructions outlined in this manual.