Pentek US-1500 User Manual
Page 4
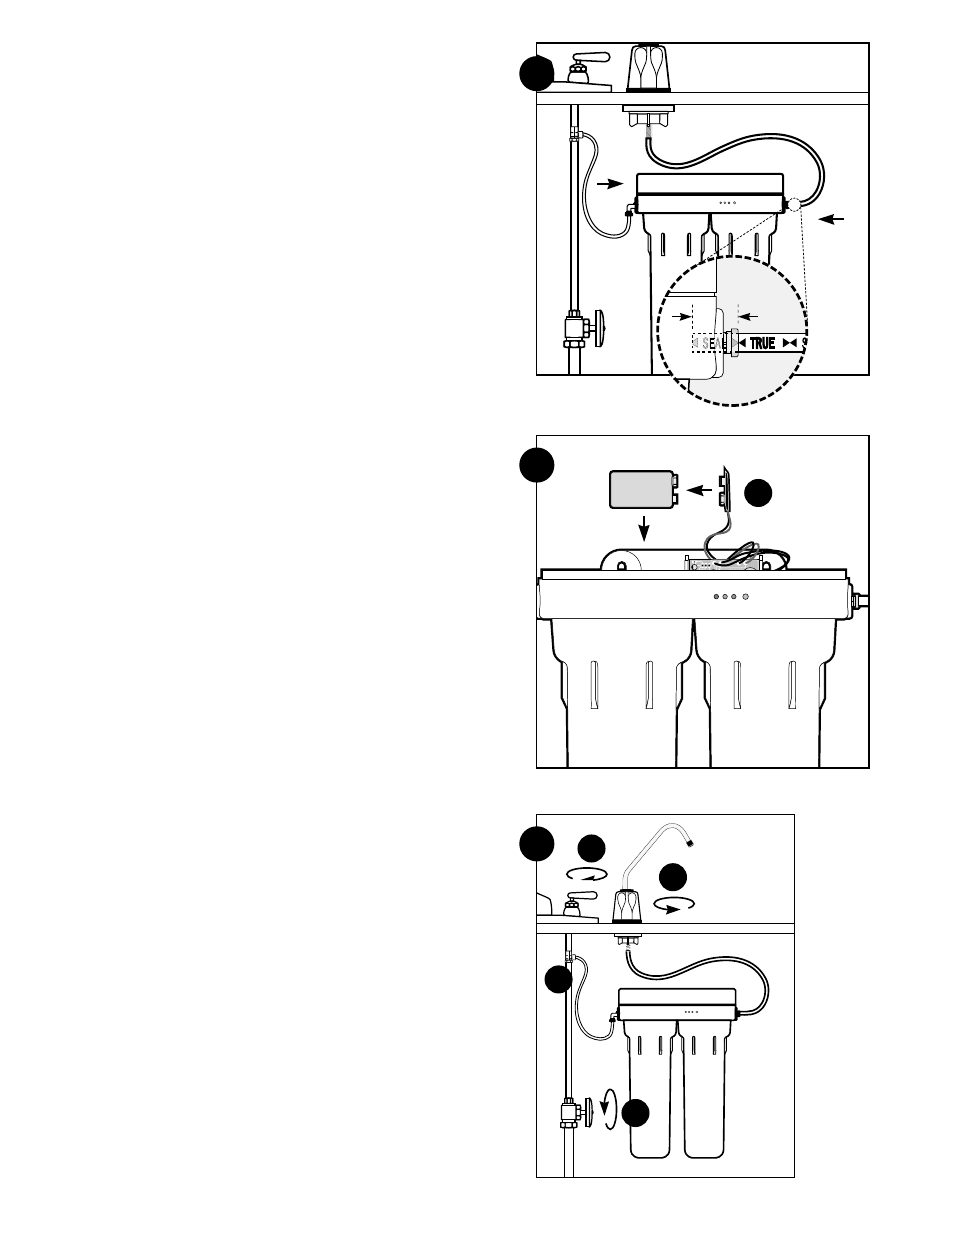
7. Connecting the System
(A) Assemble tubing with system as shown in Fig. 7A, inserting tubing into
appropriate inlet or outlet quick-connect fitting until it stops.
NOTE: In some installations, connecting the system to the water supply
adapter and/or drinking water faucet causes the tubing to enter the quick-
connect fitting at a sharp angle. This may exert pressure on the quick-
connect fitting and cause it to leak. In these situations, you may wish to use
one or both of the quick-connect elbows included with the installation kit.
Simply push the quick-connect elbow directly into the quick-connect fitting
on the system, then insert the tubing into the quick-connect elbow.
(B) When cut between a set of black guide arrows, the tubing should be pushed
into the fitting so that the entrance of the fitting falls between the next set of
guide arrows (approximately 5/8" [16 mm]).
8. Installing the Battery
(A) Remove cover on top of system. Attach 9-volt battery (included) to connector,
then place battery in holder located to the left of the monitor panel as shown
(Fig. 8A).
(B) Replace cover on top of system. Using a pen or pencil, press and release the
blue reset button on the front of the system (Fig. 8B). The electronic monitor
should beep twice. If the monitor has been reset properly, the two beeps will
be followed by a sequence of two green, two yellow, and two red lights. The
monitor should be reset whenever a new set of filter cartridges is installed.
9. Putting the System into Operation
(A) Slowly turn on cold water supply.
(B) Shut off faucet opened before starting installation.
(C) Open water supply adapter.
(D) Rotate base of drinking water faucet counter-clockwise to “ON” position.
Allow water to run for 5 minutes to flush air and carbon fines from filter
cartridges. Check system for leaks before leaving installation.
INSTALLATION IS NOW COMPLETE.
4
7
8
A
9
A
B
C
D