Setting and fastening the window, 2d 2e – Pella Performance Upgrade And HurricanesHield Impact Resistant For Fixed Frame Direct Set Windows 801U0103 User Manual
Page 3
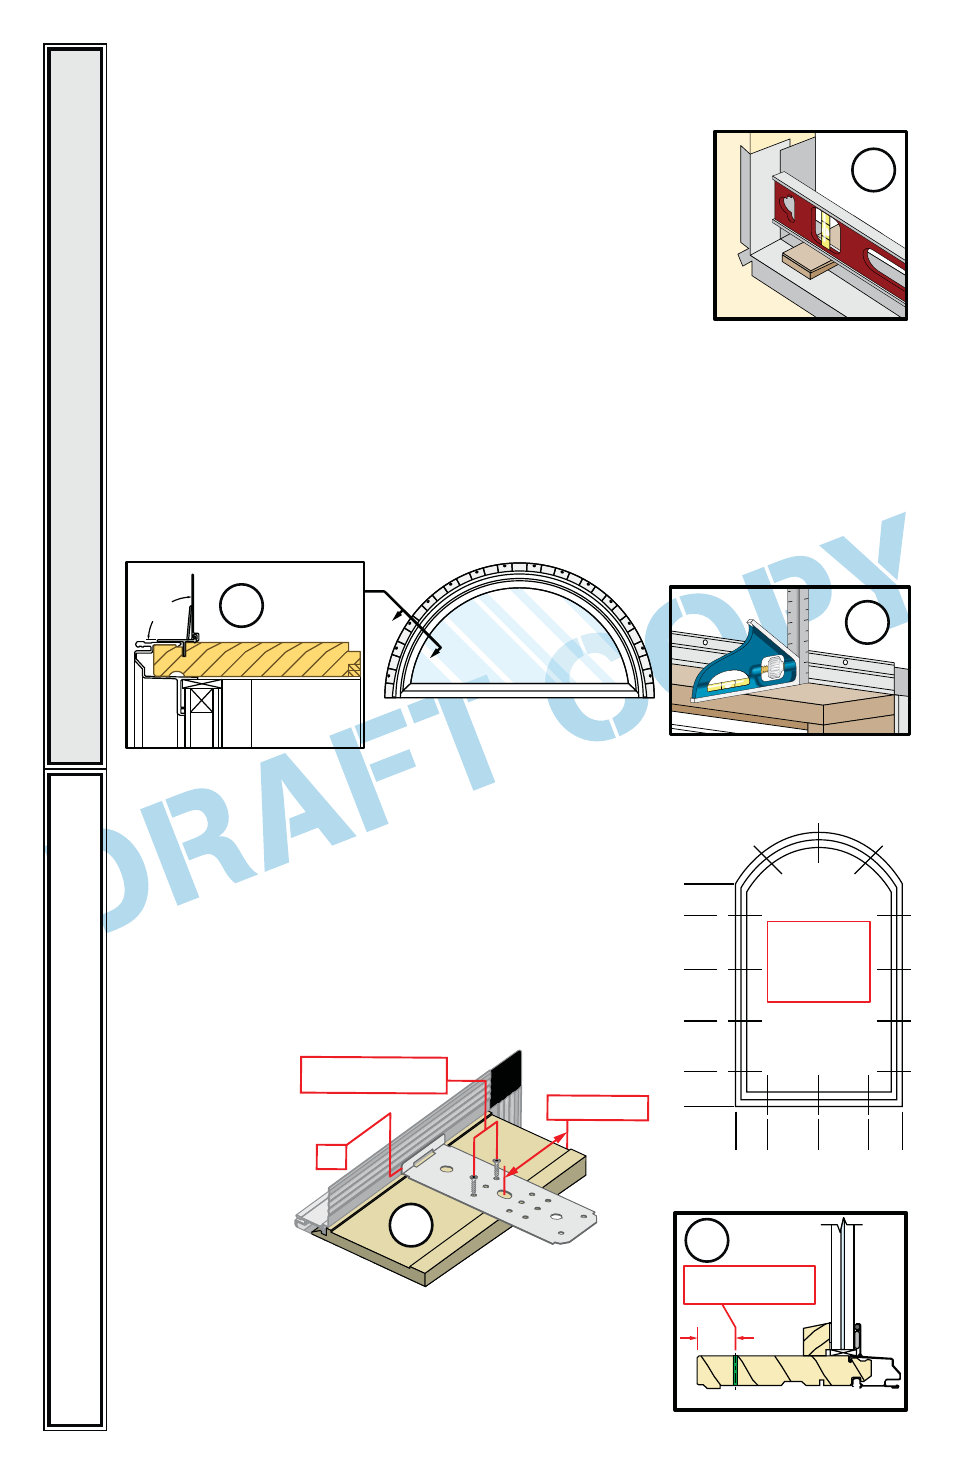
A. Install and level shims. Place 1" wide by 1/4" thick shims
on the bottom of the opening, 2-1/2" from each side,
beneath transition bars and mullion joints. Keep shims
back 1/2" from interior face of window. Adjust shims as
necessary to ensure the sill is level. Once level, attach
shims to prevent movement.
Note: Improper placement of shims may result in
bowing the bottom of the window.
B. Remove plastic wrap and cardboard packaging from window.
Note: If grilles are removed from the window at this time, label them and store
them in a protected area.
2
SETTING AND FASTENING THE WINDOW
C. Units with fold-out installation fins: Fold out fin to 90°. On units with pre-applied
fin corners, be careful not to remove or tear the fin corners.
Note: If the fin is not at 90°, the window will not line up correctly on the interior.
Ř
WINDOW
Ř
ALL
WINDOWS
Ř
ALL
WINDOWS
Ř
D. Windows using Installation Clips: Install installation
clips. If installation fins are used; place the clip so that
the lip is facing up and against the installation fin, at the
locations shown in the placement diagram. If installation
fins are not used, the clip lip faces down and is inserted
into a groove in the frame. Secure the clip by driving
#6 x 5/8" corrosion resistant screws through the outer
two holes of the three holes shown.
6" MAX
6" MAX
10"
MAX
10"
MAX
10"
MAX
6"
MAX
10"
MAX
10"
MAX
6"
MAX
FOR PLACEMENT
OF FRAME
SCREWS AND
INSTALLATION
CLIPS
$MBE'SBNF4JMM
%SJMM
DMFBSBODFIPMF
#
E. Windows using frame screws: Pre-drill installation
screw holes. On the room side of the window, drill
13/64" diameter clearance holes through the frame
as shown on the placement diagram. Space the holes
a maximum of 6" from each end and a maximum of
10" on center on the head, jambs and sill.
2A
2A
Ó
#
¡
$*3$-&)&"%8*5)
'-&9*#-&'*/
2C
2C
6“ from end
Lip
#6 x 5/8” corrosion
2D
resistant screws
2D
2E
PERFORMANCE UPGRADE & HURRIC
ANESHIELD
Note: Performance Upgrade and HurricaneShield® require
use of installation clips or screws through the frame.
Use of fins in addition to clips or screws is optional.