8 installation instructions, Choosing the installation location, Preparation for installation – Panasonic CW-A121VR User Manual
Page 3: Installation procedure
8.3.1.
Installation Procedures
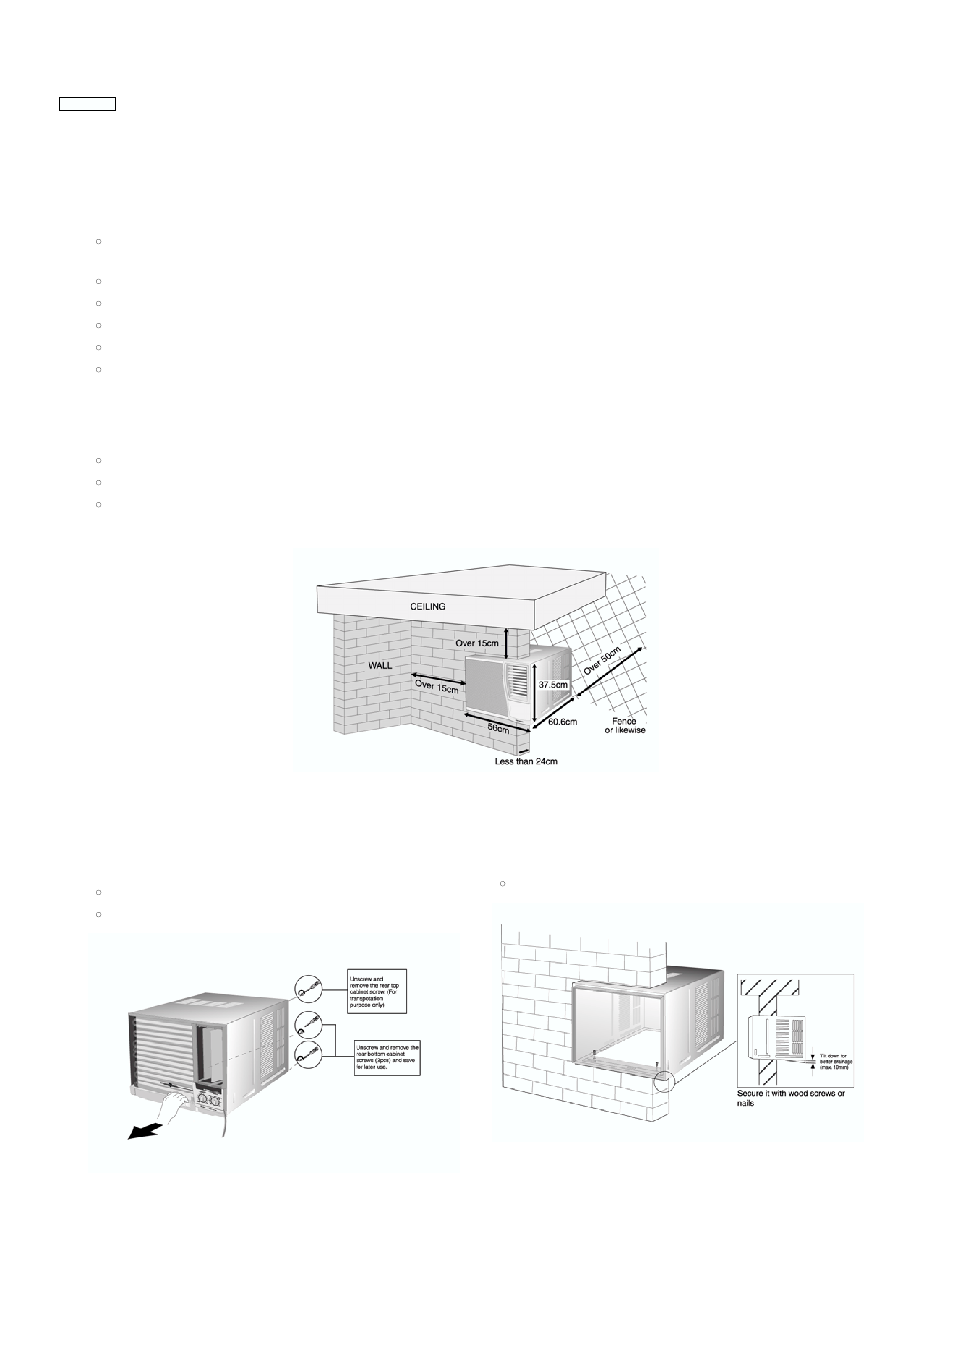
• Remove the screws from the rear cabinet.
• Slide the chassis out from the cabinet.
• Place cabinet into the installation hole.
8 Installation Instructions
8.1.
Choosing the Installation Location
• When installing, use the nearest power outlet. Make sure the power outlet is easy to reach so you can quickly disconnect your
air conditioner in case of emergency.
• Ensure that the air conditioner is well supported, securely fastened, easily reachable and not obstructed.
• Avoid locations with: salty or sulphurous air, draughts, dampness and flammable gas.
• If you install the drainage system, be sure to channel the condensed water to a suitable location
• Covers, obstructions and unsteady support may cause excessive operating noise and vibration.
• The rear end of the air conditioner is splash proof. You need not shield or cover it.
8.2.
Preparation for Installation
DIMENSION
• There should not be any obstacles surrounding the unit.
• Prepare an installation hole slightly bigger than the cabinet size.
• Left and right sides of the unit should be at least 15cm away from the wall
8.3.
Installation Procedure
10
CW-A121VR