Ontrols, Isplays – Philips DVDR520H/75 User Manual
Page 5
5
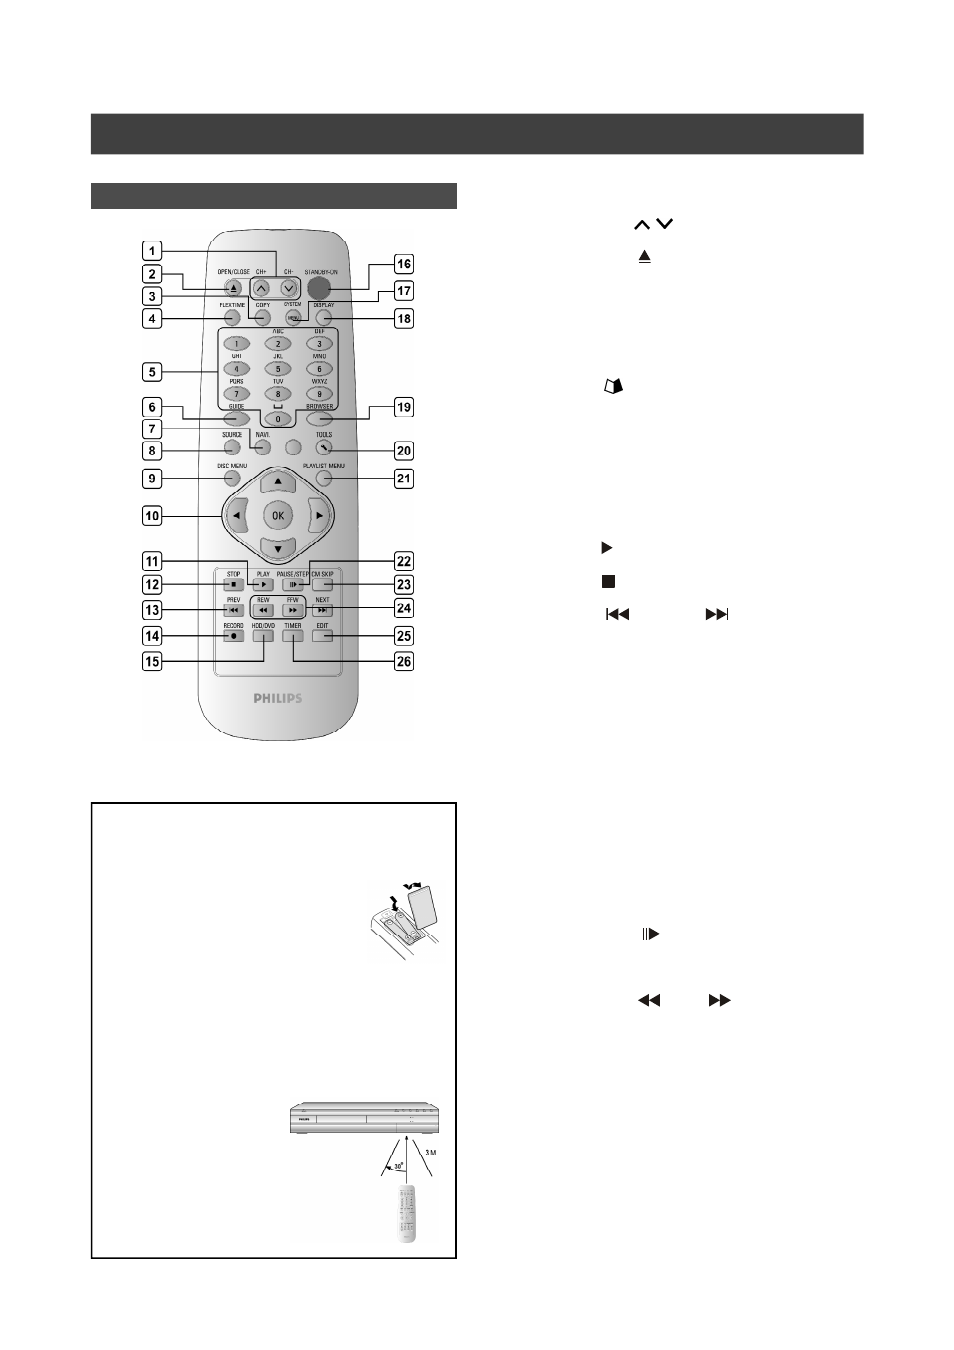
Remote Control
To install batteries
—
Open the battery compartment and insert the
batteries. Make sure the polarities (+
and -) match the marks indicated
inside the remote control.
CAUTION!
—
Remove batteries if they are ex-
hausted or if the Remote Control will
not be used for a long time
—
Do not use old and new or different types of
batteries in combination
—
Batteries contain chemical substances, so they
should be disposed properly.
Remote sensor
The remote has a range of
approximately 3m and works
best when pointed directly at
the unit horizontally at angles
up to 30° from the front of the
unit.
The Remote Control
1)
CH+, CH- buttons (
,
)
2)
Open/Close button (
OPEN/CLOSE)
3)
Copy button (COPY)
4)
Flex Timer button (FLEX TIME)
5)
Numeric buttons (0, 1~9)
6)
Guide button (
GUIDE)
7)
Navigation button ( NAVI)
8)
Source button (SOURCE)
9)
Disc menu button (DISC MENU)
10) Cursor (
pqtu), OK buttons (OK)
11) Play button ( PLAY)
12) Stop button (
STOP)
13) Skip buttons (
PREVIOUS/
NEXT )
14) Record button (RECORD)
15) HDD/DVD button (HDD/DVD)
16) POWER ON/STANDBY button (STANDBY-ON)
17) System Menu button (SYSTEM MENU)
18) Display button (DISPLAY)
19) Browser (BROWSER)
20) G-Code button (G-Code)
21) Disk Tools button (TOOLS)
22) Playlist/Menu button (PLAYLIST / MENU)
23) Pause/Step button (
PAUSE/STEP)
24) CM SKip button (CM Skip)
25) F.F./REW. buttons(
REW./
F.F)
26) Edit button (EDIT)
27) Timer button (TIMER)
C
ONTROLS
AND
D
ISPLAYS