Assembly, Handwheel assembly, Dust ports – Powermatic DDS-237 User Manual
Page 8: Dust collection, Electrical connections
8
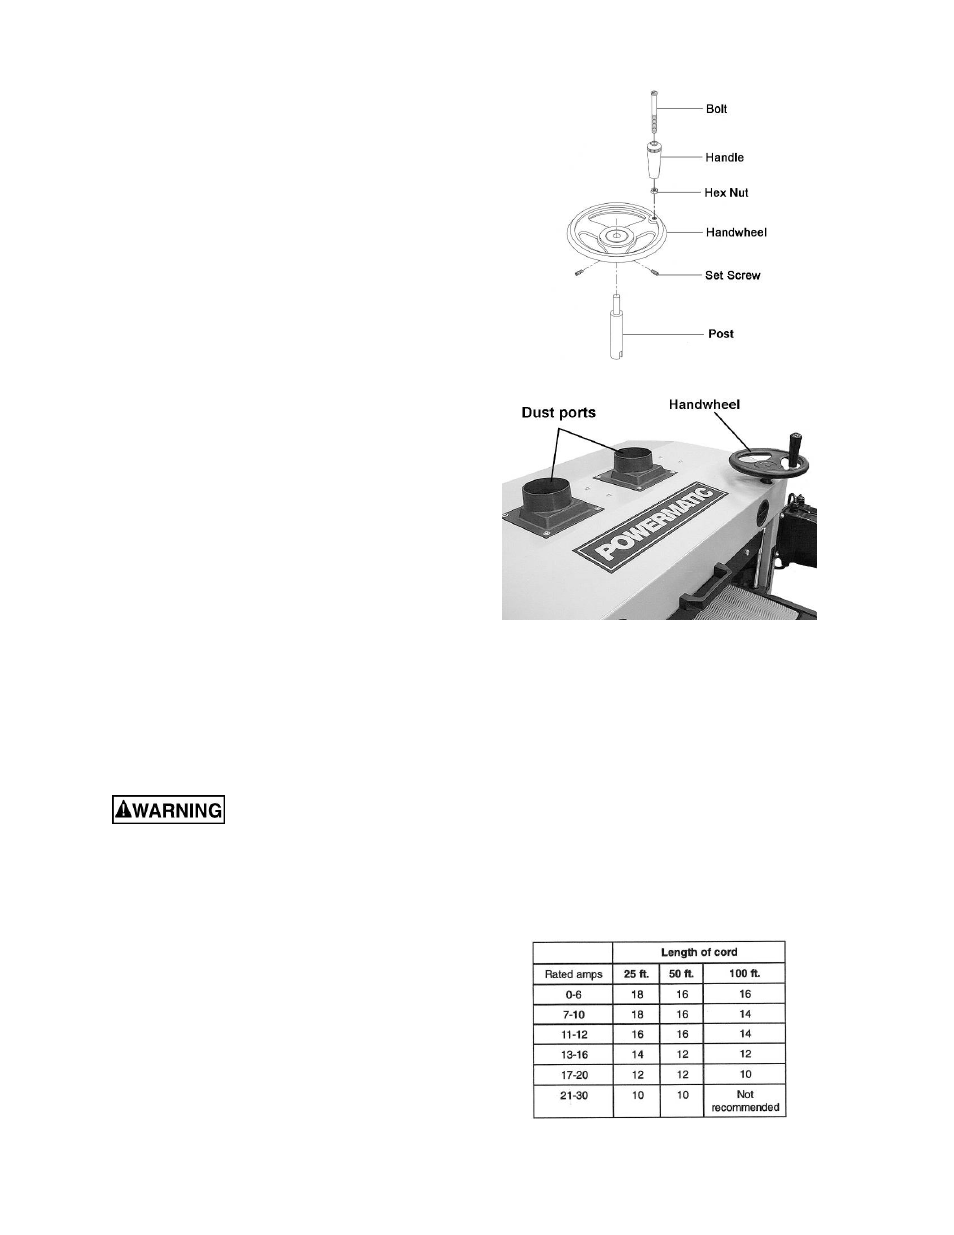
Assembly
Handwheel Assembly
1. Slide the post up into the handwheel and
secure with the set screws, as shown in Fig 1.
2. Use a flat head screwdriver to screw the bolt of
the handle as far as it will go into the threaded
hole of the handwheel, then tighten the hex nut
down against the handwheel (Fig. 1).
The handle must rotate freely after tightening
the hex nut. If the handle is too tight, loosen
the hex nut and back out the bolt slightly, then
re-tighten the hex nut.
3. The handwheel assembly, used for raising and
lowering the conveyor table, is designed to be
mounted and removed quickly. Set the
handwheel assembly down into the hole of the
hood (Fig. 2) and rotate it until it seats itself
upon the pins of the leadscrew below.
Note: The handwheel must be removed before the
hood can be opened.
Dust Ports
Mount the two dust ports to the top of the hood
with eight 3/16 x 1/2 screws and eight flat washers
(Fig. 2).
Dust Collection
It is strongly recommended that you connect a
proper dust extraction system to the two 4” ports
atop the sander. Make sure the capacity of your
dust collector is at least 1200 CFM.
Electrical Connections
Electrical connections must be
made by a qualified electrician in compliance
with all relevant codes. The machine must be
properly grounded to help prevent electrical
shock and possible fatal injury.
A power plug is not provided with the DDS-225 or
DDS-237 Dual Drum Sander. You may either
connect the proper UL/CSA listed plug or
“hardwire” the machine directly to your electrical
panel provided there is a disconnect near the
machine for the operator. Consult electrical
drawings on pages 39-42 for further clarification of
wiring setup.
This machine must be grounded. Grounding
provides a path of least resistance to help divert
current away from the operator in case of electrical
malfunction. The green wire is the grounding wire.
Figure 1
Figure 2
Make sure the voltage of your power supply
matches the specifications on the motor plate of
the machine.
Extension Cords
The use of an extension cord is not recommended,
but if one is necessary, make sure the cord rating
is suitable for the amperage listed on the
machine's motor plate. An undersize cord will
cause a drop in line voltage resulting in loss of
power and overheating.
The chart in Table 1 shows the correct size cord to
use based on cord length and motor plate amp
rating. If in doubt, use the next heavier gauge. The
smaller the gauge number, the heavier the cord.
Table 1