Operation – Powermatic 1632 User Manual
Page 10
10
OPERATION
CONTROLS
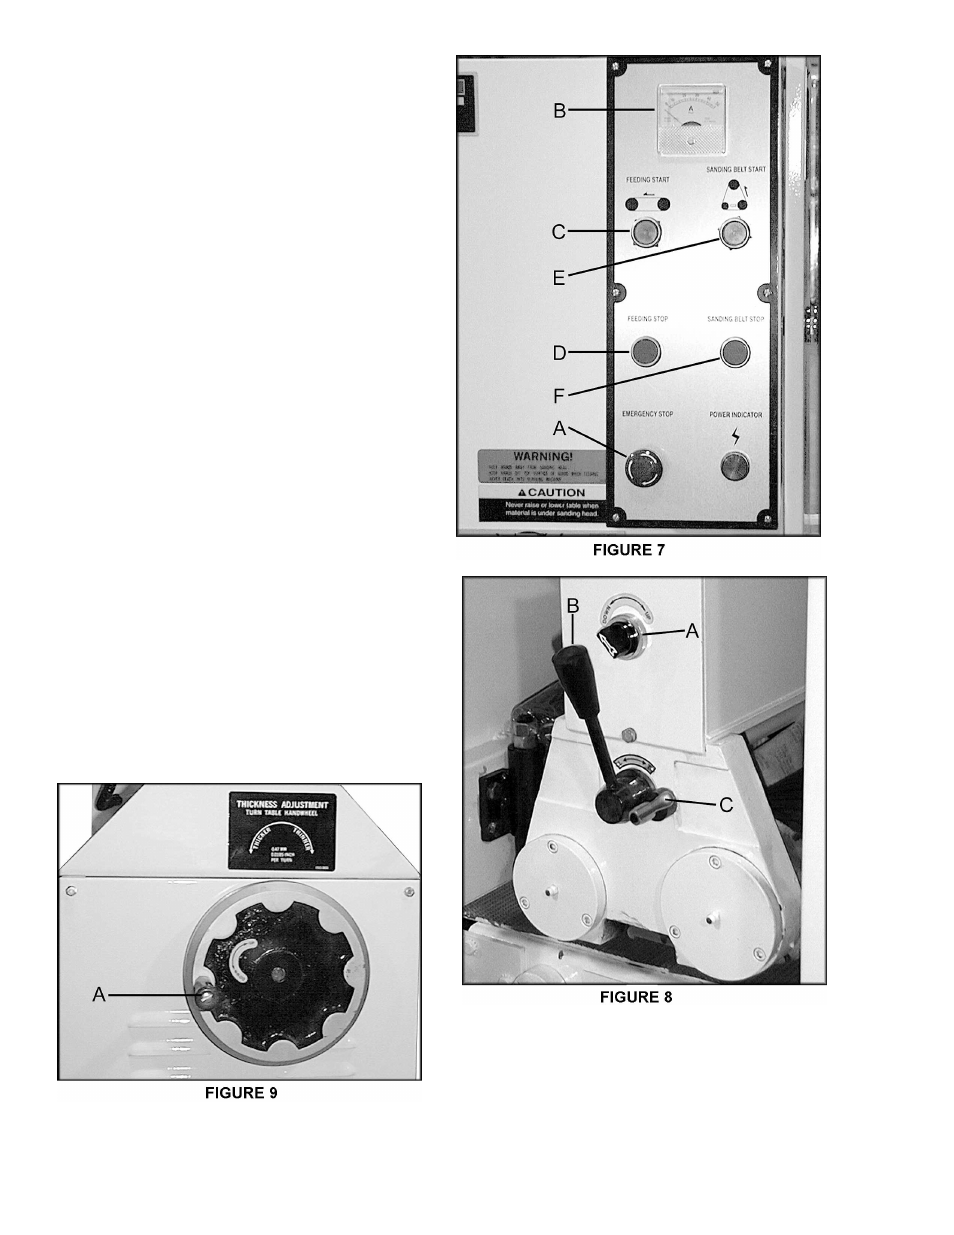
(Figure 7):
Emergency stop (A) will stop the feeding belt and
sanding belt. The button must be turned clockwise
to reset sanding functions.
Amp Meter (B) displays the amperage.
Feeding Start (C) will start the feeding belt only.
Feeding Stop (D) will stop the feeding belt only.
Sanding Belt Start (E) will start the sanding belt
only.
Sanding Belt Stop (F) will stop the sanding belt
only.
NOTE: The orange bar on the front of the infeed
roller acts as a safety stop. When the bar is
pressed, the brakes are applied.
1.
Connect the air line to the sander.
2.
Adjust the pressure gauge to 75 psi.
3. Engage the upper roller by turning the knob
(A), Figure 8, to the upper position.
4.
Adjust the platen with the lever (B) and lock it
(C) in the desired position. The platen or main
rubber roller can act as the sanding contact, as
well as a combination of both.
5. Rotate the main handwheel (A), on the lower
cabinet, to raise or lower the table. See Figure
9. Refer to the scale for the desired setting.
The recommended depth of sanding is .0164"
or two revolutions of the handwheel. The table
can be locked in place by the lever at the base
of the column.