Advanced configuration (advanced users only), Advanced configuration, Advanced users only) – Linksys E3000 User Manual
Page 58: Access the browser-based utility, Create a shared folder
Linksys E3000
Appendix B: How to Install and Access USB Storage
55
High Performance Wireless-N Router
Advanced Configuration
(Advanced Users Only)
To manage access to the USB storage device, you can
create shared folders, user groups, and user accounts .
Access the Browser-Based Utility
To access the browser-based utility, launch the web
browser on your computer, and enter the Router’s default
IP address, 192.168.1.1, in the Address field . Then press
Enter .
A login screen will appear . (Non-Windows 7 users will see
a similar screen .) In the User name field, enter admin . Then
enter the password created during the Setup Software .
(If you did not run the Setup Software, then use the
default password, admin . You can set a new password
on the Administration > Management screen . Refer to
Administration > Management, page 38 .) Click OK to
continue .
Login Screen
Create a Shared Folder
1 . Click the Storage tab .
2 . Click the Disk tab .
Storage > Disk
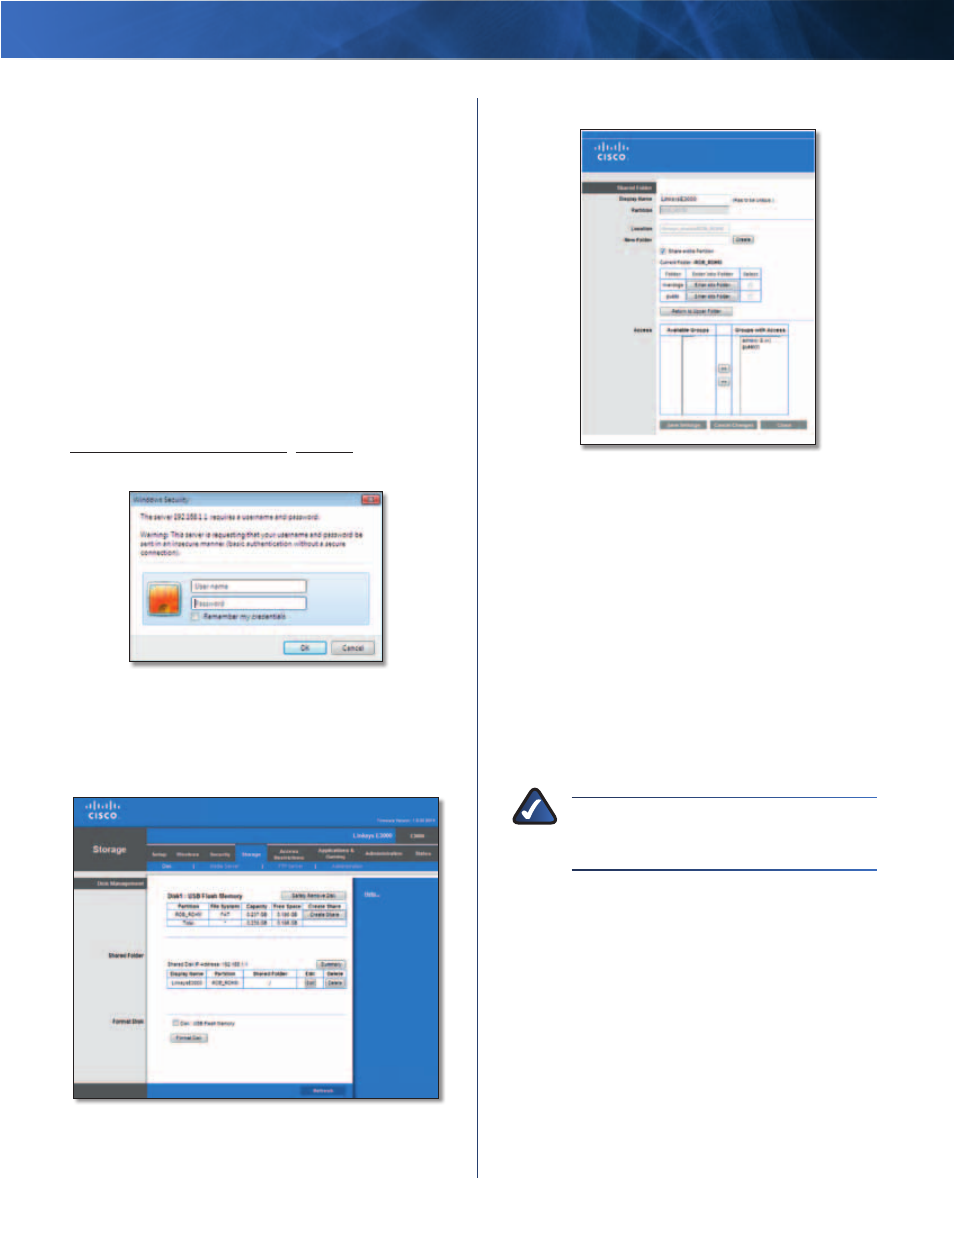
3 . To create a shared folder, click Create Share .
Shared Folder
4 . In the Display Name field, create a display name for the
shared folder .
5 . In the New Folder field, create a name for the physical
location of the shared folder . Then click Create .
6 . If the shared folder should include the entire partition,
select Share entire Partition and proceed to step 8 .
If you do not want to share the entire partition, then
specify the folder you do want to share .
7 . Select the appropriate folder . To display subfolders,
click Enter into Folder . To return to the previous
folder, click Return to Upper Folder .
8 . To allow a group access to the shared folder, select it
from the Available Groups column, and then click the
>> button .
NOTE:
Specify which user groups have read-
and-write or read-only access to the shared
folders .
9 . To block a group from accessing the shared folder,
select it from the Groups with Access column, and
then click the << button .
10 . Click Save Settings to apply your changes, or click
Cancel Changes to clear your changes . Click Close to
exit the screen and return to the Disk screen .