Drive controls and connectors, Installing the drive, Step 1. opening the computer – Lenovo ThinkCentre 41N5624 User Manual
Page 17: Step 2. unpacking the drive, Drive, Controls, Connectors, Installing, Step, Opening
Drive
controls
and
connectors
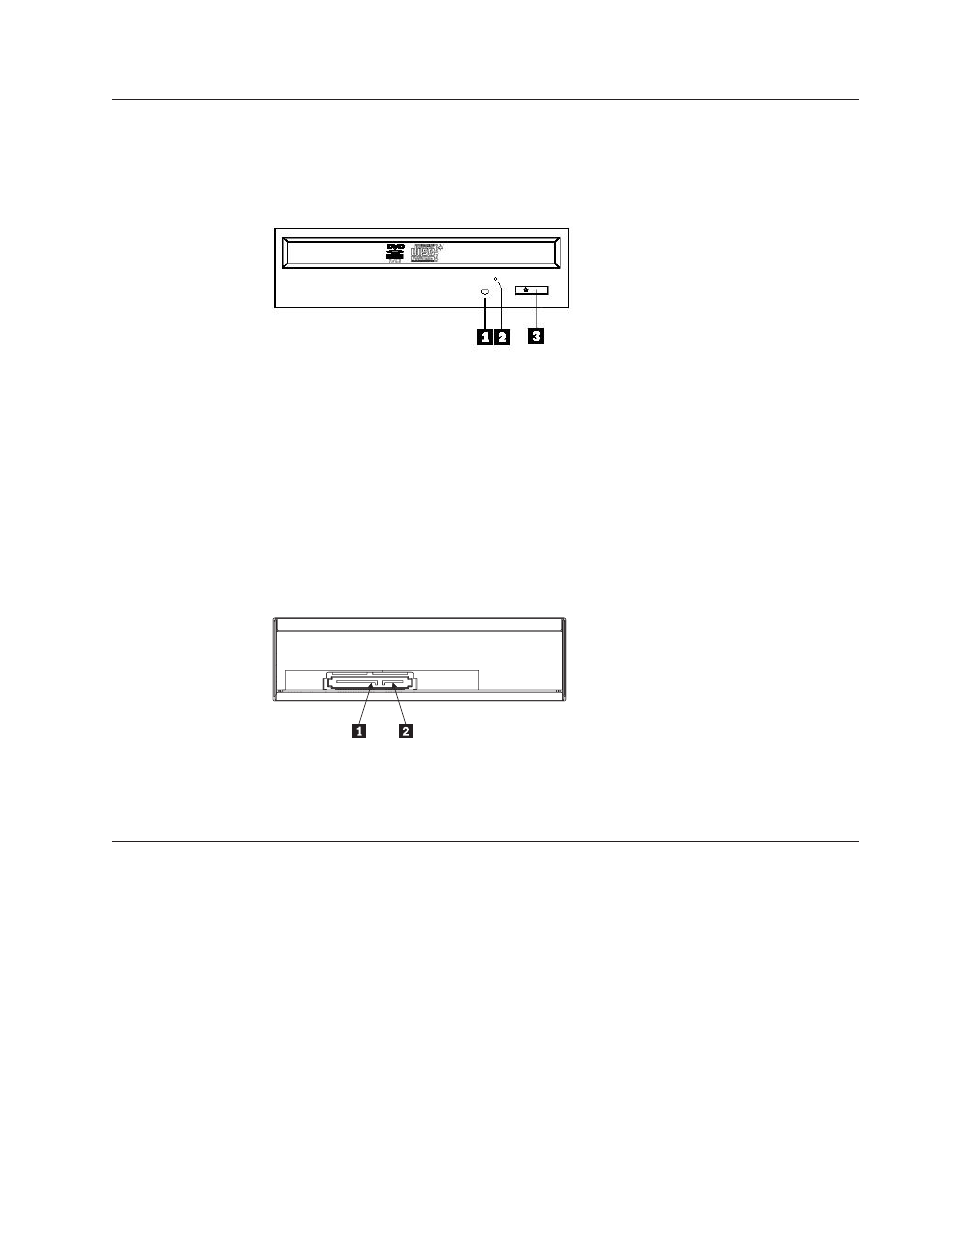
The
following
diagrams
show
the
location
and
functions
of
the
drive
controls
and
connectors.
Front
view
of
the
drive:
1 Busy
indicator
This
light
comes
on
when
the
drive
reads
from
or
writes
to
a
disc.
2 Emergency
eject
hole
This
hole
provides
access
to
the
eject
mechanism
to
remove
a
disc
from
the
drive.
3 Open/Close
button
This
button
opens
and
closes
the
disc
drawer
when
you
push
it.
Rear
view
of
the
drive
1 15pin
power
connector
2 7pin
signal
configuration
Installing
the
drive
Follow
these
steps
to
install
the
CD-RW/DVD-ROM
Combination
Drive:
Step
1.
Opening
the
computer
1.
Turn
off
the
computer
and
all
attached
devices.
2.
Unplug
all
power
cords
from
the
computer
and
all
attached
devices.
3.
Lift
the
cover
from
the
computer.
Refer
to
your
computer
documentation
for
instructions
on
how
to
lift
the
computer
cover.
Step
2.
Unpacking
the
drive
1.
Before
opening
the
antistatic
bag
that
the
drive
is
packed
in,
touch
the
bag
to
an
unpainted
metal
surface
for
at
least
two
seconds.
This
drains
the
static
electricity
from
the
package
and
your
body.
Installation
and
user’s
guide
1-3