Aker – Liebherr WF1051 User Manual
Page 20
A delight in freshness
WF1051 / EWTNes 2956
18
I
CE
M
AKER
Connection to the Water Supply
- Figures 23, 24
1. Install the shut-off valve, water filter and
automatic shut-off device as required.
Note
The solenoid valve is located at the rear of
your unit.
2. Place a 1/4" OD copper tubing between the
shut-off valve and solenoid valve. Make sure
there is approximately 30" (70 cm) of excess
tubing behind the unit for easy connection.
IMPORTANT
The solenoid valve has a Metric R3/4 male
connection.
A R3/4(metric) to a 1/4" OD adapter and
cable clip are supplied with the icemaker.
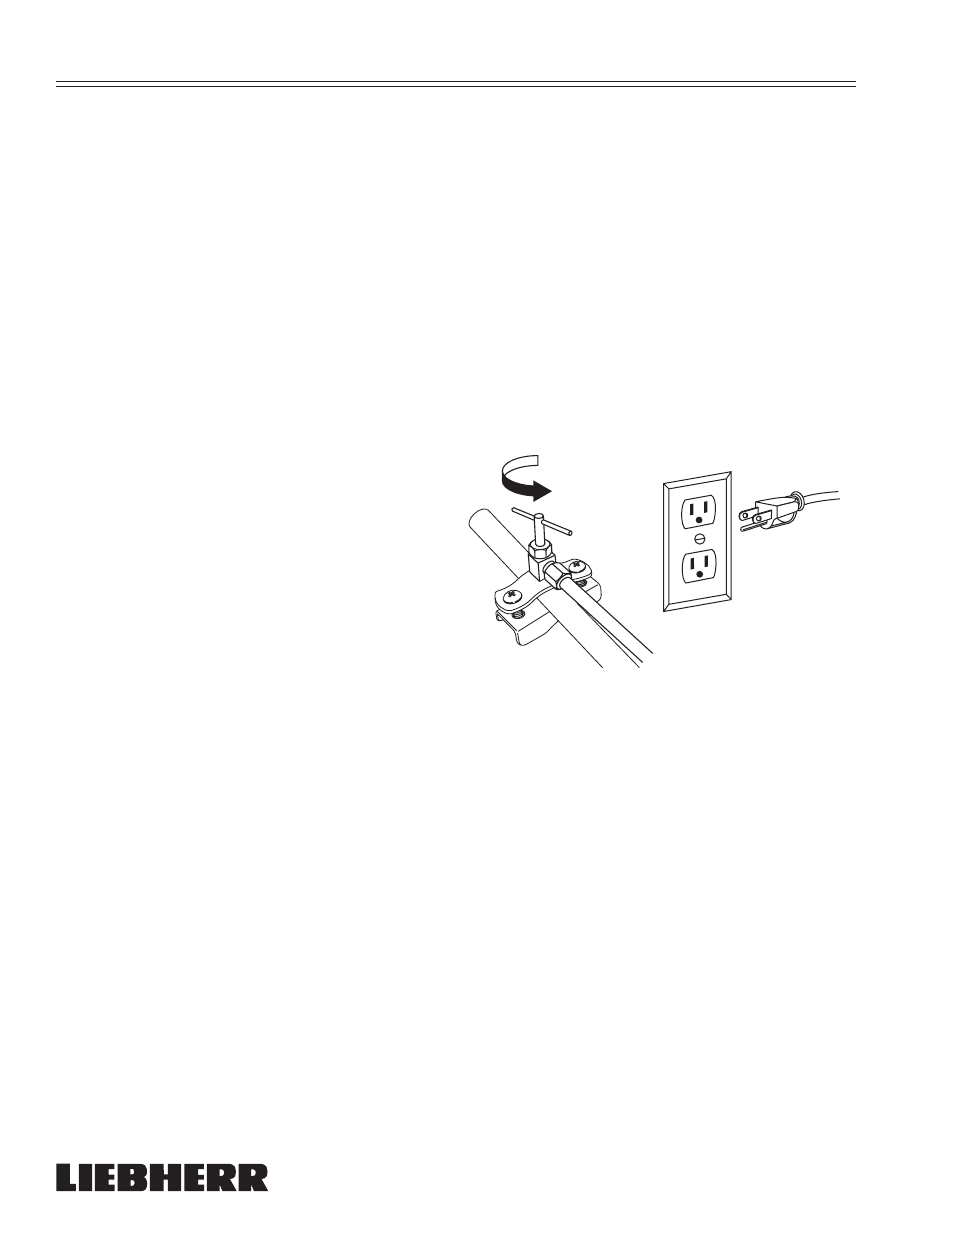
Figure
24: Remove the cover cap (4) from
the solenoid valve (1). Install the connection
bracket (2) with sealing ring (6) on the
solenoid valve (1). Attach the copper tube to
the connection bracket (2). Secure the copper
tube (3) to the appliance using the cable
clip (5).
3. Open the shut-off valve for the water supply
and check the entire water system for leaks.
Before the appliance is used for the first time
a licensed plumber should bleed air from the
system.
4. Insert the electrical plug for the combined
winecooler/freezer into the electrical outlet
(Figure 23).
5. Move the combined winecooler-freezer into
final position in the room.
Figure 23