Replacing an optical drive, Replacing, Optical – Lenovo 7360 User Manual
Page 34: Drive, Removing, Hard, Disk, From, Bracket
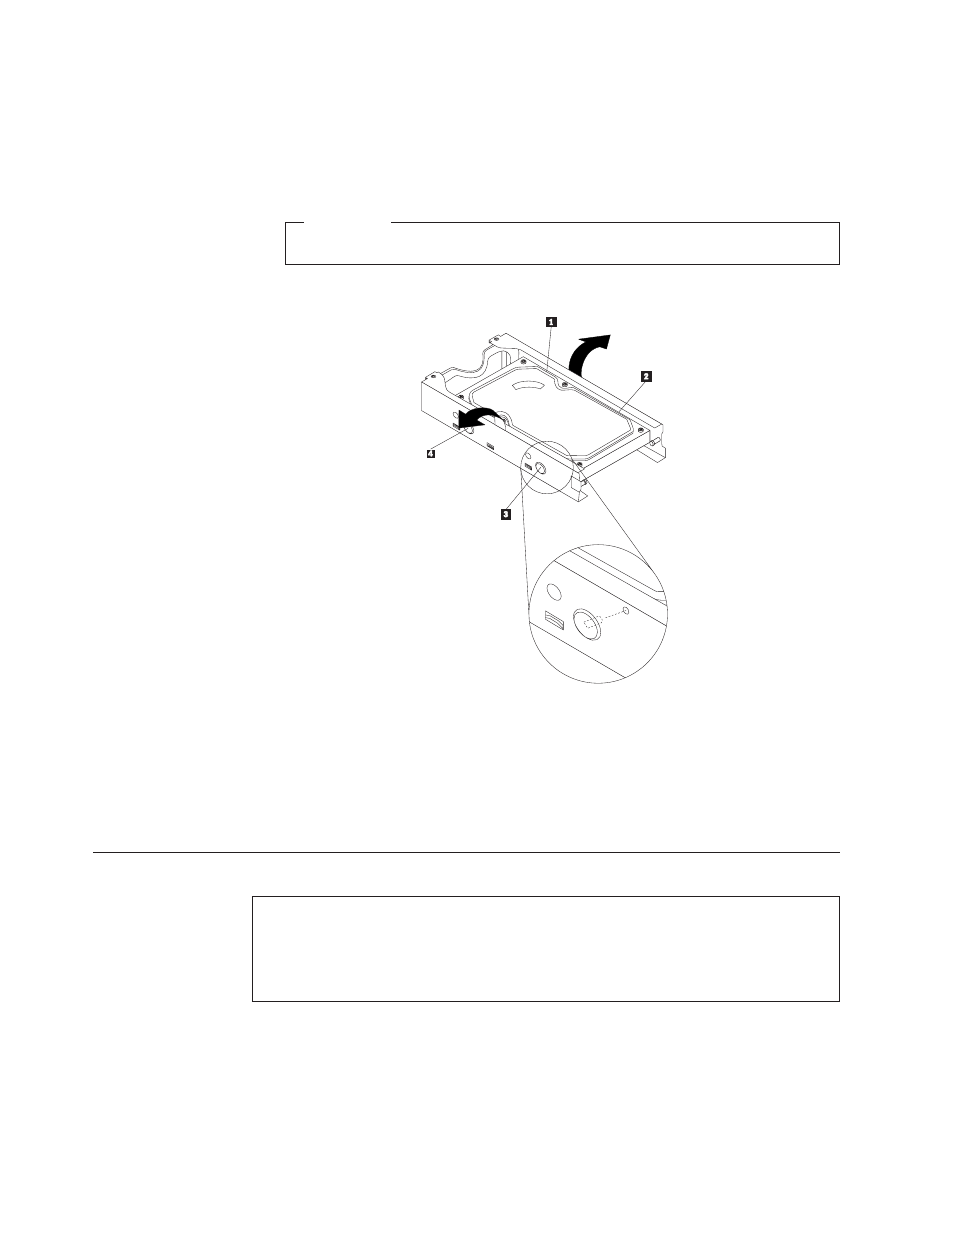
6.
Remove
the
failing
hard
disk
drive
from
the
bracket
by
flexing
the
bracket.
7.
To
install
the
new
drive
into
the
bracket,
flex
the
bracket
and
align
pin
1 ,
pin
2 ,
pin
3 ,
and
pin
4
on
the
bracket
with
the
holes
in
the
hard
disk
drive.
Important
Do
not
touch
the
circuit
board
on
the
bottom
of
the
hard
disk
drive.
8.
Connect
the
signal
and
power
cables
to
the
new
hard
disk
drive.
9.
Install
the
hard
disk
drive
and
bracket
into
the
rear
retainer
and
rotate
down
until
the
two
clips
on
the
blue
handle
of
the
hard
disk
drive
bracket
snap
into
place.
10.
Go
to
Replacing
an
optical
drive
Attention
Do
not
open
your
computer
or
attempt
any
repair
before
reading
the
“Important
safety
information”
in
the
ThinkCentre
Safety
and
Warranty
Guide
that
came
with
your
computer.
To
obtain
a
copy
of
the
ThinkCentre
Safety
and
Warranty
Guide,
go
to:
http://www.lenovo.com/support
To
replace
an
optical
drive:
1.
Open
the
computer
cover.
See
Figure
21.
Removing
the
hard
disk
drive
from
the
bracket
26
ThinkCentre
Hardware
Installation
and
Replacement
Guide