Removing, Heat, Sink – Lenovo 7360 User Manual
Page 32: Assembly
3.
Disconnect
the
heat
sink
and
fan
assembly
cable
from
the
system
board.
See
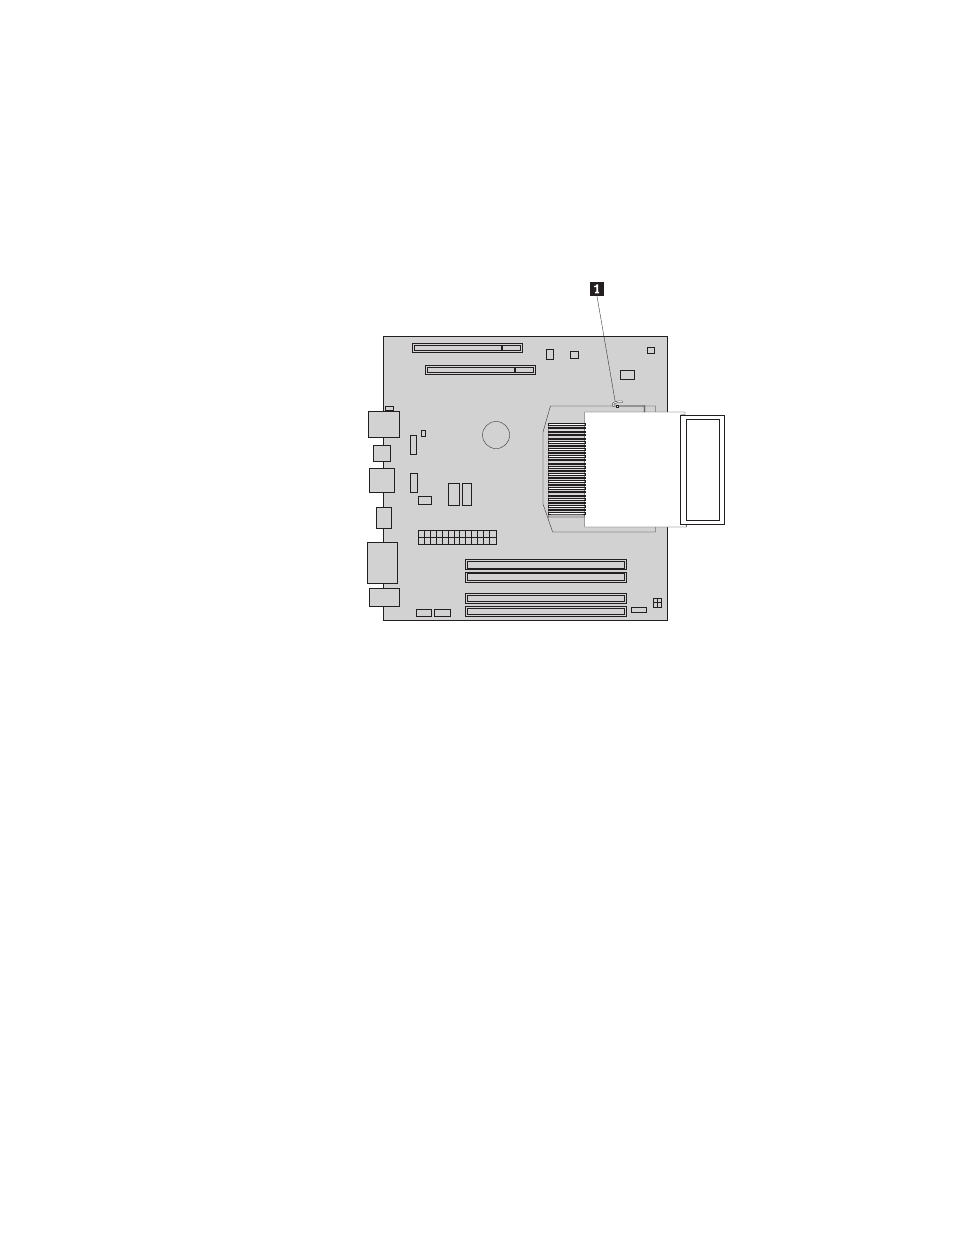
4.
Remove
the
heat
sink
and
fan
assembly
from
the
system
board
by
pivoting
the
lever
1
securing
the
heat
sink
and
fan
assembly
until
it
is
fully
in
the
up
position.
Carefully
lift
the
heat
sink
and
fan
assembly
off
the
system
board.
Note:
It
helps
to
remove
the
hard
disk
drive
before
this
step.
See
5.
Place
the
new
heat
sink
and
fan
assembly
into
position
and
lower
the
lever
to
secure
the
heat
sink
and
fan
assembly.
6.
Connect
the
heat
sink
and
fan
assembly
cable
to
the
microprocessor
fan
connector
on
the
system
board.
7.
Go
to
Figure
19.
Removing
the
heat
sink
and
fan
assembly
24
ThinkCentre
Hardware
Installation
and
Replacement
Guide