Lenovo TS130 User Manual
Page 65
To replace the system board, do the following:
1. Remove all media from the drives and turn off all attached devices and the server. Then, disconnect all
power cords from electrical outlets and disconnect all cables that are connected to the server.
2. Remove the server cover. See “Removing the server cover” on page 21.
3. Place the server on its side to gain easier access to the system board.
4. Remove all memory modules and PCI cards that are currently installed. See “Installing or removing a
memory module” on page 28 and “Installing or replacing a PCI card” on page 24.
5. Remove the heat sink and fan assembly from the failing system board. See “Replacing the heat sink and
6. Remove the microprocessor from the failing system board. See “Replacing the microprocessor” on
7. Remove the battery from the failing system board. See “Replacing the system board battery” on page 51.
8. Remove the front fan assembly from the server. See “Replacing the front fan assembly” on page 44.
9. Note the location of all cable connections on the system board and disconnect all cables. See “Locating
parts on the system board” on page 14.
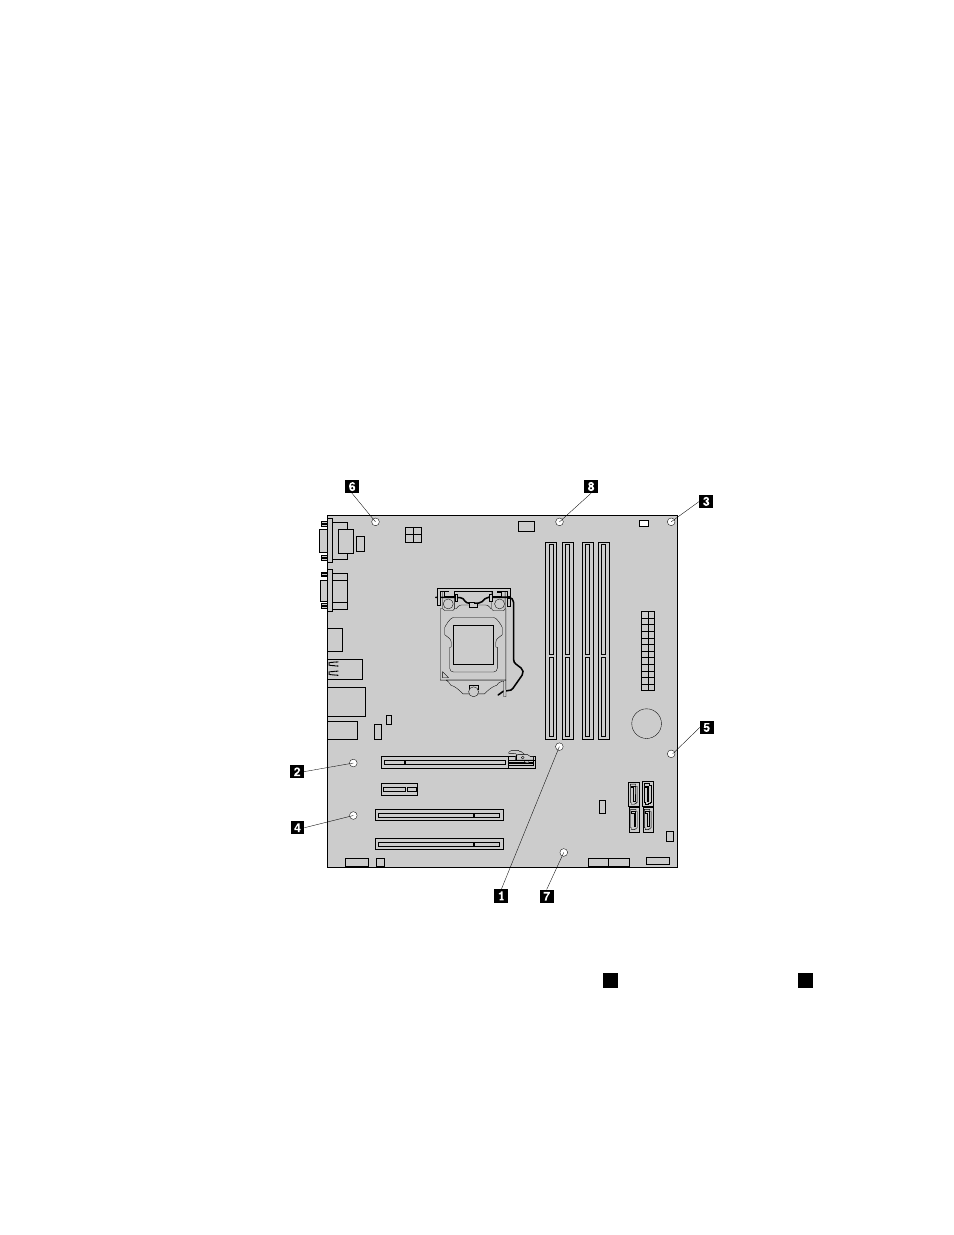
10. Remove the eight screws that secure the system board to the chassis by following the sequence shown
in the following illustration.
11. Carefully lift the failing system board out of the chassis.
12. Position the new system board into the chassis so that the screw holes in the new system board are
aligned with those in the chassis. Install the eight screws that secure the system board to the chassis in
the reverse order that they were removed; that is, install the screw
8
first and install the screw
1
last.
13. Remove the microprocessor socket cover from the new system board.
14. Install the memory modules, PCI cards, battery, microprocessor, and heat sink and fan assembly that
you removed from the failing system board to the new system board.
15. Connect all cables to the system board. See “Locating parts on the system board” on page 14.
16. Go to “Completing the parts replacement” on page 54.
Chapter 5
.
Installing, removing, or replacing hardware
53