Loop recording, 6. creating a master track, P.67) – KORG D3200 User Manual
Page 77: Operation
67
Recovery
CD
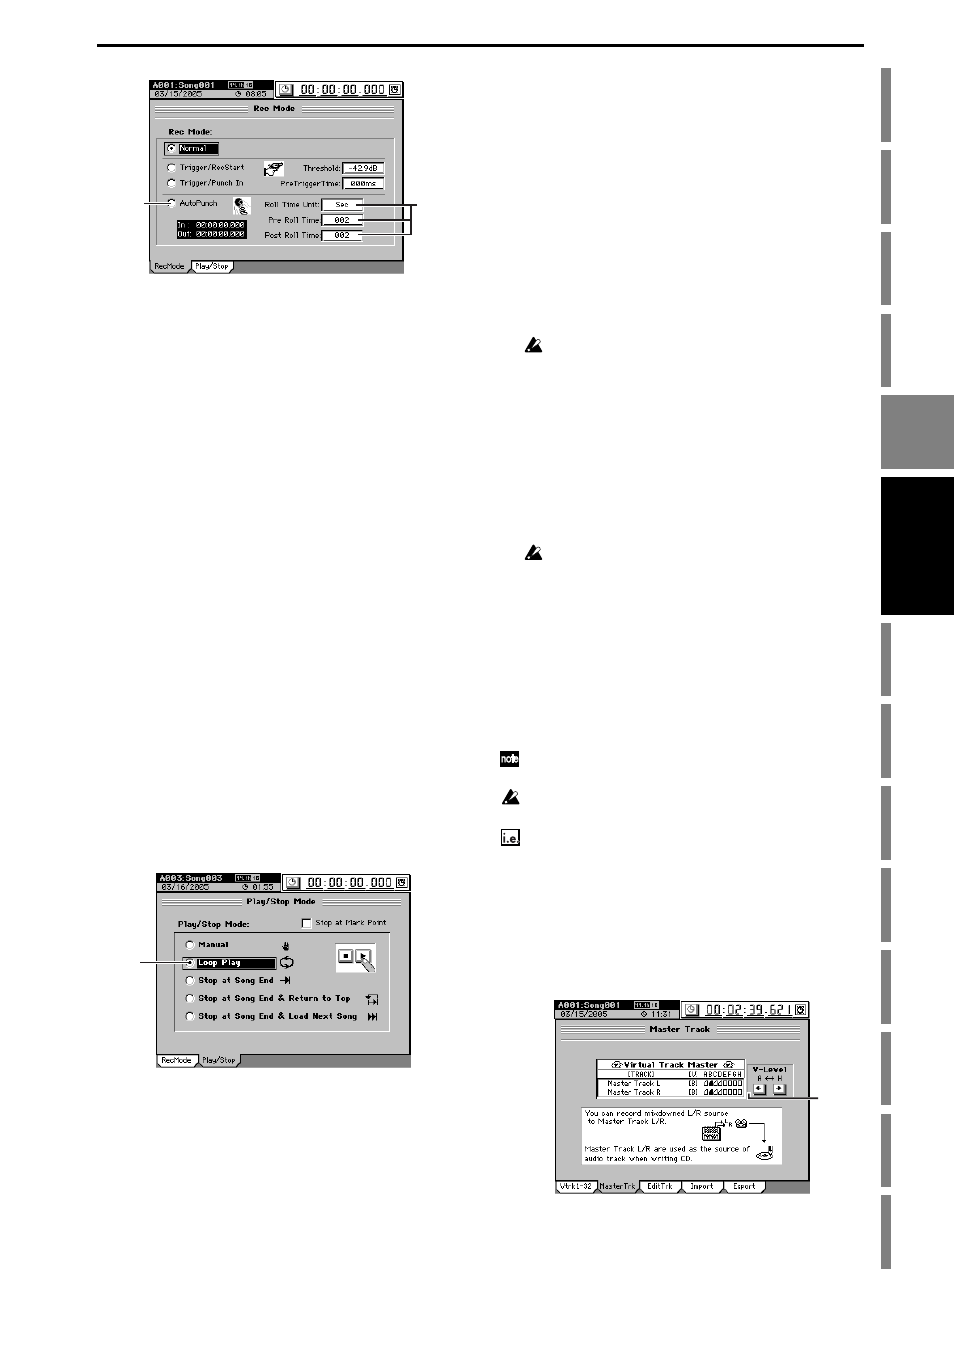
(6) Begin recording.
• When you press the REC key, the recorder will move
to a location earlier than the punch-in point, as speci-
fied by the pre-roll time, and will enter the record-
ready state (REC key blinking).
• When you press the PLAY key, playback will begin.
Playback will continue during the pre-roll time, and
then recording will occur from the specified punch-in
point (IN). (The REC and PLAY keys will light.)
(7) Stop recording.
• When you reach the punch-out point (OUT), record-
ing will end and playback will resume. (The REC key
will be dark and the PLAY key will be lit.)
• When the post-roll time ends, the recorder will stop.
(8) Verify the content that was recorded.
Move to a location earlier than where you began record-
ing (IN), and play back to verify that the recording is sat-
isfactory.
Loop recording
When using auto punch-in/out recording, you can click the
Loop Play
radio button (in the Play/Stop Mode field of the
“Play/Stop”
tab page) so that the IN–OUT region will be re-
corded repeatedly (loop). When you are finished recording,
you can use the Undo/Redo functions to compare different
takes, and keep the best one.
(1) Adjust the settings for auto punch-in/out.
Refer to “Auto punch-in/out” (
(2) Click the Loop Play radio button to turn it on (high-
lighted).
The Loop indicator will light.
(3) Begin recording.
• When you press the REC key, you will move to a point
before the specified IN (recording start) location, as set
by the pre-roll time, and the D3200 will be in record-
ready condition (REC key blinking).
• When you press the PLAY key, playback will begin
(PLAY key will light).
Playback will continue for the pre-roll time, and
recording will begin at the IN point. (The REC key
will light.)
• Recording will end when you reach the OUT point,
and playback will continue for the post-roll time. (The
REC
key will go dark.)
• Then you will move to the pre-roll time, and the same
process will be repeated.
• To stop, press the STOP key at a point outside the
recording region (IN–OUT).
(4) Use the Undo/Redo function to compare the takes, and
select the best one.
• Press the UNDO key to display the “Undo/Redo” tab
page.
The “Undo/Redo” tab page displays the most recent
recording (Level 00) and the previous recordings
(Level “loop-recorded takes minus 1”) together with
the Rec Track (track number).
Loop recordings appear in the list as “Record Track,” just as
conventional recordings.
• In the “Undo/Redo” tab page, click the Undo button
and Redo button to select a recorded take. The
selected performance will be recalled.
(5) Listen to the recorded performance.
• Press the PLAY key to play back, and listen to the
recording. If “Loop Play” is on, the region between the
IN (beginning of recording) and OUT (end of record-
ing) points will continuously play back.
• Repeat this process to select the best performance.
The data in the list lets you go back through the most recent
sixteen levels.
1-6. Creating a master track
After applying effects and EQ to each track to create the over-
all balance of your song, you can then apply effects and EQ
to the entire song to make the volume and tone consistent,
and record the resulting two-track stereo mix onto the “mas-
ter track.”
The master track data you create here can also be copied to a
channel track (
After recording or track editing, you can use the Undo function to
return to the state prior to recording or editing (
If you recorded on a different virtual track, check the virtual track
that is selected after executing Undo.
Mixing down the audio of tracks 1–32 and recording a
master track for a 44.1 kHz/16-bit song
(1) Select the virtual tracks that you want to use in your
final mix.
• For each channel track, select the virtual track that you
want to include in the mix that will be recorded onto
the master track (
• Select a virtual track for the master track.
(4)
(5)
(2)
(1)