Konica Minolta NON-CONTACT 3D DIGITIZER VIVID 9i User Manual
Page 32
30
Replacing the Lens and Field Calibration
3
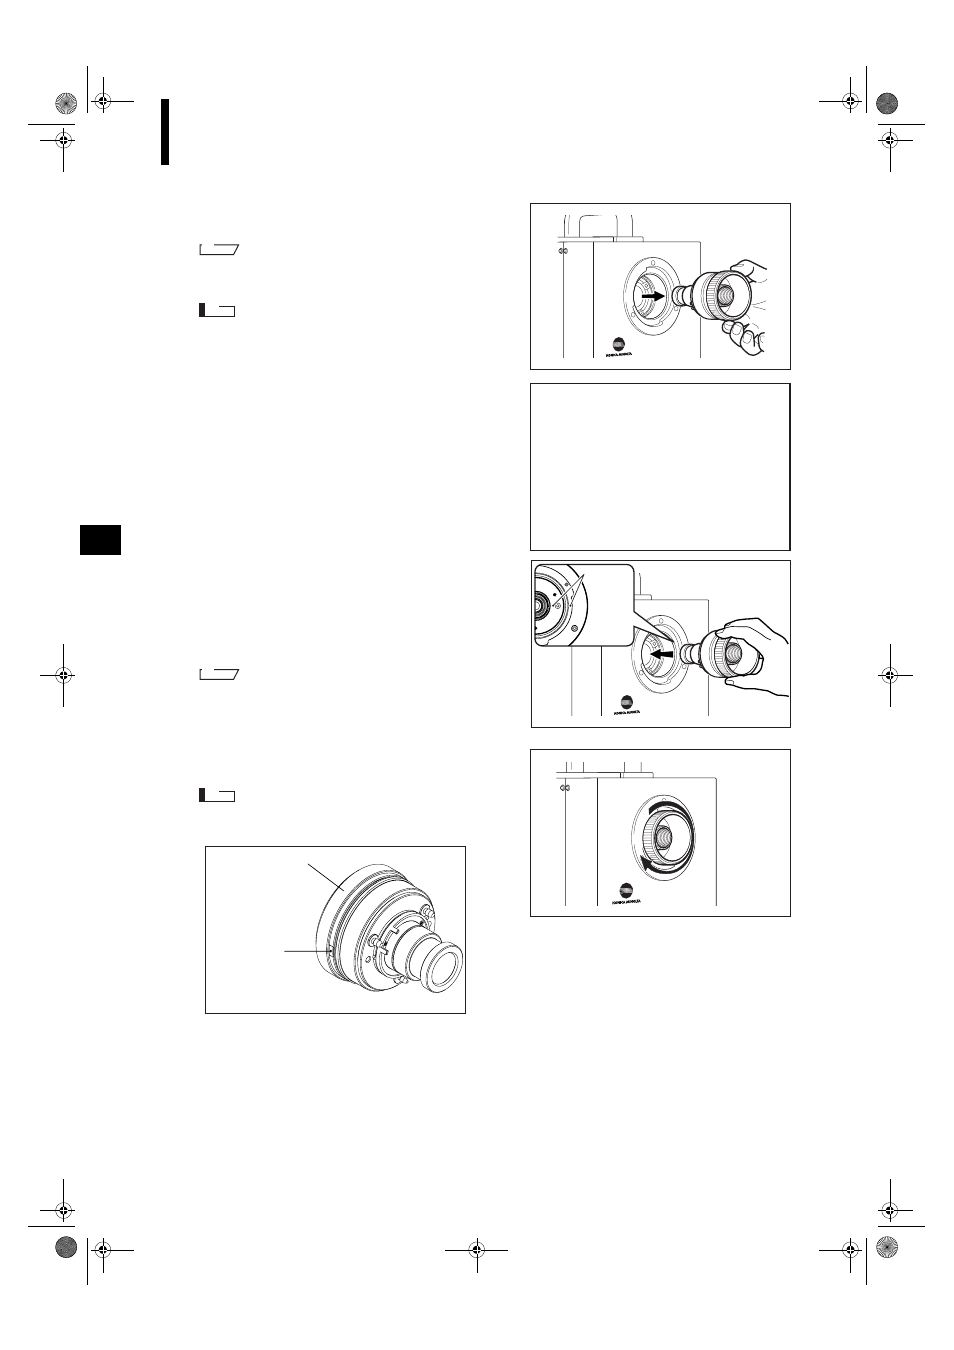
Hold the external edge of the fixing ring and
pull it out.
M
emo
Hold the ring with your finger located near the red mark on
the lens. This will facilitate pulling the lens.
N
ote
Attach the lens cap to the removed lens, place it in the lens
case and keep it in a safe place.
The following information will appear in the viewfind-
er as shown on the right.
4
Attach the desired lens.
• Remove the lens cap.
• Align the red mark on the lens with the one on the
lens mount socket, and insert the lens until a click is
heard.
M
emo
Hold the ring with your finger located near the red mark on
the lens. This will facilitate inserting the lens.
5
Turn the lens fixing ring clockwise to secure
the lens.
N
ote
After tightening the lens, make sure that the red mark on
the ring is aligned with the red mark on the body.
CHANGE LENS
S/N
2001005
PRESS ANY KEY
AND SCAN FIELD
CALIBRATION SYSTEM
Red
mark
Tightening ring
Red mark
Vivid910-hard-E.book Page 30 Monday, October 18, 2004 3:11 PM