Connect scanner – Kodak I3200 User Manual
Page 13
2-2
A-61771 March 2013
NOTES:
• If the CD does not start automatically, open the My Computer icon on
your desktop. Double-click the icon indicating your CD-ROM drive, then
double-click on
setup.exe.
• If the message Portions of this application are already installed is
displayed, click Yes to continue the installation process. Any previously
installed Kodak Scanner software that is shared with this scanner will be
updated.
3. Click Next when the Welcome screen is displayed.
4. Click I Agree after you have read and agreed with the terms of the
Software License Agreement. The installation will start and several
progress screens will be displayed.
5. Click Finish when the installation is complete.
6. Remove the Installation CD from the CD-ROM drive.
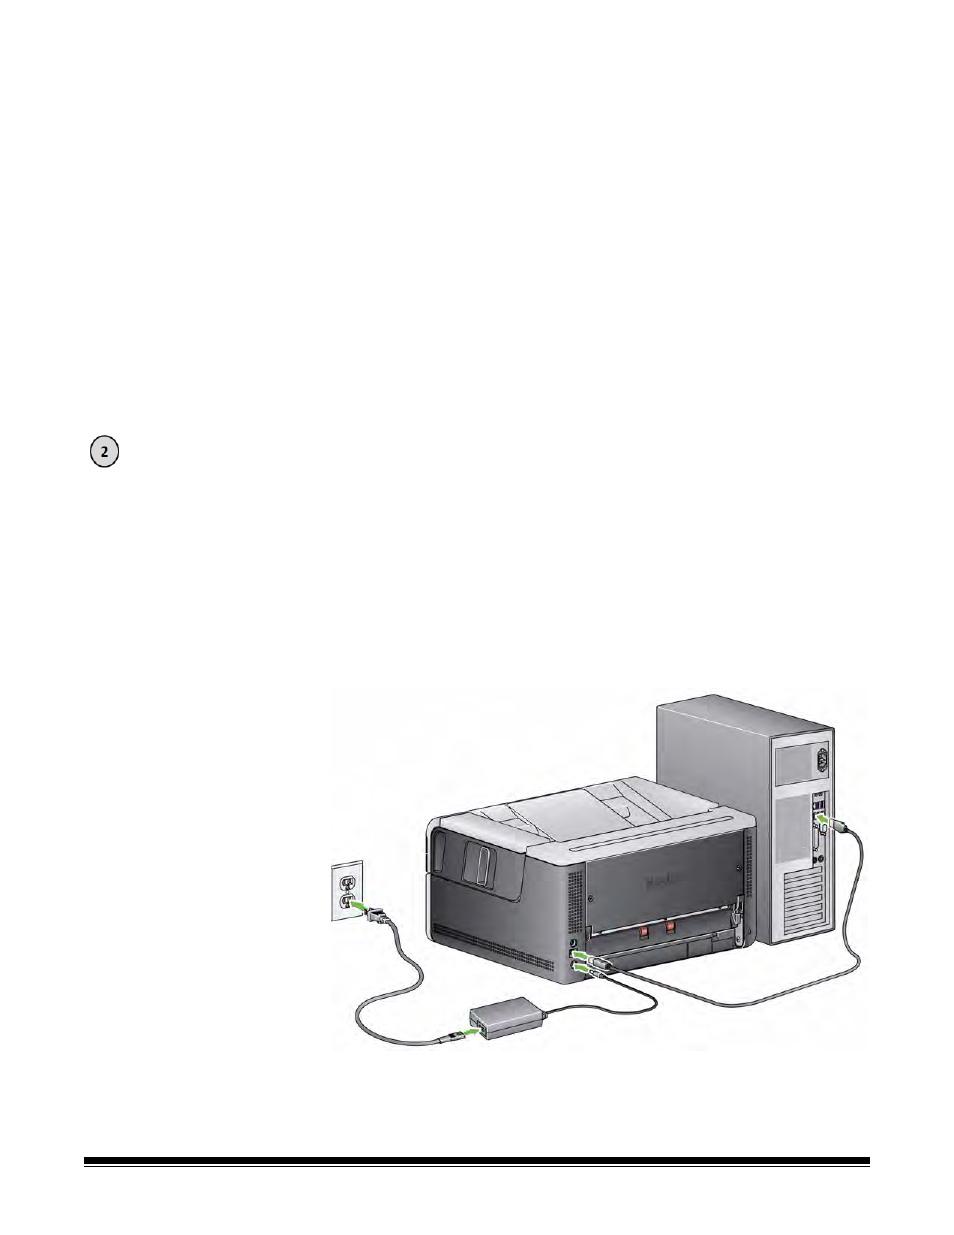
When the software has been installed, connect the power cord and USB cable
to the scanner. Refer to the illustration below for making proper connections.
Make sure the power outlet is located within 5 feet / 1.52 meters of the scanner
and is easily accessible.
1. Select the appropriate AC power cord for your region from the supply of
power cords packed with your scanner.
2. Plug the output power cord into the power port on the scanner. Be sure it is
securely attached.
3. Plug the other end of the power cord into the wall outlet.
4. Attach the USB cable to the scanner USB port.
5. Attach the other end of the USB cable to the proper USB port on your PC.
Connect scanner