Kawasaki 691191 User Manual
Page 7
3. If, when first inserting the battery pack, the red “ON” button does not light up,
press the “SET” button on the charger. When the battery is charging, the red
light is “ON”.
4. After approximately one hour of charging, the red indicator light should go
“OFF”
and the green light should come “ON”. The green light indicates that the
battery is fully charged.
5. When fully charged, reattach battery pack onto Cordless Circular Saw, making
certain latches fasten securely. Cordless Circular Saw will not operate properly if
the battery pack is not saeted properly.
SYMBOLS
IMPORTANT:
Some of the following symbols may be used on your tool. Please
study them and learn their meaning. Proper interpretation of these symbols will
allow you to operate the tool better and safer.
SYMBOL
NAME
EXPLANATION
V
Volts
Voltage (Potential)
A
Amperes
Current
Hz
Hertz
Frequency (Cycles per Second)
W
Watt
Power
Kg
Kilograms
Weight
Alternating Current
Type of Current
Direct Current
Type of Current
Alternating or Direct Current
Type of Current
Earthing Terminal
Grounding Terminal
Class II Construction
Denotes Double Insulation
min
Minutes
Time
s
Seconds
Time
Diameter
Size of Drill Bits,
Grinding Wheels, etc.
No load speed
No-load Rotational Speed
.../min
Revolutions per Minute
Revolutions, Surface Speed,
Strokes, etc. per Minute
1,2,3, …
Ring Selector Settings
Speed, Torque or Position Settings
12
CHARGER
Before using battery charger, please read carefully all
instructions and cautionary markings on battery charger, battery pack and
product using battery.
The charger will not automatically turn “OFF” when the
battery pack is fully charged.
The charging indicator light will remain “ON”
until the charger is disconnected from the electrical outlet.
Use only the charger which accompanied your product or direct replacement as
listed in this manual.
Do not substitute any other charger. Use only Alltrade
approved chargers with your product.
Do not disassemble charger.
Do not use charger if it has been damaged, left outdoors in the rain, snow, wet
or damp environments, or immersed in liquid.
The battery pack and charger heat during charging.
Place the charger on a flat,
non-flammable surface away from flammable materials with at least four inches of
clearance to allow proper air circulation around the charger and battery pack.
When the battery pack requires recharging, a 1 hour charge allows the tool to
operate at full power.
A charging indicator light on the charger will illuminate to
show that charging is taking place.
CHARGING BATTERY PACK
CHARGE BATTERY PACK:
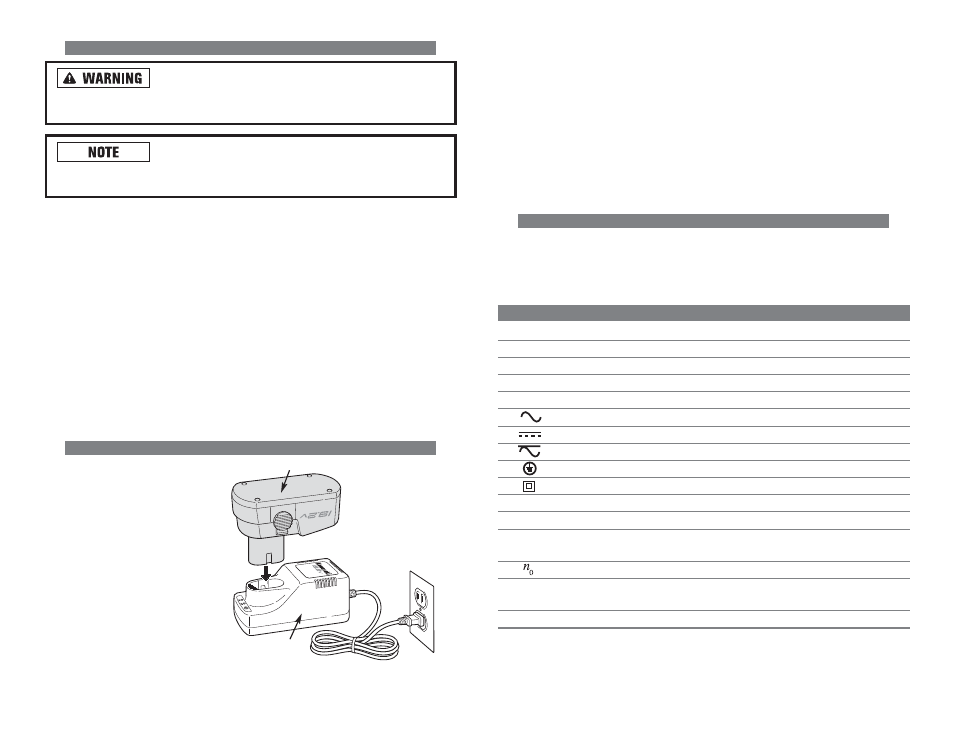
1. Plug the charger into the
nearest 120 volt electri-
cal outlet. The step of
the battery has positive
and terminal markings
on it. Align the markings on the
identical markings on the top of
the charger base. Insert the bat-
tery pack into base. Pack will not
insert properly if reversed.
2. Make sure the trigger on the
Cordless Circular Saw is in the
“OFF”
position and remove the battery pack from the Cordless Circular Saw.
BATTERY PACK
BATTERY
CHARGER