Kidde 0915CA User Manual
Page 5
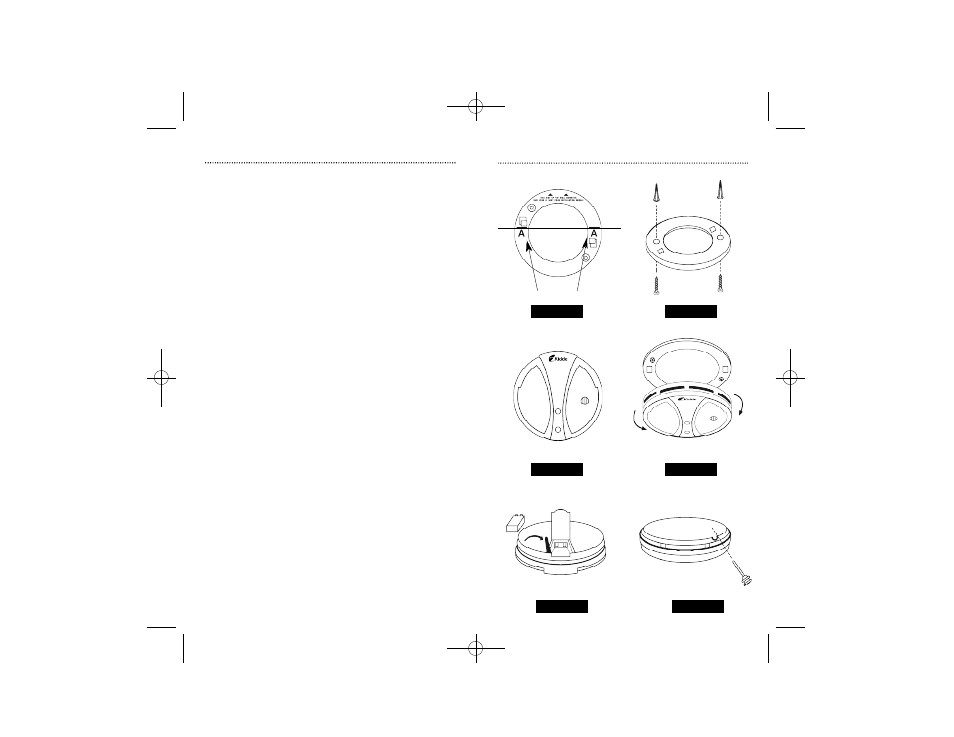
Alarm Tamper Resist Feature
• To make the smoke alarm tamper-resistant, a locking
pin has been provided in the bag with the screws and
anchors. Using this pin will deter children and others
from removing the alarm from the mounting plate. To
use the pin, insert it into the hole in the side of the
alarm after the alarm has been installed on the
mounting plate (Image 3F).
NOTE: The tamper-resistant pin will have to be removed in
order to change the battery. Use long nose pliers to pull the pin
out of the hole. It is now possible to remove the alarm from the
mounting plate.
Mobile Homes
Mobile homes built in the past five to seven years have
been designed to be energy efficient. Install smoke alarms
as recommended in Recommended Locations and Image 2A.
In mobile homes that are not well insulated compared to
present standards, extreme heat or cold can be transferred
from the outside to the inside through poorly insulated
walls and roof. This may create a thermal barrier that can
prevent the smoke from reaching an alarm mounted on
the ceiling. In such units, install the smoke alarm on an
inside wall with the top edge of the alarm at a minimum
of 10 cm (4") and a maximum of 30.5 cm (12") below the
ceiling (Image 2A).
If you are not sure about the insulation in your mobile
home, or if you notice that the outer walls and ceiling are
either hot or cold, install the alarm on an inside wall. For
minimum protection, install at least one alarm close to the
bedrooms. For additional protection, see Image 1A.
WARNING: Test your smoke alarm operation after R.V. or mobile
home vehicle has been in storage, before each trip and at least
once a week during use.
I n s t a l l a t i o n
I n s t a l l a t i o n
8
7
IMAGE 3A
IMAGE 3B
IMAGE 3C
IMAGE 3D
“A” LINE
ALIGNMENT MARKS
SUGGESTED WALL
MOUNTING POSITION
ROTATE TO MOUNT OR
TO REMOVE
IMAGE 3E
BATTERY
REMINDER TAB
IMAGE 3F
TAMPER-RESIST
LOCKING PIN
0918-7227-02_DC_MAN_ENG 10/5/04 4:40 PM Page 6