Kidde 0915CA User Manual
Page 4
I n s t a l l a t i o n
I n s t a l l a t i o n
5
6
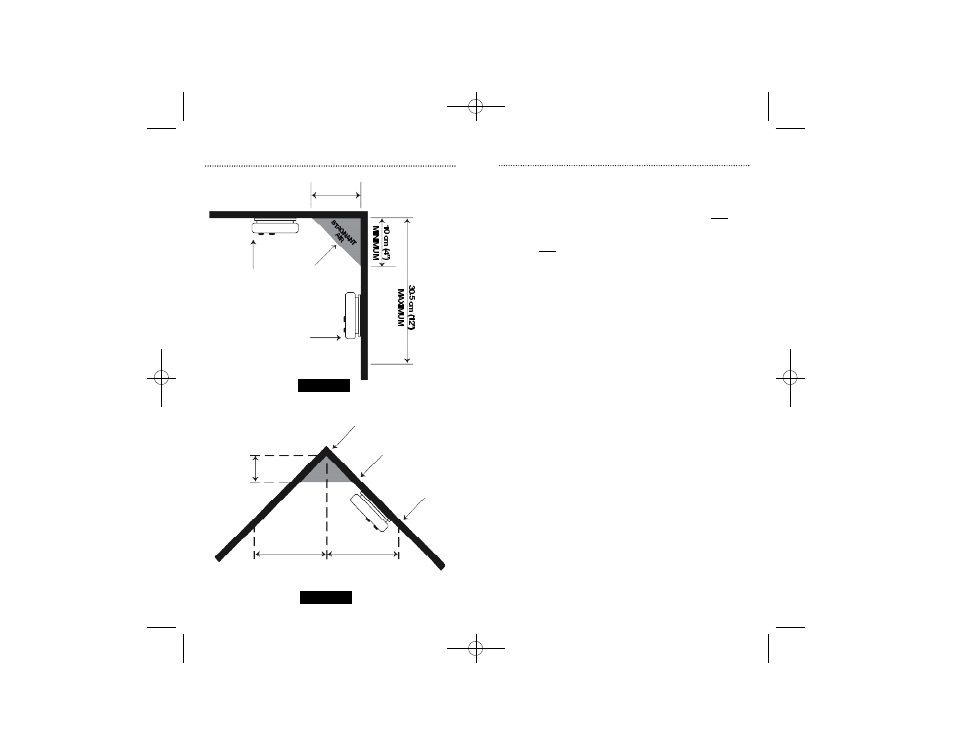
IMAGE 2A
IMAGE 2B
HORIZONTAL DISTANCE FROM PEAK
CEILING
10 cm (4”)
MINIMUM
SIDE WALL
BEST
PLACEMENT
ACCEPTABLE
PLACEMENT
NEVER HERE
10 cm (4”)
0.9 m (3’)
0.9 m (3’)
NOT IN
THIS AREA
BEST
ANYWHERE IN
THIS AREA
Mounting
CAUTION: This unit is sealed. The cover is not removable!
NOTE: Any statements referring to a battery, applies to both
batteries used with model 0918CA.
NOTE: Any statements referring to a battery reminder tab,
applies to both battery reminder tabs used with model 0918CA.
• Remove the mounting plate from the back of the alarm
by holding the plate and twisting the alarm in the
direction indicated by the “OFF” arrow on the alarm
cover.
• To ensure aesthetic alignment of the alarm with the
hall-way, or wall, the “A” line on the mounting plate
must be parallel with the hallway when ceiling-
mounted, or h o ri zo n t a l when wall mounted (Image 3A).
• Secure the mounting plate to the wall or ceiling with
the anchors and screws provided (Image 3B).
• For aesthetic reasons, the suggested position for wall
mounting is with the button(s) facing down (Image 3C).
• Press the battery reminder tab down into the battery
compartment while inserting the battery (Image 3E).
CAUTION: If the battery reminder tab is not held down in the
battery compartment by the battery, the battery door will not
close and the unit will not attach to the mounting plate.
• Alignment marks are provided on the edge of the
mounting plate and the alarm. After installing the
mounting plate, place the alarm onto the mounting plate,
making sure the alignment marks are lined up. Twist the
alarm in the direction indicated by the “ON” arrow on
the alarm cover (Image 3D) until it locks in place.
0918-7227-02_DC_MAN_ENG 10/5/04 4:40 PM Page 4