Setting the date and time – Konica Minolta Dimage X20 User Manual
Page 20
20
GETTING UP AND RUNNING
SETTING THE DATE AND TIME
After initially inserting a memory card and charging the battery, the camera’s clock and calendar
must be set on the setup menu. When images are recorded, the image data is saved with the date
and time of recording. Depending on the region, the menu language may also have to be set. To
change the language, see the camera notes on the following page.
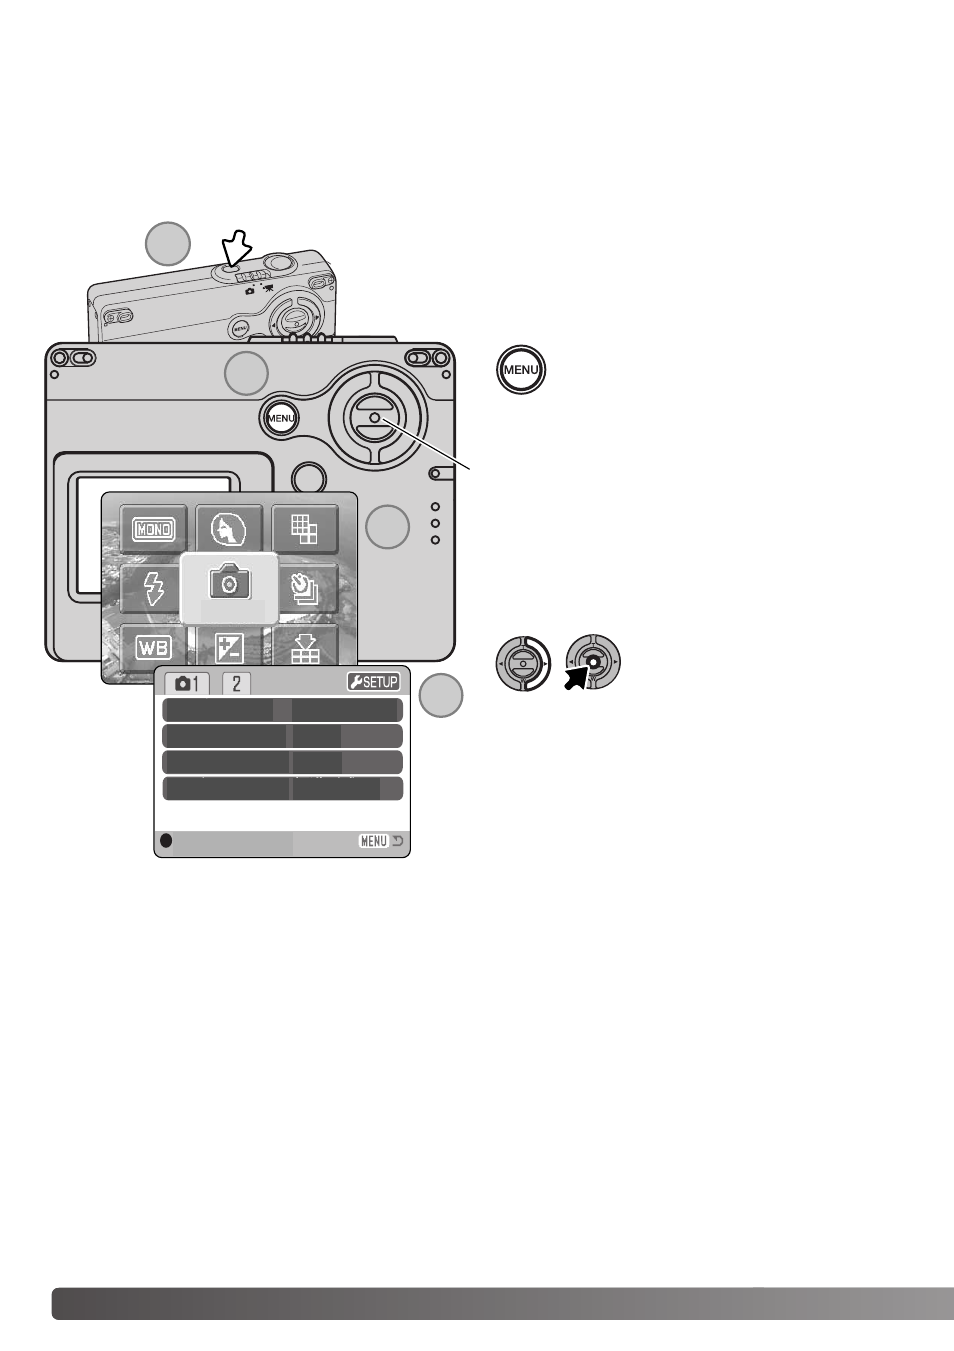
Turn the camera on by pressing the
main switch near the shutter-release
button (1).
Press the menu button to display the
main menu on the LCD monitor (2).
Controller
In the recording-mode menu, the setup icon is
located on the top-right corner. Highlight the setup
icon with the right key of the controller and press
the center of the controller to open the setup
menu (4).
Press the central button of the con-
troller while the main menu is displayed
on the LCD monitor to open the record-
ing-mode menu (3).
Digital zoom
On
Inst. Playback
File # memory
Folder name
Off
On
Std. form
Enter
MENU
1
2
3
4