Installing or changing a hard drive – Swann DVR4-950 User Manual
Page 17
17
17
6. Replace the Hard Drive and plug in the SATA and the power cable as shown in
step 5.
7. Screw in the hard drive to the bottom of the case as in step 4.
8. Replace the top of the case.
9. Screw in the remaining screws to the sides and back of the DVR as in step 2.
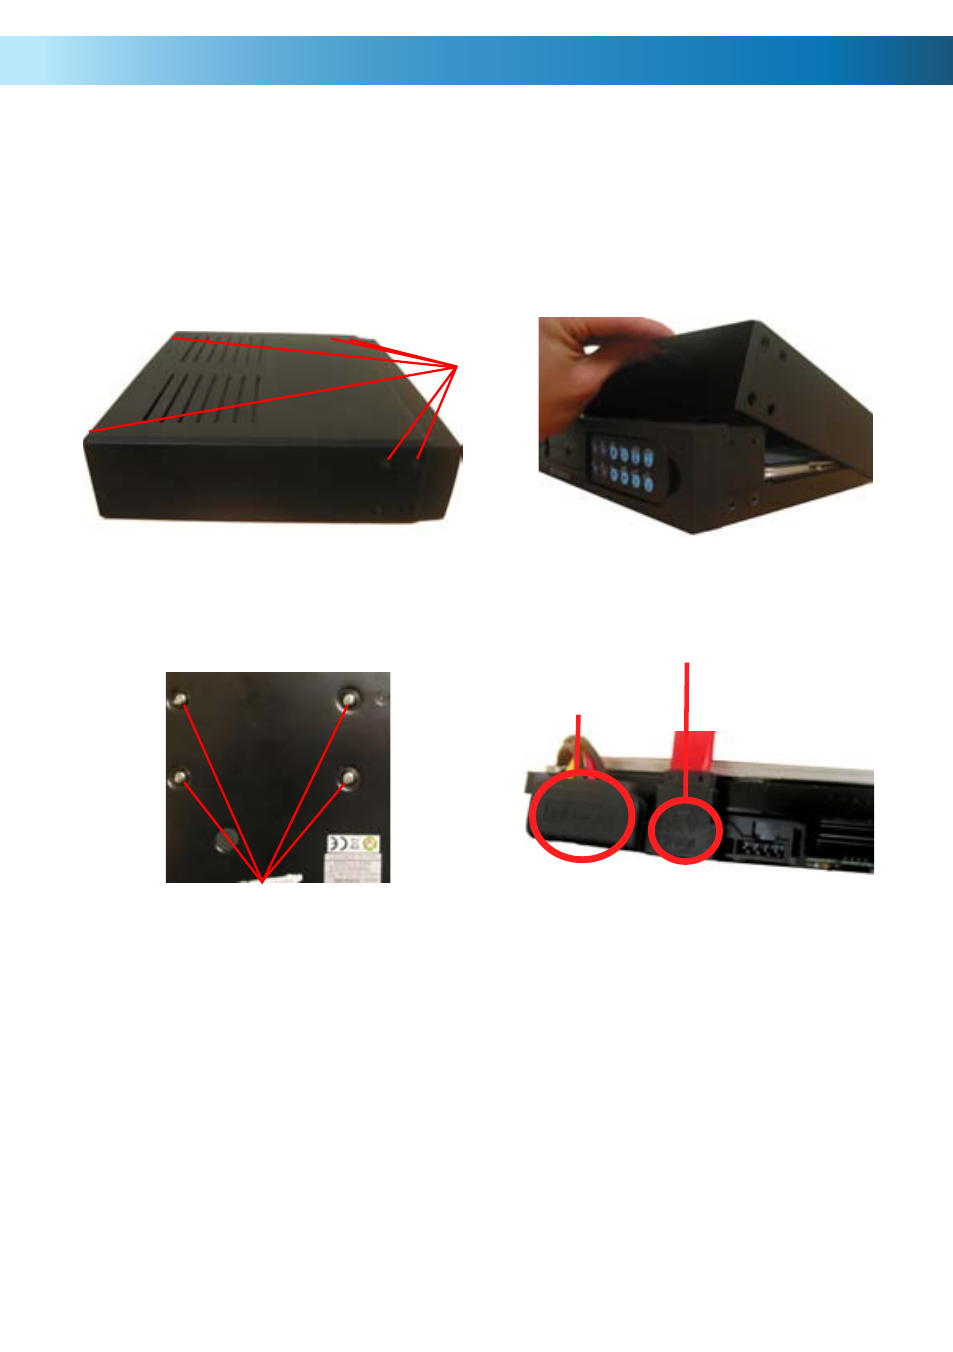
4. Locate the screws below the hard
drive. Secure the hard drive before re-
moving the 4 screws to avoid damaging
the hard drive
5. Push the metal clip on the SATA
cable (single RED or ORANGE cable)
to unplug the cable from the hard
drive. Unplug the power cable (2
BLACK 1 YELLOW and 1 RED cable)
from the back of the Hard Drive.
Remove
Power Cable
SATA Cable
IMPORTANT NOTE: The following instructions are for installing or changing the
hard drive. If your DVR4-950™ already has a hard drive pre-installed disregard
these steps.
Installing / Changing a Hard Drive in the DVR4-950™
1. Ensure the DVR4-950™ is unplugged and removed from mains power.
2. Locate and remove the 6 screws 2 on
each side at the front and 2 at the top
on the back. (The bottom screws on the
front do not need to be removed.
3. Pull up the top case of the DVR.
Remove
Installing or Changing a Hard Drive