Operating instructions mode d’emploi – Shark V1310C User Manual
Page 7
OPERATING INSTRUCTIONS
MODE D’EMPLOI
Déblocage
De temps à autres, l’aspirateur peut
s’obstruer d’une accumulation de débris. Il
doit alors être nettoyé. Afin de réduire les
risques d’électrocution, le cordon
d’alimentation doit être débranché avant
de d’éliminer un débris ou avant de
procéder à l’entretien ou au dépannage.
Important:
Les dommages causés par
l’élimination de blocage ne sont pas
couverts par la garantie limitée du produit.
ATTENTION:
Faites attention aux objets
coupants pendant le déblocage.
Important:
Replacez bien les pièces de
l’aspirateur avant de l’utiliser à nouveau.
2. Vérifiez s’il y a un bouchon derrière la
barre de brosse. (Fig. 23)
Emptying the Dust Cup Container
WARNING:
To avoid injury, keep
loose clothing, hair, fingers and all
other parts of body away from any
moving part (such as the beater brush).
Turn off the switch and unplug the
vacuum before adjusting the vacuum for
the carpet height.
The front of the vacuum cleaner has a
carpet adjustment knob that raises and
lowers the motorized power head to
match the type of carpet. With the
vacuum NOT connected to the electrical
outlet, set the adjustment to the lowest
setting for maximum cleaning. If the
vacuum is to difficult to push, move the
knob to the next highest setting until the
vacuum is comfortable to push. The
beater brush must reach the carpet for
effective cleaning.
How to Adjust for Carpet Height
Fig. 9
Hose
Holder
3. When using the
attachments, always
make sure that the hose
is inserted into the hose
holder that is located at
the bottom of the unit,
just behind the dust
cup container.
(Fig. 9) this will
keep your vacuum
from tipping over.
Warning:
Always unplug the
unit from electrical outlet before
opening the Dust Cup (container).
Entrée d’air
Fig. 23
3. Procédez au déblocage par cette
entrée. N’insérez jamais d’objet pointu
dans l’ouverture.
4. Branchez l’appareil et passez
l’aspirateur.
Important:
Do NOT use the vacuum
without the HEPA filter in place.
1. To remove the dust cup container,
press the dust cup release button and
remove the dust cup container.
(Fig. 11)
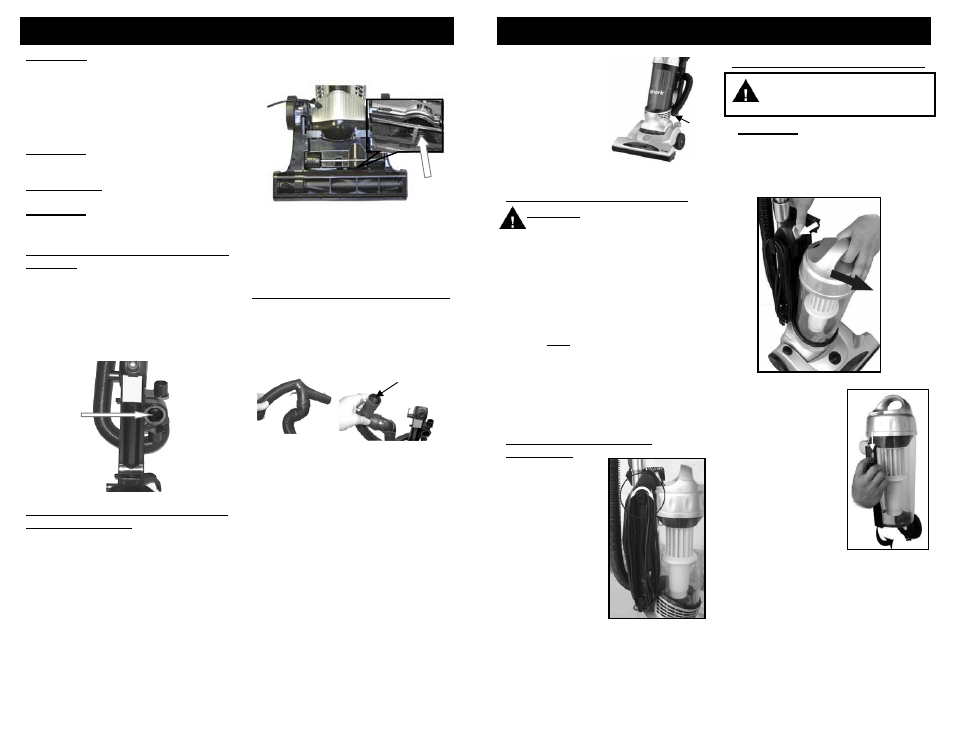
Nettoyage de la Conduite d’air de la
Coupelle
1. Débranchez l’aspirateur.
2. Vérifiez si la coupelle est pleine. Si oui,
retirez-la et videz-la.
3. Vérifiez si la conduite d’air derrière la
coupelle est obstruée. (Fig. 22)
4. Branchez l’appareil et passez
l’aspirateur.
Déblocage de la Poignée du Tuyau
Si le pouvoir aspirant est toujours
diminué, vérifiez que la poignée n’est pas
obstruée.
1. Débranchez l’appareil et retirez la
poignée du tuyau pour vérifier si elle
est obstruée.
Fig. 11
Fig. 22
2. Débloquez l’ouverture de la poignée
du tuyau. (Fig. 24) N’insérez jamais
d’objet pointu dans l’ouverture.
3. Vérifiez si le tube de rallonge est
débloqué en le mettant sous la lumière
et en repérant tout débris pouvant
l’obstruer.
4. Branchez l’appareil et passez
l’aspirateur.
Déblocage
Fig. 24
2. To empty the dust
cup container, hold
the dust cup from
the handle over a
garbage container
and press on the
trap door release
button that is on the
back side of the
dust cup container
to release the dust
cup bottom
(Fig. 12)
Fig. 12
Conduite d’air
de la coupelle
Winding & Unwinding the
Power Cord
This vacuum cleaner
is equipped with a
convenient cord
storage feature. The
power cord winds
around the two cord
holders at the side
of the unit. The top
cord holder has a
quick cord release
feature. Turn the
cord hook to the left
or the right to
remove the power
cord. (Fig. 10)
Déblocage de l’entrée d’air Derrière
la Barre de Brosse
Il y a une entrée d’air derrière la barre de
brosse, sous l’appareil. Il peut s’y
accumuler des débris qui réduisent la
puissance d’aspiration. Pour débloquer
cette entrée:
1. Débranchez l’appareil et mettez
l’aspirateur sur le côté.
Fig. 10
5
32