Operating instructions consignes d’utilisation – Shark V1310C User Manual
Page 10
OPERATING INSTRUCTIONS
CONSIGNES D’UTILISATION
Clearing Blockages
Occasionally the vacuum may become
blocked by a build up of debris which will
require cleaning. To reduce the risk of
electric shock, the power cord must be
disconnected before clearing a blockage
or performing maintenance/trouble
shooting checks.
CAUTION:
If any part of your unit has a
blockage, it may overheat and then
automatically shut off. Unplug the vacuum
and allow it to cool down.
Important:
Damages caused while
clearing or attempting to clear blockages
are not covered under your product’s
limited warranty.
CAUTION:
Beware of sharp objects
when clearing blockages.
Important:
Replace parts of the vacuum
securely before continuing to use.
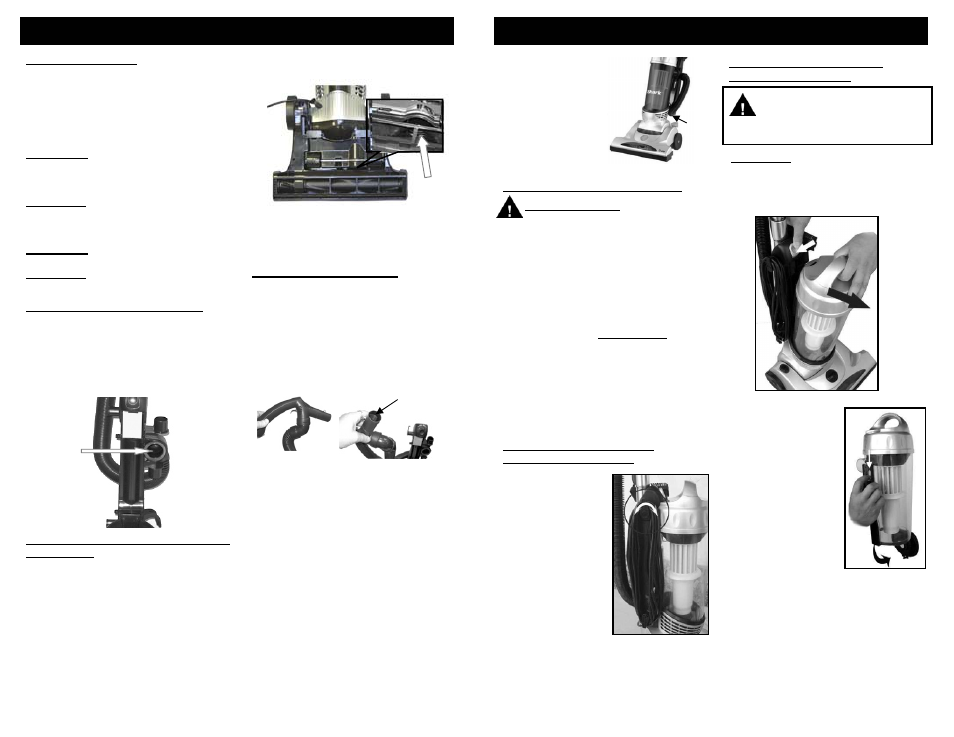
2. Check to see if there is a clog just
behind the agitator. (Fig. 23)
Vidange du Réservoir de la
Coupelle à Poussière
Avertissement:
Débranchez
toujours l’appareil avant d’ouvrir
la coupelle à poussière
(réservoir).
Fig. 9
Porte-
tuyau
3. Lorsque vous utilisez les
accessoires, assurez-vous
toujours que le tube est
bien inséré dans le
porte-tube situé au
bas de l’appareil,
derrière la coupelle à
poussière (Fig. 9).
Ceci empêchera
votre aspirateur de renverser.
Intake Opening
Fig. 23
3. Clear the blockage from this opening.
Never
insert sharp objects into
opening to clean.
4. Plug unit in, to continue vacuuming.
Important:
N’utilisez pas
l’aspirateur
sans son filtre HEPA.
1. Pour retirer la coupelle de
l’aspirateur, appuyez sur son bouton
de relâche et retirez-la (Fig. 11).
Réglage de la Hauteur du Tapis
AVERTISSEMENT:
Tenez les
doigts, toutes les parties du corps,
les cheveux et les vêtements lâches
éloignés des pièces mobiles, telles que
la brosse de battage. Éteignez
l’aspirateur et débranchez-le avant de
régler la hauteur du tapis.
Le devant de l’aspirateur présente une
poignée qui élève et abaisse
l’électrobrosse motorisée afin de
correspondre au type de tapis. Pendant
que l’aspirateur est DÉBRANCHÉ,
réglez la hauteur à son niveau le plus
bas pour un nettoyage maximal. Si
l’aspirateur est difficile à déplacer,
déplacez la poignée vers le réglage
suivant jusqu’à ce que l’aspirateur bouge
sans difficulté. La brosse à battage doit
toucher au tapis afin de le nettoyer
efficacement.
Clearing the Hose Handle
Never
insert sharp objects into an
opening to clear. To check airflow, plug
the unit in and check for suction at end of
hose handle.
If the suction is reduced, to check for
blockage remove hose end from hose
handle.
1. Unplug the unit and remove hose
handle to check for any blockage.
Clearing the Dust Cup Air Duct
1. Unplug the vacuum.
2. Check fullness of the dust cup, if full,
empty the dust cup.
3. Remove the dust cup and check the
air duct behind the dust cup for any
blockage. (Fig. 22)
4. Plug in unit and resume vacuuming.
Fig. 11
Clear
Blockage
Fig. 24
Dust Cup
Air Duct
Fig. 22
2. Pour vider le
réservoir de la
coupelle, tenez-la
par la poignée au-
dessus d’un sac de
poubelle et
appuyez sur le
bouton de relâche
de la trappe situé à
l’arrière. Ceci
ouvrira le fond de la
coupelle (Fig. 12).
Fig. 12
Enroulage et déroulage du
Cordon d’alimentation.
Cet appareil est doté
d’une fonction
pratique de
rangement du cordon.
Le cordon
d’alimentation
s’enroule autour
des deux porte-
cordons latéraux
de l’appareil.
Le porte-cordon
supérieur est doté
d’une fonction de
relâche rapide.
Tournez le crochet du cordon
vers la gauche ou vers la droite pour
retirer le cordon d’alimentation. (Fig. 10)
2. Clear the blockage from the opening,
of the hose handle. (Fig. 24)
3. Verify that extension tube is clear by
holding it up to the light to see if there
is any debris blocking the extension
tube.
4. Plug in unit and resume vacuuming.
Clearing the Intake Opening Behind
the Agitator
There is an intake opening behind the
agitator underneath the unit where debris
may collect, reducing suction. To clear
this opening:
1. Unplug the unit and lay the vacuum
on its side.
Fig. 10
29
8